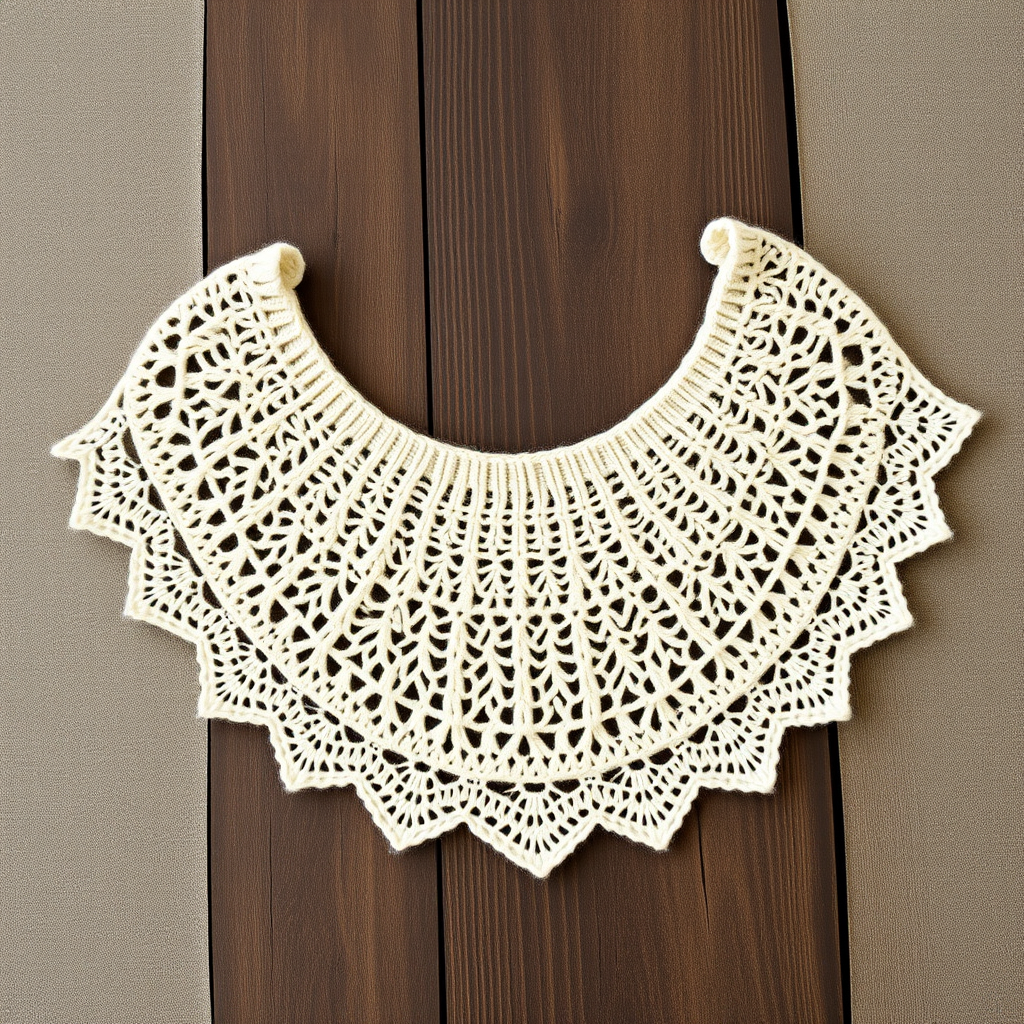
Whispering Pines Lace Shawl Free Pattern

Whispering Pines Lace Shawl: A Free Beginner-Friendly Knitting Pattern
Wrap yourself in the gentle elegance of this feather-light lace shawl, inspired by the soft rustle of pine needles in a forest breeze. The delicate stitch pattern creates a flowing, organic drape that feels like a warm embrace. This triangular shawl is worked from the top down, starting with a simple garter tab cast-on, and features a repetitive lace pattern that is both meditative and rewarding. Perfect for cozy evenings, thoughtful gifts, or a touch of handmade luxury, this pattern is designed with beginners in mind while still offering a beautiful, sophisticated result.
Materials Needed
Before you begin, gather the following materials to ensure a smooth and enjoyable knitting experience:
- Yarn: Fingering weight yarn (e.g., Malabrigo Sock, 100% superwash merino, 440 yards per skein) - 2 skeins in a soft sage green or misty blue. The color choice is yours, but a muted, natural tone enhances the organic lace pattern.
- Needle: US 6 (4.0 mm) circular knitting needle, 32-inch or longer. The long circular needle is essential to accommodate the growing number of stitches as the shawl expands.
- Notions: Stitch markers (at least 2), a tapestry needle for weaving in ends, and blocking pins/mat for the final finishing step.
- Gauge: 20 stitches and 28 rows = 4 inches in stockinette stitch (blocked). While gauge is important for size, this shawl is forgiving; a slightly different gauge will simply alter the final dimensions.
Step-by-Step Instructions
This shawl is worked from the top down, starting with a garter tab cast-on. The lace pattern is simple and repetitive, making it perfect for a relaxing knit. Follow each section carefully, and you'll have a stunning shawl in no time.
Abbreviations
- k = knit
- p = purl
- yo = yarn over
- k2tog = knit two together (right-leaning decrease)
- ssk = slip, slip, knit (slip two stitches knitwise one at a time, then knit them together through the back loop - left-leaning decrease)
- pm = place marker
- sm = slip marker
Section 1: Garter Tab Cast-On
This technique creates a neat, sturdy foundation for the top edge of your shawl.
- Cast on 3 stitches using your preferred method (long-tail cast-on works well).
- Knit 6 rows of garter stitch (all knit on every row). You will have a small, square tab with a bumpy texture.
- Now, rotate the tab to pick up stitches along the side edge. Pick up and knit 3 stitches along the side edge (one for every two rows of garter). Then, pick up and knit 3 stitches from the original cast-on edge. You now have 9 stitches on the needle: 3 from the side, 3 from the cast-on, and 3 from the top.
- Knit 1 row (this will be the wrong side of the shawl).
Section 2: Increase Section
This section establishes the central spine and increases the stitch count to prepare for the lace pattern. The increases are placed at the edges and on either side of the center stitch.
- Row 1 (right side): k3, yo, k1, yo, pm, k1 (center stitch), pm, yo, k1, yo, k3. (13 stitches)
- Row 2 and all even rows: k3, purl to last 3 stitches, k3. (This creates a garter stitch border on both edges.)
- Row 3: k3, yo, k to marker, yo, sm, k1, sm, yo, k to last 3 stitches, yo, k3. (17 stitches)
- Repeat rows 2 and 3 until you have 45 stitches on the needle, ending with a wrong-side row (Row 2). This will create a triangular shape with a defined center spine.
Section 3: Lace Pattern
Now the magic begins! This four-row repeat creates the delicate, pine-needle-inspired lace. The pattern is mirrored on either side of the center stitch, with decreases slanting outward for a balanced, organic look.
- Row 1 (right side): k3, yo, *k2tog, yo* repeat from * to * until 2 stitches before marker, k2, yo, sm, k1, sm, yo, k2, *yo, ssk* repeat from * to * until 4 stitches before end, yo, k3.
- Row 2 (wrong side): k3, purl to last 3 stitches, k3.
- Row 3: k3, yo, *k1, yo, k2tog* repeat from * to * until 2 stitches before marker, k2, yo, sm, k1, sm, yo, k2, *ssk, yo, k1* repeat from * to * until 4 stitches before end, yo, k3.
- Row 4: same as row 2 (k3, purl to last 3 stitches, k3).
- Repeat rows 1-4 until the shawl measures approximately 24 inches from the center cast-on, ending with a wrong-side row (Row 2 or 4). The fabric should feel airy and have a beautiful drape.
Section 4: Edging
This section adds a few extra repeats of the lace pattern to create a more pronounced, scalloped edge before binding off. It gives the shawl a finished, polished look.
- Row 1 (right side): k3, yo, *k2tog, yo* repeat from * to * until 2 stitches before marker, k2, yo, sm, k1, sm, yo, k2, *yo, ssk* repeat from * to * until 4 stitches before end, yo, k3.
- Row 2: k3, purl to last 3 stitches, k3.
- Row 3: k3, yo, *k1, yo, k2tog* repeat from * to * until 2 stitches before marker, k2, yo, sm, k1, sm, yo, k2, *ssk, yo, k1* repeat from * to * until 4 stitches before end, yo, k3.
- Row 4: k3, purl to last 3 stitches, k3.
- Repeat rows 1-4 three more times (4 total repeats of the edging pattern). This will add length and a more dramatic scalloped edge to the bottom of the shawl.
Section 5: Bind Off
A stretchy bind-off is crucial here to ensure the edge remains flexible and doesn't pull the lace tight.
- Bind off loosely on the right side using a stretchy bind-off method (e.g., Jeny's Surprisingly Stretchy Bind-Off). This method involves knitting the first stitch, then knitting the next stitch, and passing the first stitch over the second, but with a yarn-over before each stitch to add extra give.
- Weave in all ends with a tapestry needle, being careful to follow the path of the yarn to keep the fabric smooth.
Blocking
Blocking is the final, transformative step that opens up the lace pattern and gives the shawl its beautiful, finished shape. Do not skip this!
- Soak the shawl in lukewarm water with a drop of wool wash for 20 minutes. This allows the fibers to relax and absorb the water.
- Gently squeeze out excess water (do not wring). Press the shawl between clean towels to remove additional moisture.
- Lay flat on a blocking mat and pin out the edges to open up the lace pattern. Pin the top edge straight and the bottom edge into gentle points, stretching the fabric to its full potential. Use a measuring tape to ensure the top edge is straight and the points are evenly spaced.
- Allow to dry completely before unpinning. This can take 24-48 hours depending on humidity.
Once dry, your Whispering Pines Lace Shawl is ready to be worn and admired. The soft, airy fabric and delicate lace pattern will drape beautifully, evoking a sense of calm and natural beauty. Enjoy your handmade creation!