Whispering Dunes Tote Bag Free Pattern
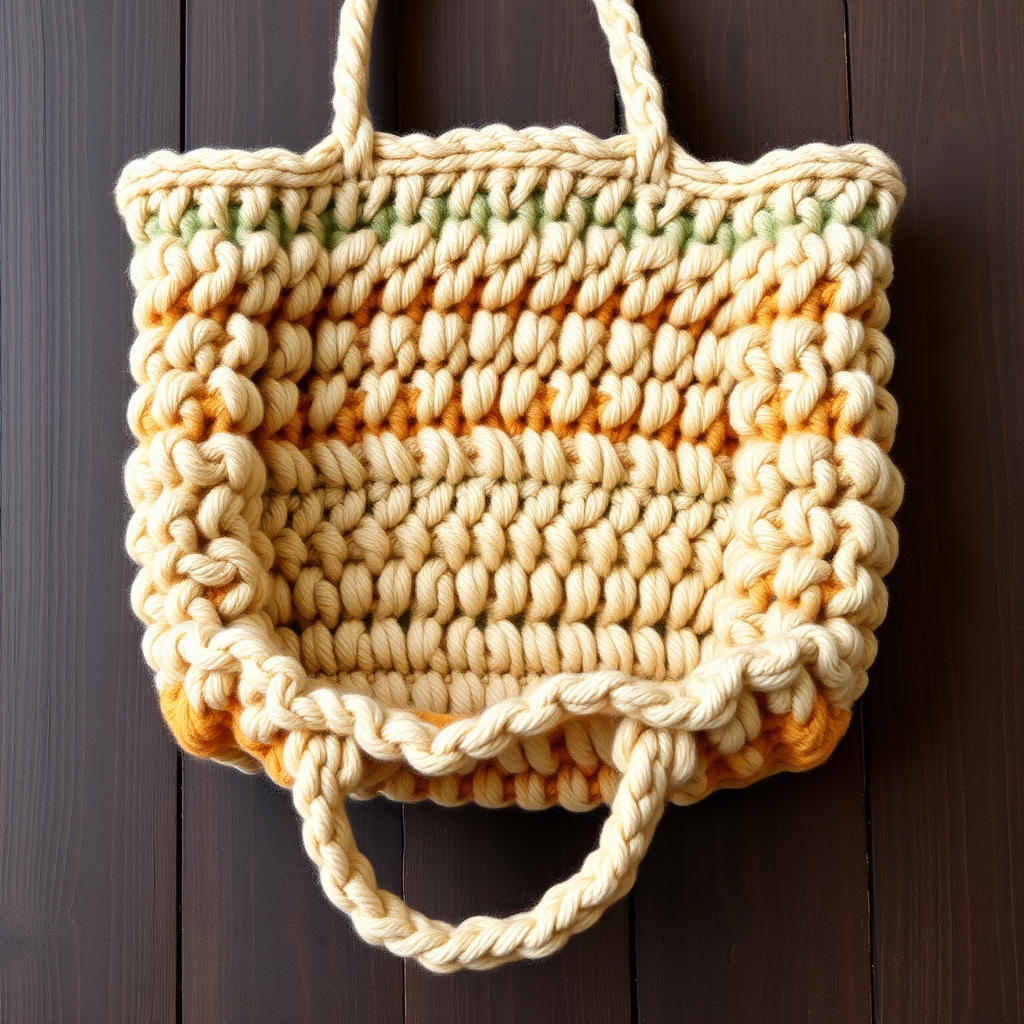
Whispering Dunes Tote Bag Free Crochet Pattern
Carry a piece of the desert with you wherever you go! The Whispering Dunes Tote Bag is a stunning, textured crochet project that captures the organic beauty of rolling sand dunes in a practical, everyday accessory. This free pattern features a unique wave stitch that creates a beautiful, rippled texture across the entire bag, evoking the sculptural, dimensional look of desert landscapes. Made with soft, sandy-hued cotton yarn in three complementary shades, this tote is both stylish and sturdy—perfect for beach days, farmers market runs, or your daily commute. Whether you're a seasoned crocheter or looking for a rewarding intermediate project, this bag is sure to become a favorite.
Materials Needed
Before you begin, gather the following materials to ensure a smooth and enjoyable crochet experience:
- Yarn: Worsted weight cotton yarn in three shades:
- Yarn A (Sand): Pale beige - approximately 100g
- Yarn B (Dune): Golden tan - approximately 100g
- Yarn C (Oasis): Muted sage green - approximately 100g
- Crochet Hook: 5.0 mm (H/8) crochet hook
- Other Tools: Yarn needle for weaving in ends, scissors, stitch markers (optional but helpful)
Gauge: 14 stitches and 12 rows = 4 inches in wave stitch pattern. Always check your gauge to ensure your bag turns out the correct size.
Step-by-Step Instructions
This bag is worked in one piece from the bottom up, then folded and seamed. Follow these detailed instructions carefully, and you'll have a beautiful tote in no time.
Foundation and Base
- Foundation Chain: With yarn A (Sand), chain 61 loosely. This loose foundation is crucial for the bag's bottom to lie flat and not pucker.
- Row 1: Single crochet (sc) in the 2nd chain from the hook and in each chain across. You should have 60 single crochet stitches total. Chain 1, turn.
- Row 2: Single crochet in each stitch across. (60 sc). Chain 1, turn. This row creates a solid, stable base for the wave pattern to build upon.
Wave Pattern Setup
- Row 3 (Wave Pattern Setup): Chain 3 (this counts as your first double crochet), turn.
Pattern repeat: *Skip 2 stitches, work 5 double crochet (dc) in the next stitch, skip 2 stitches, single crochet (sc) in the next stitch.*
Repeat from * to * across the row, ending with a double crochet in the last stitch. You will have 10 wave points created. This row sets the foundation for the entire textured pattern.
Building the Waves
- Rows 4-6: Chain 3 (counts as first dc), turn.
Pattern repeat: *Work 5 double crochet in the center double crochet of the next wave group (this is the 3rd dc of the 5-dc group from the previous row), single crochet in the single crochet between waves.*
Repeat from * to * across, ending with a double crochet in the top of the turning chain. This stacking technique creates the beautiful, vertical ripple effect.
Color Changes and Pattern Repetition
- Row 7 (Color Change to Yarn B): Change to yarn B (Dune). Chain 1, turn. Single crochet in each stitch across, working 2 single crochet in the center of each wave group to maintain the stitch count. You should have 60 sc. This row acts as a "rest" row and prepares the fabric for the next wave section.
- Rows 8-12: Repeat Rows 3-7 with yarn B. This means you'll do the wave setup row, then 3 rows of wave building, then a sc rest row.
- Rows 13-18: Repeat Rows 3-7 with yarn C (Oasis).
- Rows 19-24: Repeat Rows 3-7 with yarn A (Sand).
- Rows 25-30: Repeat Rows 3-7 with yarn B (Dune).
- Rows 31-36: Repeat Rows 3-7 with yarn C (Oasis).
- Rows 37-42: Repeat Rows 3-7 with yarn A (Sand).
Pro Tip: When changing colors, do so on the last yarn over of the final stitch of the previous row to create a clean, seamless color transition.
Finishing the Body
- Row 43: Chain 1, turn. Single crochet in each stitch across. Fasten off and weave in the yarn end. This final sc row creates a neat, finished edge at the top of the bag.
Seaming the Sides
- Fold and Pin: Fold the rectangle in half with right sides together (the right side is the side with the more pronounced wave texture). The bottom of the bag is the foundation chain edge. Pin the side seams to keep the fabric aligned.
- Whip Stitch Seams: Using yarn A and a yarn needle, whip stitch the side seams together, leaving the top open. Make sure your stitches are even and snug but not too tight, to avoid puckering. Weave in the ends securely.
Creating the Handles
- Turn Right Side Out: Turn the bag right side out so the textured waves are on the outside.
- Attach Yarn for Handle 1: Attach yarn A to the top edge at one side seam using a slip stitch.
- Chain for Handle: Chain 60 stitches loosely. This will be the length of your handle. Adjust the number of chains if you prefer a shorter or longer handle.
- Attach Handle End: Slip stitch to the other side of the same seam (the opposite top corner of the bag). This creates a loop for the first handle.
- Reinforce Handle: Single crochet in each chain across the handle loop. This doubles the yarn, making the handle much sturdier and more comfortable to carry. When you reach the end, slip stitch to the opposite side of the bag top to secure.
- Create Handle 2: Repeat steps 16-19 for the other handle on the opposite side seam. Ensure both handles are the same length and are attached symmetrically.
- Weave in Ends: Weave in all remaining yarn ends using your yarn needle. Trim any excess yarn.
Final Thoughts
Congratulations! You've completed your very own Whispering Dunes Tote Bag. The combination of the textured wave stitch and the warm, earthy color palette creates a truly unique and beautiful accessory. This bag is not only a stylish statement piece but also a durable and functional carryall. The worsted weight cotton yarn ensures it holds its shape, while the sturdy crocheted handles can comfortably carry your daily essentials. Enjoy your new handmade tote, and don't be surprised if you receive compliments wherever you go! Happy crocheting!


