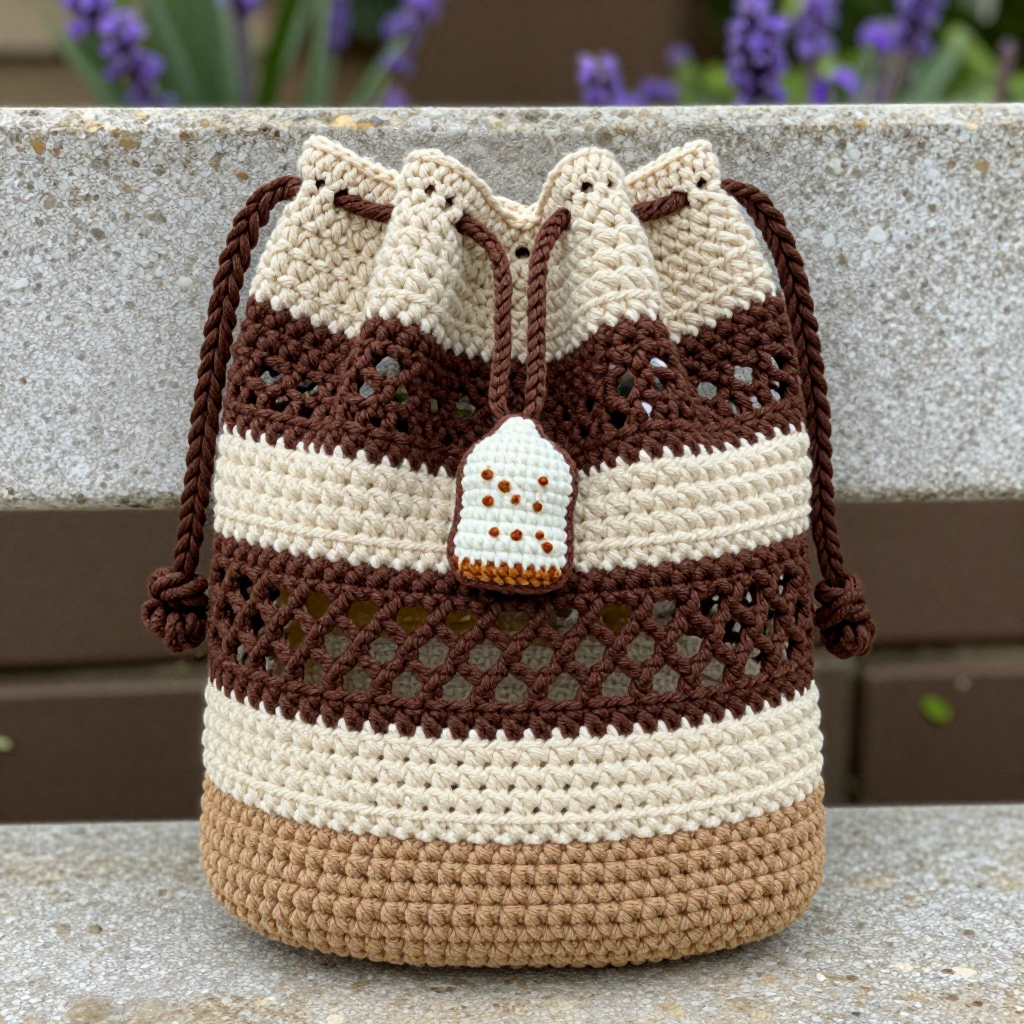
Velvet Argyle Diamond Crochet Gym Bag Base Free Pattern

Velvet Argyle Diamond Crochet Gym Bag Base — Free Beginner Pattern
Introduction
If you have never held a crochet hook before, this is the perfect first "real" project for you — it is worked almost entirely in one simple stitch, and the only thing that changes is where you put your hook. This plush velvet bag is made from the bottom up: a flat circular base with a soft blush diamond glowing at its center, then a textured emerald body that grows upward like little alpine ridges, finished with a blush border and two simple handles. The finished bag is about 10 inches across and 8 inches tall — just right for a water bottle, a towel, and your gym shoes — and the velvet yarn makes it feel like a squishy, luxurious pillow you can carry. You will be amazed at how quickly the diamond appears, and by the end you will have a bag you actually want to show off.
Materials Needed
- Yarn (main color, MC): Bernat Velvet (100% polyester, bulky weight #5), 1 skein Emerald — 315 yd / 288 m per 10.5 oz / 300 g skein. You will use roughly 250 yd.
- Yarn (contrast color, CC): Bernat Velvet, 1 skein Blush — same yardage. You will use roughly 60 yd.
- Hook: Size 6.0 mm (US J-10) crochet hook.
- Stitch markers: 4–6 removable markers (or safety pins, or a scrap of contrasting yarn tied in a loop).
- Tapestry needle: A large-eye, blunt-tip needle (sometimes called a yarn needle) for sewing handles and weaving in ends.
- Scissors: Any sharp pair.
- Measuring tape or ruler.
- Finished size: Base diameter approx. 10 in (25 cm); bag body height approx. 8 in (20 cm); handles approx. 12 in (30 cm) long and 2 in (5 cm) wide.
Abbreviations and Beginner Glossary
- ch — chain. Make a loop, yarn over (wrap yarn around hook), pull the hook through the loop. That is one chain. Chains are the "starter" stitches.
- sc — single crochet. Insert hook into stitch, yarn over, pull up a loop (2 loops on hook), yarn over, pull through both loops. One loop remains.
- dc — double crochet. Yarn over, insert hook into stitch, yarn over, pull up a loop (3 loops on hook), yarn over, pull through 2 loops, yarn over, pull through remaining 2 loops.
- fpdc — front post double crochet. Instead of going into the top of a stitch, you go around the vertical body (the "post") of the stitch from the round below. Yarn over, insert hook from front to back around that post, yarn over, pull up a loop, yarn over, pull through 2 loops, yarn over, pull through remaining 2 loops. This is what makes the raised alpine ridges.
- sl st — slip stitch. Insert hook into stitch, yarn over, pull the loop straight through both the stitch and the loop on your hook. It joins rounds without adding height.
- st / sts — stitch / stitches.
- beg — beginning.
- MC — main color (Emerald).
- CC — contrast color (Blush).
- Magic ring — an adjustable loop you pull closed after working into it, so there is no hole in the center. If it feels tricky, chain 4 and join with a sl st into a ring, then work into the ring instead.
- Turn — flip your work over so you work back the other way. This keeps the texture even.
- Join with sl st — after the last stitch of a round, slip stitch into the first stitch of that round to close the circle.
- Fasten off — cut the yarn a few inches from your work, pull the tail all the way through the last loop, and tug gently to lock it.
- Intarsia — working blocks of different colors in the same row, each with its own small ball of yarn, so you do not carry the unused color across the back.
Gauge
12 stitches and 8 rounds = 4 inches (10 cm) in alpine stitch pattern after blocking.
Gauge means "how big your stitches come out." If your stitches are too big, your bag will be larger than 10 inches; too small, and it will be smaller. To check: with MC, chain 20, work a small square of the alpine pattern (alternating dc and fpdc rows) until it is about 4 inches tall, then measure the middle 4 inches. If you have more than 12 stitches in 4 inches, switch to a larger hook; if fewer, switch to a smaller hook. Velvet yarn is slippery, so measure gently and do not stretch the fabric.
Beginner Tips Before You Start
- Count every round out loud. The base grows by 12 stitches each round, so the counts (12, 24, 36 … 120) are your safety net. If a round ends with the wrong number, undo it now rather than later.
- Use a stitch marker in the first stitch of each round. Velvet yarn hides stitches, and the marker tells you exactly where to join.
- Do not pull the yarn tight. Velvet has almost no stretch; tight tension makes it stiff and hard to work into. Keep your loops relaxed and let the hook do the pulling.
- Keep the unused color loose. When you change colors for the diamond, leave a little slack so the fabric does not pucker. Do not carry the color across the back — use a separate small ball for each color block.
- Work the fpdc around the post two rounds below (the stitch directly beneath the one you would normally work into). It feels odd at first; after one round it becomes automatic.
- Stop when you are tired. Velvet is forgiving but slippery; mistakes are easier to spot and fix when you are fresh.
Step-by-Step Instructions
Base (joined rounds, turning each round)
With MC, make a magic ring.
Round 1: Ch 2 (does not count as a st), work 12 dc into ring, join with sl st to first dc. Turn. (12 dc)
Round 2: Ch 2, 2 dc in each st around, join with sl st to first dc. Turn. (24 dc)
Round 3: Ch 2, *2 dc in next st, dc in next st; repeat from * around, join with sl st to first dc. Turn. (36 dc)
Round 4: Ch 2, *2 dc in next st, dc in next 2 sts; repeat from * around, join with sl st to first dc. Turn. (48 dc)
Round 5: Ch 2, *2 dc in next st, dc in next 3 sts; repeat from * around, join with sl st to first dc. Turn. (60 dc)
Round 6: Ch 2, *2 dc in next st, dc in next 4 sts; repeat from * around, join with sl st to first dc. Turn. (72 dc)
Round 7: Ch 2, *2 dc in next st, dc in next 5 sts; repeat from * around, join with sl st to first dc. Turn. (84 dc)
Round 8: Ch 2, *2 dc in next st, dc in next 6 sts; repeat from * around, join with sl st to first dc. Turn. (96 dc)
Round 9: Ch 2, *2 dc in next st, dc in next 7 sts; repeat from * around, join with sl st to first dc. Turn. (108 dc)
Round 10: Ch 2, *2 dc in next st, dc in next 8 sts; repeat from * around, join with sl st to first dc. Turn. (120 dc)
Do not fasten off. Base measures approx. 10 in (25 cm) in diameter.
Argyle Diamond Motif (worked over the center of the base)
The diamond is worked in CC over the MC base using intarsia. It spans 24 stitches and 12 rounds, centered on the base. Change color by working the last pull-through of the previous stitch with the new color.
Round 11 (set-up round): Ch 2, dc in each st around, join with sl st to first dc. Turn. (120 dc)
Round 12: Ch 2, dc in first 48 sts with MC, change to CC and dc in next 24 sts, change to MC and dc in remaining 48 sts, join with sl st to first dc. Turn. (120 dc)
Round 13: Ch 2, dc in first 47 sts with MC, change to CC and dc in next 26 sts, change to MC and dc in remaining 47 sts, join with sl st to first dc. Turn. (120 dc)
Round 14: Ch 2, dc in first 46 sts with MC, change to CC and dc in next 28 sts, change to MC and dc in remaining 46 sts, join with sl st to first dc. Turn. (120 dc)
Round 15: Ch 2, dc in first 45 sts with MC, change to CC and dc in next 30 sts, change to MC and dc in remaining 45 sts, join with sl st to first dc. Turn. (120 dc)
Round 16: Ch 2, dc in first 44 sts with MC, change to CC and dc in next 32 sts, change to MC and dc in remaining 44 sts, join with sl st to first dc. Turn. (120 dc)
Round 17: Ch 2, dc in first 45 sts with MC, change to CC and dc in next 30 sts, change to MC and dc in remaining 45 sts, join with sl st to first dc. Turn. (120 dc)
Round 18: Ch 2, dc in first 46 sts with MC, change to CC and dc in next 28 sts, change to MC and dc in remaining 46 sts, join with sl st to first dc. Turn. (120 dc)
Round 19: Ch 2, dc in first 47 sts with MC, change to CC and dc in next 26 sts, change to MC and dc in remaining 47 sts, join with sl st to first dc. Turn. (120 dc)
Round 20: Ch 2, dc in first 48 sts with MC, change to CC and dc in next 24 sts, change to MC and dc in remaining 48 sts, join with sl st to first dc. Turn. (120 dc)
Round 21: Ch 2, dc in first 49 sts with MC, change to CC and dc in next 22 sts, change to MC and dc in remaining 49 sts, join with sl st to first dc. Turn. (120 dc)
Round 22: Ch 2, dc in first 50 sts with MC, change to CC and dc in next 20 sts, change to MC and dc in remaining 50 sts, join with sl st to first dc. Turn. (120 dc)
Fasten off CC. Do not fasten off MC.
Alpine Stitch Bag Body (continuous rounds, no turning)
Round 1: Ch 2, dc in each st around, join with sl st to first dc. (120 dc)
Round 2: Ch 2, *fpdc around next st, dc in next st; repeat from * around, join with sl st to first dc. (60 fpdc, 60 dc — 120 sts)
Round 3: Ch 2, *dc in next st, fpdc around next st; repeat from * around, join with sl st to first dc. (60 dc, 60 fpdc — 120 sts)
Repeat Rounds 2–3 until the bag body measures approx. 8 in (20 cm) from the base, ending after a Round 3. At the gauge of 8 rounds per 4 inches, that is about 16 rounds total (8 repeats of Rounds 2–3). Fasten off MC.
Top Edging
Round 1: Join CC with sl st to any st, ch 1, sc in each st around, join with sl st to first sc. (120 sc)
Round 2: Ch 1, sc in each st around, join with sl st to first sc. Fasten off CC. (120 sc)
Handles (make 2)
With MC, ch 41.
Row 1: Sc in 2nd ch from hook and in each ch across. (40 sc)
Row 2: Ch 1, turn, sc in each st across. (40 sc)
Row 3: Ch 1, turn, sc in each st across. Fasten off, leaving a long tail for sewing. (40 sc)
Assembly and Finishing
1. Block the base. Lightly mist the base with water (or pin it to a towel and mist), then pat it flat into a circle about 10 inches across. Let it dry completely — this opens up the alpine texture and evens out the diamond.
2. Position the handles. Fold the bag flat so the diamond sits centered on the front. Place one handle on each side of the opening, about 4 in (10 cm) apart, with each handle end overlapping the top edging by 1 in (2.5 cm). Pin in place.
3. Sew the handles. Thread a tapestry needle with the long tail. Sew back and forth through the handle end and the top edging, going through both layers, until the end is secure. Repeat for all four handle ends, then knot on the inside.
4. Weave in all ends. Thread each tail onto the tapestry needle and run it through the back of several stitches (about 2 inches), then trim close. Do not knot tightly — velvet holds well when woven in.
5. Optional: Line the bag with fabric for extra structure, sewing a simple tube of cotton to the inside of the top edging.
Pro Tips and Variations
- Change the colors: Swap Emerald for charcoal and Blush for cream for a modern gym bag, or use a single color throughout and let the alpine texture be the star.
- Make it bigger or smaller: Add one more increase round (Round 11: *2 dc in next st, dc in next 9 sts — 132 dc) for a larger base, or stop at Round 9 (108 dc) for a smaller one. Keep the diamond centered by adjusting the MC stitch counts on either side.
- Substitute yarn: Any bulky weight #5 yarn works — chenille, chunky acrylic, or a thick cotton. Always swatch first, because velvet and cotton behave very differently.
- Add a closure: Sew a small button to the front and a loop of chain stitches to the back for a simple flap closure.