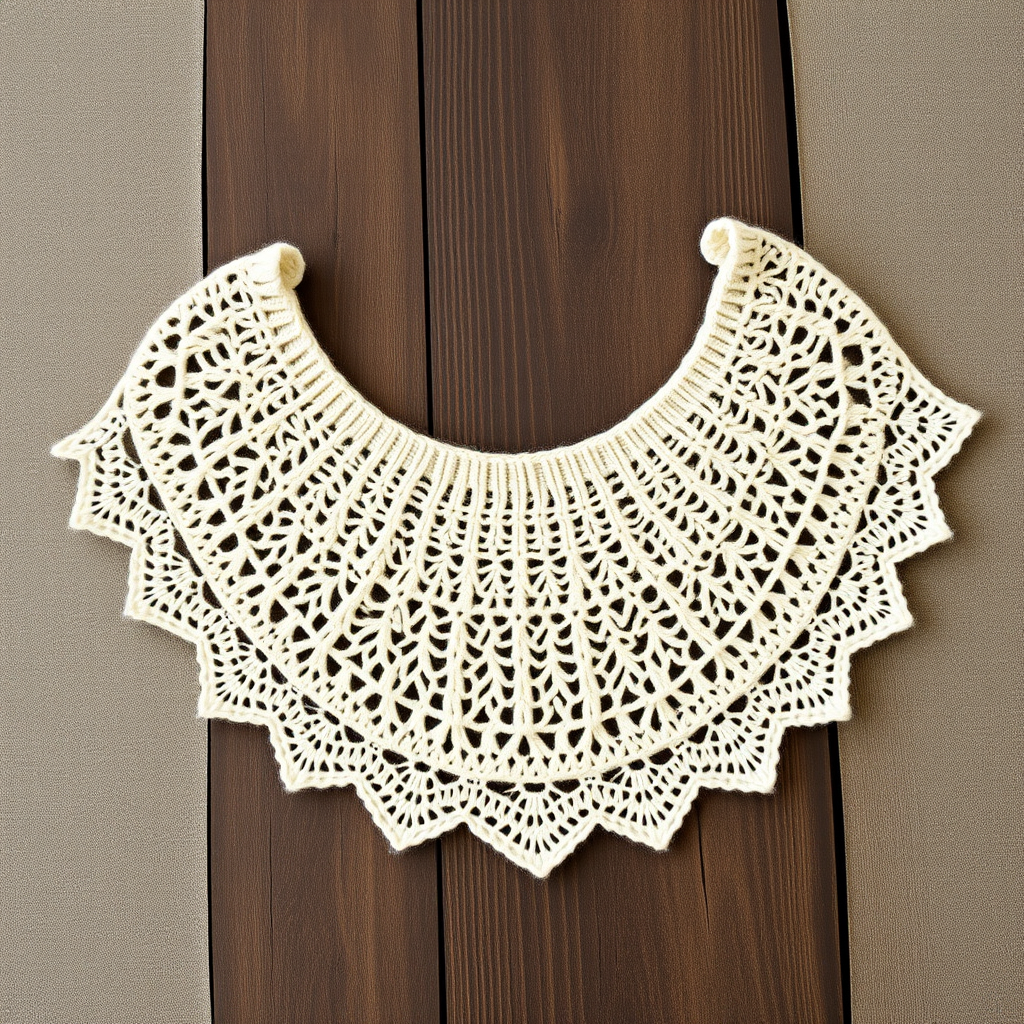
Verdant Veil Lace Shawl Free Knitting Pattern – Botanical Leaf Motif

The Verdant Veil Lace Shawl: A Free Knitting Pattern for a Botanical Masterpiece
Welcome to a world where the serenity of a forest floor meets the elegance of fine lace knitting. Today, I am thrilled to share with you a pattern that has captured my heart: the Verdant Veil Lace Shawl. This isn't just a knitting project; it is a journey into texture, color, and the timeless beauty of botanical motifs. Imagine wrapping yourself in a cloud of soft, airy lace, where cascading leaf patterns dance across a gradient of sage to deep forest green. Whether you are a seasoned lace knitter looking for a new obsession or a confident beginner ready to take the next step, this shawl is designed to be a rewarding and meditative experience. Let's cast on and bring this serene woodland charm to life.
Materials Needed: Gathering Your Botanical Toolkit
Before we begin our knitting adventure, let's ensure you have everything you need. The beauty of this pattern lies in its simplicity of materials, allowing the stitch work and yarn to shine.
- Yarn: Fingering weight yarn (e.g., Malabrigo Sock) in a gradient of sage green to deep forest, approximately 800 yards. The gradient is key to the shawl's visual magic, but a solid color or hand-dyed speckled yarn will also create a stunning effect.
- Needles: US 6 (4.0 mm) circular knitting needle with a 32-inch cable. The long cable is essential to accommodate the growing number of stitches as the shawl expands.
- Notions: Stitch markers (at least 4), a tapestry needle for weaving in ends, and blocking pins for the final flourish.
- Gauge: 20 stitches and 28 rows = 4 inches in stockinette stitch after blocking. While gauge is important for size, the drape of this shawl is forgiving. Focus on maintaining a consistent tension.
Step-by-Step Instructions: Knitting the Verdant Veil
This shawl is knitted from the top down, starting with a garter tab cast-on and increasing outward to form a graceful crescent shape. We will break this down into manageable sections. Don't be intimidated by the lace chart; we will take it row by row.
Abbreviations: Your Knitting Glossary
- k: knit
- p: purl
- yo: yarn over (creates an increase and a hole)
- k2tog: knit two together (a right-leaning decrease)
- ssk: slip, slip, knit (a left-leaning decrease)
- pm: place marker
- sm: slip marker
- rep: repeat
- RS: Right Side (the public side of the work)
- WS: Wrong Side (the inside of the work)
Part 1: The Garter Tab Cast-On and Set-Up
The garter tab is a classic, elegant way to begin a shawl, creating a seamless, clean edge at the center back of your neck.
- Cast On: Using the garter tab method, cast on 3 stitches.
- Knit the Tab: Knit 6 rows of garter stitch (which means you simply knit every row). You will have a small, square-ish tab with ridges.
- Pick Up Stitches: Now, we will pick up stitches to form the base of the shawl. Rotate your work 90 degrees clockwise. Pick up and knit 3 stitches along the side edge of the tab (one for every two ridges). Then, rotate again and pick up 3 stitches from the original cast-on edge. You now have 9 stitches on your needle.
- Set-Up Row (WS): k3, pm, p3, pm, k3. This establishes your garter stitch borders (the first and last 3 stitches) and the central panel.
Part 2: The Increase Section – Shaping the Crescent
We will now work the increases that give the shawl its crescent shape. The increases are placed at the edges and on either side of the center marker.
- Row 1 (RS): k3, yo, sm, k1, yo, k to 1 stitch before marker, yo, k1, sm, yo, k3. (This adds 4 stitches: one at each edge and one on each side of the center).
- Row 2 (WS): k3, sm, purl to last marker, sm, k3. (The borders are always knit, the middle is purled on WS rows).
- Repeat: Repeat Rows 1-2 until you have 45 stitches between the markers (total 51 stitches). This will take 22 repeats of the increase rows. Your shawl will begin to look like a gentle triangle.
Part 3: The Leaf Lace Pattern – The Heart of the Shawl
Now for the magic! We will work a 12-row repeat that creates the cascading leaf motifs. We will continue the increases on every RS row, so the pattern grows organically. The repeat is worked between the markers.
Note: The pattern repeat is designed to fit within the increasing stitch count. The increases at the edges and center will add stitches, and the lace pattern will absorb them over time. Trust the pattern!
- Row 1 (RS): k3, yo, sm, *k1, yo, k2tog, k3, yo, ssk, k1, yo, k2tog, k3, yo, ssk, k1, rep from * to last marker, sm, yo, k3.
- Row 2 (WS): k3, sm, purl all stitches, sm, k3.
- Row 3 (RS): k3, yo, sm, *k2, yo, ssk, k1, yo, k2tog, k1, yo, ssk, k1, yo, k2tog, k2, rep from * to last marker, sm, yo, k3.
- Row 4 (WS): as Row 2.
- Row 5 (RS): k3, yo, sm, *k3, yo, ssk, k1, yo, k2tog, k1, yo, ssk, k1, yo, k2tog, k3, rep from * to last marker, sm, yo, k3.
- Row 6 (WS): as Row 2.
- Row 7 (RS): k3, yo, sm, *k4, yo, ssk, k1, yo, k2tog, k1, yo, ssk, k1, yo, k2tog, k4, rep from * to last marker, sm, yo, k3.
- Row 8 (WS): as Row 2.
- Row 9 (RS): k3, yo, sm, *k5, yo, ssk, k1, yo, k2tog, k1, yo, ssk, k1, yo, k2tog, k5, rep from * to last marker, sm, yo, k3.
- Row 10 (WS): as Row 2.
- Row 11 (RS): k3, yo, sm, *k6, yo, ssk, k1, yo, k2tog, k1, yo, ssk, k1, yo, k2tog, k6, rep from * to last marker, sm, yo, k3.
- Row 12 (WS): as Row 2.
Repeat: Continue repeating Rows 1-12 of the Leaf Lace Pattern until the shawl measures approximately 24 inches from the center cast-on, ending with a WS row. This is where you can customize the size—a shorter shawl for a scarf, or longer for a generous wrap.
Part 4: The Edging – A Delicate Finish
This simple, airy edging adds a final touch of elegance and helps the shawl lay flat.
- Row 1 (RS): k3, yo, sm, *k2tog, yo, rep from * to last marker, sm, yo, k3.
- Row 2 (WS): k3, sm, purl all stitches, sm, k3.
- Repeat: Repeat Rows 1-2 three more times (so you have 8 rows total of edging).
Part 5: Bind Off and Weave In
- Bind Off: Loosely bind off all stitches knitwise. A loose bind-off is crucial for a stretchy, drapey edge. You can even go up a needle size for this step if you tend to bind off tightly.
- Weave In Ends: Using your tapestry needle, carefully weave in all loose ends on the wrong side of the work.
Part 6: Blocking – The Final Transformation
Blocking is where lace truly comes alive. It opens up the stitches, defines the leaf motifs, and gives the shawl its beautiful drape.
- Soak: Fill a basin with lukewarm water and a gentle wool wash. Submerge the shawl and let it soak for 20-30 minutes. Do not agitate.
- Gently Squeeze: Carefully lift the shawl out and gently squeeze out excess water. Never wring or twist. Roll it in a clean towel to remove more moisture.
- Pin and Shape: Lay the shawl flat on a blocking mat. Begin pinning out the points of the leaf motifs, stretching the lace gently to open up the yarn overs. Pin the top edge and the bottom points to create the crescent shape. Be generous with your pins—this is what creates the stunning, airy texture.
- Dry: Allow the shawl to dry completely before unpinning. This can take 24-48 hours.
And there you have it—your very own Verdant Veil Lace Shawl. A beautiful, wearable piece of art that carries the serenity of the forest with you. I hope this pattern brings you as much joy in the making as it will in the wearing. Happy knitting, and may your stitches always be blessed with patience and creativity!