The Whispering Pines Half Double Crochet Decrease Stitch Sampler – Free Pattern
The Whispering Pines Half Double Crochet Decrease Stitch Sampler – Free Pattern
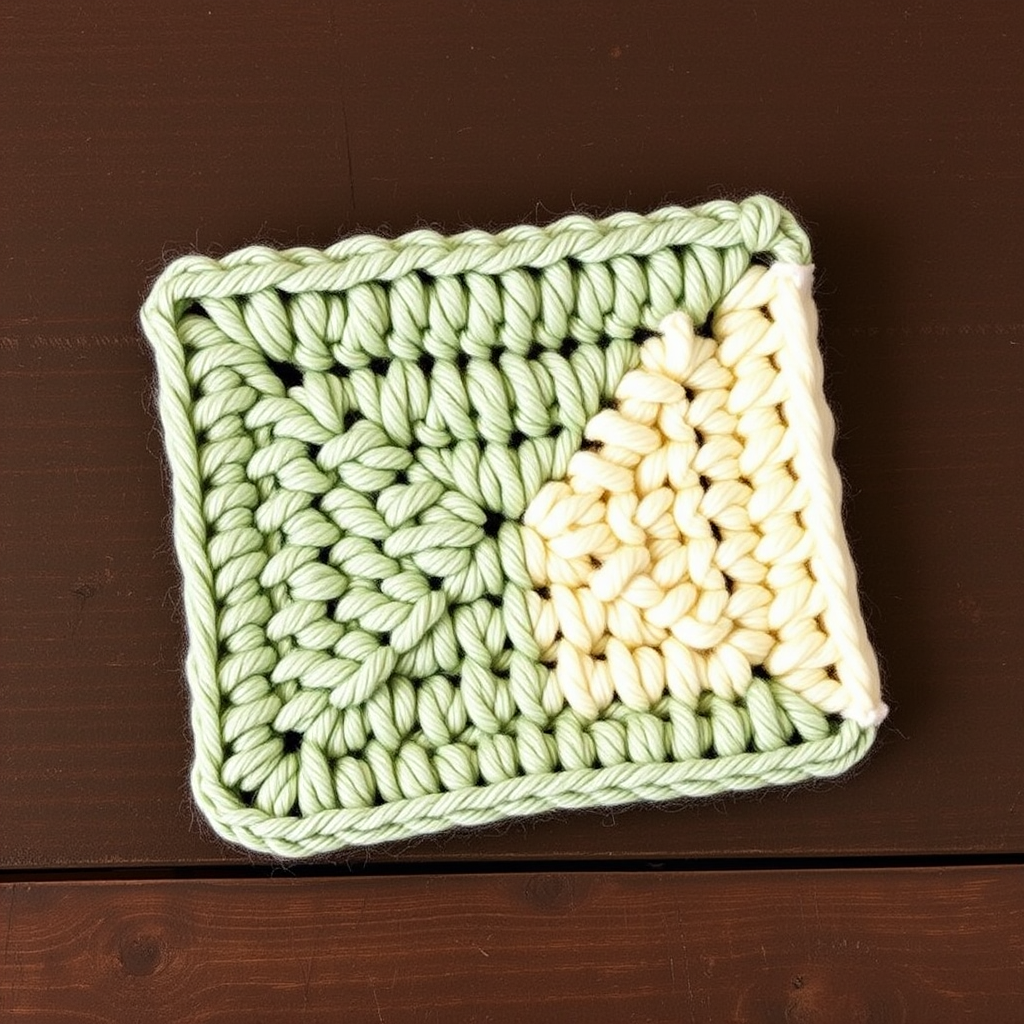
Welcome to a serene journey through the art of crochet shaping! Today, we're exploring the Whispering Pines Half Double Crochet Decrease Stitch Sampler, a beautifully designed pattern that teaches you four distinct methods for decreasing in half double crochet. Whether you're a beginner looking to expand your skills or an experienced crocheter seeking to perfect your shaping techniques, this sampler is the perfect project. You'll create a stunning rectangular swatch with elegant, tapering sections that showcase each decrease method in a visually striking way. Let's dive in and master the art of invisible, seamless shaping together!
Materials Needed
Before we begin, gather your materials. This project is wonderfully simple, requiring just a few essentials:
- Yarn: Worsted weight yarn in two contrasting colors – Color A (soft sage green) and Color B (cream). The contrast between these colors will beautifully highlight the different decrease techniques.
- Crochet Hook: 5.5mm (I-9) crochet hook. This size is perfect for worsted weight yarn, creating a dense, plush fabric.
- Other Tools: A yarn needle for weaving in ends, and scissors. Optional but recommended: blocking mats and pins to finish your sampler beautifully.
Gauge: 14 hdc x 11 rows = 4 inches in half double crochet. While gauge isn't critical for a sampler, it's good practice to check it for consistency.
Step-by-Step Instructions
This sampler is worked flat in rows, with each section demonstrating a different half double crochet decrease method. You will create a rectangular swatch that showcases all four techniques. Follow along carefully, and you'll have a beautiful, educational piece in no time.
Foundation
Let's start with the base of our sampler.
- With Color A, chain 31.
- Row 1: Work 1 hdc in the 3rd chain from hook and in each chain across. (29 hdc) Turn.
- Row 2: Chain 2 (counts as first hdc), hdc in each stitch across. (29 hdc) Turn.
Section 1: Invisible Decrease (hdc2tog)
This first section uses the invisible decrease, which creates a nearly seamless, subtle shaping. The decrease slants to the left, creating a gentle taper.
- Row 3: Chain 2, hdc in next 12 stitches, hdc2tog (insert hook in next stitch, yarn over, pull through, insert hook in next stitch, yarn over, pull through, yarn over, pull through all 5 loops on hook), hdc in next 13 stitches. (28 hdc) Turn.
- Row 4: Chain 2, hdc in next 11 stitches, hdc2tog, hdc in next 13 stitches. (27 hdc) Turn.
- Row 5: Chain 2, hdc in next 10 stitches, hdc2tog, hdc in next 13 stitches. (26 hdc) Turn.
- Row 6: Chain 2, hdc in next 9 stitches, hdc2tog, hdc in next 13 stitches. (25 hdc) Turn.
- Row 7: Chain 2, hdc in next 8 stitches, hdc2tog, hdc in next 13 stitches. (24 hdc) Turn.
- Row 8: Chain 2, hdc in next 7 stitches, hdc2tog, hdc in next 13 stitches. (23 hdc) Turn.
- Row 9: Chain 2, hdc in next 6 stitches, hdc2tog, hdc in next 13 stitches. (22 hdc) Turn.
- Row 10: Chain 2, hdc in next 5 stitches, hdc2tog, hdc in next 13 stitches. (21 hdc) Turn.
- Row 11: Chain 2, hdc in next 4 stitches, hdc2tog, hdc in next 13 stitches. (20 hdc) Turn.
- Row 12: Chain 2, hdc in next 3 stitches, hdc2tog, hdc in next 13 stitches. (19 hdc) Turn.
- Row 13: Chain 2, hdc in next 2 stitches, hdc2tog, hdc in next 13 stitches. (18 hdc) Turn.
- Row 14: Chain 2, hdc in next 1 stitch, hdc2tog, hdc in next 13 stitches. (17 hdc) Turn.
- Row 15: Chain 2, hdc2tog, hdc in next 13 stitches. (16 hdc) Turn.
- Row 16: Chain 2, hdc in next 13 stitches, hdc2tog. (15 hdc) Turn.
- Row 17: Chain 2, hdc in next 12 stitches, hdc2tog. (14 hdc) Turn.
- Row 18: Chain 2, hdc in next 11 stitches, hdc2tog. (13 hdc) Turn.
- Row 19: Chain 2, hdc in next 10 stitches, hdc2tog. (12 hdc) Turn.
- Row 20: Chain 2, hdc in next 9 stitches, hdc2tog. (11 hdc) Turn.
- Row 21: Chain 2, hdc in next 8 stitches, hdc2tog. (10 hdc) Turn.
- Row 22: Chain 2, hdc in next 7 stitches, hdc2tog. (9 hdc) Turn.
- Row 23: Chain 2, hdc in next 6 stitches, hdc2tog. (8 hdc) Turn.
- Row 24: Chain 2, hdc in next 5 stitches, hdc2tog. (7 hdc) Turn.
- Row 25: Chain 2, hdc in next 4 stitches, hdc2tog. (6 hdc) Turn.
- Row 26: Chain 2, hdc in next 3 stitches, hdc2tog. (5 hdc) Turn.
- Row 27: Chain 2, hdc in next 2 stitches, hdc2tog. (4 hdc) Turn.
- Row 28: Chain 2, hdc in next 1 stitch, hdc2tog. (3 hdc) Turn.
- Row 29: Chain 2, hdc2tog. (2 hdc) Turn.
- Row 30: Chain 2, hdc2tog. (1 hdc) Turn. Fasten off Color A.
Section 2: Standard Decrease (hdc dec)
Now we'll switch to Color B and explore the standard decrease, which creates a more pronounced, visible diagonal line slanting to the right. This is a classic technique you'll use in countless projects.
- Attach Color B to the right edge of the swatch (the side where you just finished).
- Row 31: Chain 2, hdc in next 13 stitches, hdc dec (yarn over, insert hook in next stitch, yarn over, pull through, yarn over, insert hook in next stitch, yarn over, pull through, yarn over, pull through all 5 loops on hook), hdc in next 13 stitches. (28 hdc) Turn.
- Row 32: Chain 2, hdc in next 12 stitches, hdc dec, hdc in next 13 stitches. (27 hdc) Turn.
- Row 33: Chain 2, hdc in next 11 stitches, hdc dec, hdc in next 13 stitches. (26 hdc) Turn.
- Row 34: Chain 2, hdc in next 10 stitches, hdc dec, hdc in next 13 stitches. (25 hdc) Turn.
- Row 35: Chain 2, hdc in next 9 stitches, hdc dec, hdc in next 13 stitches. (24 hdc) Turn.
- Row 36: Chain 2, hdc in next 8 stitches, hdc dec, hdc in next 13 stitches. (23 hdc) Turn.
- Row 37: Chain 2, hdc in next 7 stitches, hdc dec, hdc in next 13 stitches. (22 hdc) Turn.
- Row 38: Chain 2, hdc in next 6 stitches, hdc dec, hdc in next 13 stitches. (21 hdc) Turn.
- Row 39: Chain 2, hdc in next 5 stitches, hdc dec, hdc in next 13 stitches. (20 hdc) Turn.
- Row 40: Chain 2, hdc in next 4 stitches, hdc dec, hdc in next 13 stitches. (19 hdc) Turn.
- Row 41: Chain 2, hdc in next 3 stitches, hdc dec, hdc in next 13 stitches. (18 hdc) Turn.
- Row 42: Chain 2, hdc in next 2 stitches, hdc dec, hdc in next 13 stitches. (17 hdc) Turn.
- Row 43: Chain 2, hdc in next 1 stitch, hdc dec, hdc in next 13 stitches. (16 hdc) Turn.
- Row 44: Chain 2, hdc dec, hdc in next 13 stitches. (15 hdc) Turn.
- Row 45: Chain 2, hdc in next 13 stitches, hdc dec. (14 hdc) Turn.
- Row 46: Chain 2, hdc in next 12 stitches, hdc dec. (13 hdc) Turn.
- Row 47: Chain 2, hdc in next 11 stitches, hdc dec. (12 hdc) Turn.
- Row 48: Chain 2, hdc in next 10 stitches, hdc dec. (11 hdc) Turn.
- Row 49: Chain 2, hdc in next 9 stitches, hdc dec. (10 hdc) Turn.
- Row 50: Chain 2, hdc in next 8 stitches, hdc dec. (9 hdc) Turn.
- Row 51: Chain 2, hdc in next 7 stitches, hdc dec. (8 hdc) Turn.
- Row 52: Chain 2, hdc in next 6 stitches, hdc dec. (7 hdc) Turn.
- Row 53: Chain 2, hdc in next 5 stitches, hdc dec. (6 hdc) Turn.
- Row 54: Chain 2, hdc in next 4 stitches, hdc dec. (5 hdc) Turn.
- Row 55: Chain 2, hdc in next 3 stitches, hdc dec. (4 hdc) Turn.
- Row 56: Chain 2, hdc in next 2 stitches, hdc dec. (3 hdc) Turn.
- Row 57: Chain 2, hdc in next 1 stitch, hdc dec. (2 hdc) Turn.
- Row 58: Chain 2, hdc dec. (1 hdc) Turn. Fasten off Color B.
Section 3: Decrease at Beginning of Row
Let's switch back to Color A for this section, which focuses on decreases worked at the beginning of each row. This creates a sharp, clean diagonal edge on the left side of your work.
- Attach Color A to the right edge.
- Row 59: Chain 2, hdc dec (worked over first two stitches), hdc in next 13 stitches. (14 hdc) Turn.
- Row 60: Chain 2, hdc dec, hdc in next 11 stitches. (13 hdc) Turn.
- Row 61: Chain 2, hdc dec, hdc in next 9 stitches. (12 hdc) Turn.
- Row 62: Chain 2, hdc dec, hdc in next 7 stitches. (11 hdc) Turn.
- Row 63: Chain 2, hdc dec, hdc in next 5 stitches. (10 hdc) Turn.
- Row 64: Chain 2, hdc dec, hdc in next 3 stitches. (9 hdc) Turn.
- Row 65: Chain 2, hdc dec, hdc in next 1 stitch. (8 hdc) Turn.
- Row 66: Chain 2, hdc dec. (7 hdc) Turn.
- Row 67: Chain 2, hdc dec. (6 hdc) Turn.
- Row 68: Chain 2, hdc dec. (5 hdc) Turn.
- Row 69: Chain 2, hdc dec. (4 hdc) Turn.
- Row 70: Chain 2, hdc dec. (3 hdc) Turn.
- Row 71: Chain 2, hdc dec. (2 hdc) Turn.
- Row 72: Chain 2, hdc dec. (1 hdc) Turn. Fasten off Color A.
Section 4: Decrease at End of Row
For our final section, we'll use Color B and work decreases at the end of each row. This mirrors the previous section, creating a sharp diagonal edge on the right side of your work.
- Attach Color B to the right edge.
- Row 73: Chain 2, hdc in next 13 stitches, hdc dec. (14 hdc) Turn.
- Row 74: Chain 2, hdc in next 11 stitches, hdc dec. (13 hdc) Turn.
- Row 75: Chain 2, hdc in next 9 stitches, hdc dec. (12 hdc) Turn.
- Row 76: Chain 2, hdc in next 7 stitches, hdc dec. (11 hdc) Turn.
- Row 77: Chain 2, hdc in next 5 stitches, hdc dec. (10 hdc) Turn.
- Row 78: Chain 2, hdc in next 3 stitches, hdc dec. (9 hdc) Turn.
- Row 79: Chain 2, hdc in next 1 stitch, hdc dec. (8 hdc)Also Check Out: We think you'd love this beautiful pattern on our sister site: Sleepy Blocks Baby Blankie Free Pattern – Chunky Knit Comfort