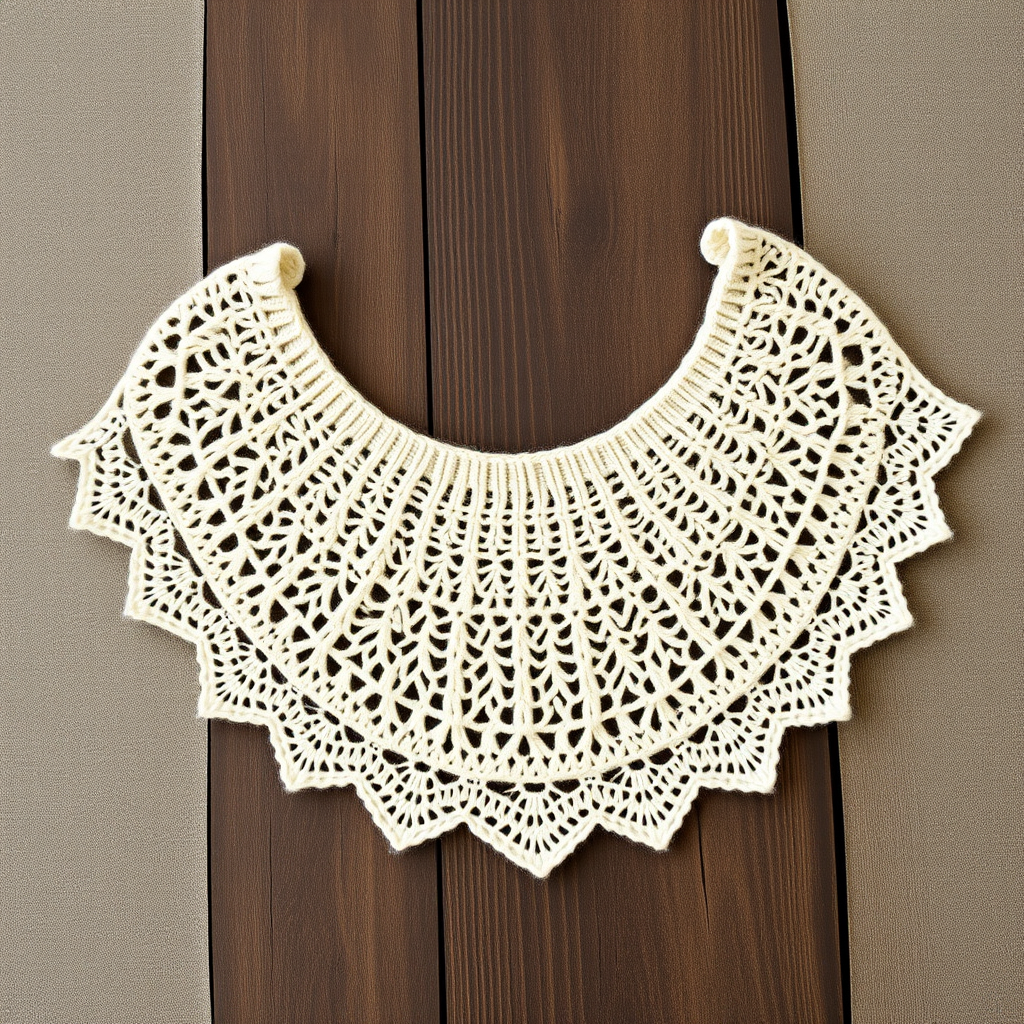
Mariposa Shawl Free Knitting Pattern – Gossamer Wing Wrap

Introducing the Mariposa Shawl: A Gossamer Wing Wrap
Wrap yourself in the delicate beauty of a butterfly's wing with this ethereal, textured shawl. The Mariposa Shawl combines soft lace panels with a cozy garter stitch body for a truly unique and romantic accessory. This free knitting pattern is designed to be approachable for beginners while still offering a rewarding challenge with its simple lace repeats. The finished piece is a wide, crescent-shaped wrap that drapes beautifully over the shoulders, evoking the lightness and grace of its namesake.
This pattern is worked from the top down, starting at the neck edge and increasing outward to form a wide, wing-like crescent shape. The combination of garter stitch, stockinette, and a simple lace repeat creates a textured, airy fabric that is both warm and breathable. Whether you're a seasoned knitter looking for a quick project or a beginner ready to try lace for the first time, the Mariposa Shawl is a perfect choice.
Materials Needed
Before you begin, gather the following materials to ensure a smooth and enjoyable knitting experience:
- Yarn: Fingering weight yarn in two colors:
- Main Color (MC): 400 yards (e.g., a soft merino/silk blend in cream or warm white)
- Contrast Color (CC): 200 yards (e.g., a dusty rose pink or any complementary shade)
- Needles: US Size 6 (4.0 mm) circular knitting needle, 32-inch or longer (to accommodate the growing number of stitches).
- Notions: Tapestry needle for weaving in ends, stitch markers (at least 4), and blocking pins for finishing.
Gauge: 20 stitches and 28 rows = 4 inches in stockinette stitch, after blocking. Gauge is important for achieving the correct size and drape, so be sure to check your tension.
Step-by-Step Instructions
This shawl is worked from the top down, starting at the neck edge and increasing outward to form a wide, wing-like crescent shape. The pattern uses a combination of garter stitch, stockinette, and a simple lace repeat to create a textured, airy fabric.
Abbreviations
- k = knit
- p = purl
- yo = yarn over
- k2tog = knit two together (right-leaning decrease)
- ssk = slip, slip, knit (left-leaning decrease)
- pm = place marker
- sm = slip marker
- RS = right side
- WS = wrong side
Special Stitch: Lace Panel (worked over 8 stitches)
- Row 1 (RS): k2, yo, ssk, k2tog, yo, k2
- Row 2 (WS): purl all stitches
- Row 3 (RS): k1, yo, ssk, yo, k2tog, yo, k1
- Row 4 (WS): purl all stitches
- Repeat these 4 rows for the lace panel.
Setup
With MC, cast on 5 stitches.
Increase Section (Garter Stitch Body)
This section creates the main body of the shawl with a simple garter stitch (knit every row) and increases at the edges to form the crescent shape.
- Row 1 (RS): k2, yo, k1, yo, k2 (7 stitches)
- Row 2 (WS): knit all stitches
- Row 3 (RS): k2, yo, k3, yo, k2 (9 stitches)
- Row 4 (WS): knit all stitches
Continue in this manner, increasing 2 stitches every RS row (knit 2, yo, knit to last 2 stitches, yo, knit 2) and knitting all stitches on WS rows, until you have 45 stitches on your needle. End with a WS row.
Lace Panel Insertion
Now we will introduce the lace panels that give the shawl its delicate, wing-like texture. The increases at the edges continue, but the center remains in garter stitch.
- Next RS row: k2, yo, k1, pm, work Lace Panel Row 1 over next 8 stitches, pm, k to last 11 stitches, pm, work Lace Panel Row 1 over next 8 stitches, pm, k1, yo, k2. (You now have two lace panels, one near each edge, with a garter stitch center.)
Continue in this pattern, maintaining the garter stitch increases at the edges (k2, yo at beginning and yo, k2 at end of RS rows) and knitting all stitches on WS rows. Work the lace panels in pattern, repeating the 4-row repeat. The center section remains in garter stitch (knit every row).
Work until the shawl measures approximately 20 inches from the cast-on edge, ending with a WS row of the lace pattern.
Contrast Color Border
Switch to CC. Knit 4 rows of garter stitch (knit all stitches on both RS and WS rows), continuing the edge increases on RS rows.
Lace Edge (worked across all stitches)
This creates a beautiful, delicate eyelet border that finishes the shawl.
- Next RS row: k2, yo, *k2tog, yo* repeat from * to * until last 3 stitches, k1, yo, k2. (This creates a row of eyelets.)
- Next WS row: purl all stitches.
- Next RS row: knit all stitches.
- Next WS row: purl all stitches.
- Bind off loosely on the next RS row (knitwise).
Finishing
Weave in all ends with a tapestry needle. Block the shawl gently to open up the lace panels and shape the wings. Pin out the edges to create a gentle crescent shape. Allow to dry completely before wearing.
Your Mariposa Shawl is now complete! The soft, airy fabric and delicate lace panels make it a stunning accessory for any occasion. Enjoy the romantic, ethereal beauty of your handmade butterfly wing wrap.