Whispering Pines Cozy Cable Catch-All Free Pattern
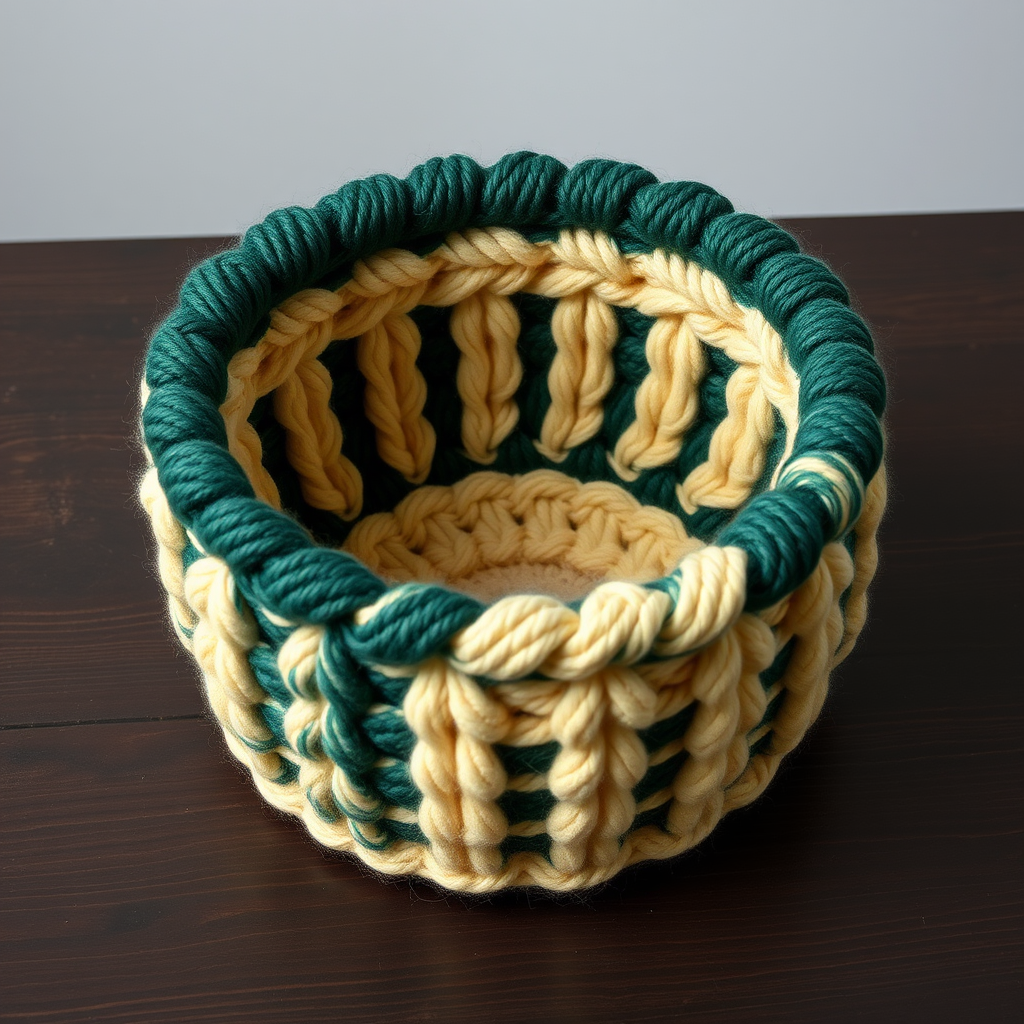
Whispering Pines Cozy Cable Catch-All: A Free Knitting Pattern for Yarn Storage
Imagine a beautiful, handcrafted basket that not only keeps your workspace tidy but also adds a touch of rustic elegance to your home. The Whispering Pines Cozy Cable Catch-All is exactly that—a plush, textured basket designed as the perfect nesting spot for your current project. Whether you're wrangling a runaway skein of yarn or storing your knitting needles, this basket keeps everything within reach while showcasing a stunning cable pattern that evokes the warmth of a cabin retreat.
This free knitting pattern is perfect for intermediate knitters looking to expand their skills into home decor. The rich, forest-inspired hues combined with chunky cables create a dimensional, cozy accessory that will make your crafting space feel like a sanctuary. Let's dive into how you can create this beautiful storage solution for yourself!
Materials Needed
Before you begin, gather the following materials to ensure a smooth knitting experience:
- Yarn: Super bulky weight yarn (size 6), approximately 250-300 yards. The sample shown uses a deep forest green for the main body and a warm cream for the base and ribbing. Choose colors that complement your home decor!
- Needles: US 13 (9 mm) circular knitting needle with a 24-inch cable, or double-pointed needles (DPNs) for working in the round. You'll also need a cable needle (or a spare DPN) for the cable stitches.
- Notions: Stitch markers (at least 2), a tapestry needle for weaving in ends, and scissors.
- Gauge: 10 stitches and 14 rows = 4 inches in stockinette stitch (knit on right side, purl on wrong side), after blocking. Note: Gauge is important for achieving the correct basket size, so be sure to check your tension!
Step-by-Step Instructions
This basket is knitted seamlessly from the bottom up. The base is worked flat in a rectangle, then stitches are picked up around the edges to form the cylindrical sides. Follow these detailed instructions carefully, and you'll have a beautiful basket in no time.
Part 1: Knitting the Base
With the main color (MC) yarn:
- Cast on 20 stitches using your preferred method (long-tail cast on works well).
- Row 1 (Right Side): Knit all stitches.
- Row 2 (Wrong Side): Purl all stitches.
- Repeat Rows 1 and 2 until the base measures 8 inches long from the cast-on edge. Tip: Measure from the bottom of the needle to ensure accuracy.
- End with a Wrong Side row (meaning your last row should be a purl row). Do not bind off. Cut the yarn, leaving a long tail (about 12 inches) for weaving in later.
Part 2: Picking Up Stitches for the Sides
Now we'll transform the flat rectangle into the beginning of a cylindrical basket.
- With the Right Side facing you, attach your working yarn (MC) to the beginning of the cast-on edge.
- Pick up and knit 20 stitches along the cast-on edge (the bottom of your rectangle).
- Pick up and knit 20 stitches along the first long side of the rectangle. Tip: Pick up stitches evenly by inserting your needle under both loops of each edge stitch.
- Pick up and knit 20 stitches along the bind-off edge (the top of your rectangle where the live stitches are).
- Pick up and knit 20 stitches along the remaining long side. You should now have 80 stitches total on your needle.
- Place a stitch marker at the beginning of the round (where you started picking up) and join to work in the round, being careful not to twist your stitches.
Part 3: Establishing the Stockinette Base Rounds
These initial rounds create a smooth, sturdy foundation for the cable pattern to sit upon.
- Round 1: Knit all stitches.
- Round 2: Purl all stitches.
- Round 3: Knit all stitches.
- Round 4: Purl all stitches.
Part 4: Working the Cable Pattern
This is where the magic happens! The cable pattern is worked over a repeating 16-stitch sequence. Since you have 80 stitches, you'll repeat the pattern 5 times around the basket. Note: If your stitch count differs slightly, ensure the pattern fits evenly around.
Round 5 (Cable Round - Front): *Knit 6, place next 4 stitches on a cable needle and hold to the front of your work, knit the next 4 stitches from the left needle, then knit the 4 stitches from the cable needle (this creates a 4-over-4 front cable), knit 6*; repeat from * to * around.
Rounds 6-8: Knit all stitches. (These are plain knit rounds that allow the cable to settle.)
Round 9 (Cable Round - Back): *Knit 6, place next 4 stitches on cable needle and hold to the back of your work, knit the next 4 stitches from the left needle, then knit the 4 stitches from the cable needle (this creates a 4-over-4 back cable), knit 6*; repeat from * to * around.
Rounds 10-12: Knit all stitches.
Repeat Rounds 5-12 until the sides measure 5 inches from the picked-up edge, ending after a Round 12 (a plain knit round). This will give you approximately 3 full cable twists.
Part 5: Adding the Ribbed Top
Now we'll switch to the contrasting color (CC) for a beautiful finish. If you're using a single color, simply continue with your MC.
- Cut your MC yarn and join your CC yarn (warm cream in the sample).
- Round 13: *Knit 2, purl 2*; repeat from * to * around. This establishes the ribbing pattern.
- Repeat Round 13 until the ribbing measures 1.5 inches. This creates a stretchy, polished edge that helps the basket maintain its shape.
- Bind off loosely in pattern: Knit the knit stitches and purl the purl stitches as you bind off. Tip: To avoid a tight edge, use a needle one size larger for the bind-off or bind off very loosely.
Part 6: Finishing Touches
Your basket is almost complete! Follow these final steps for a professional finish.
- Weave in all ends using a tapestry needle. Be sure to weave them securely into the wrong side of the work so they don't show on the outside.
- Block the basket: This step is crucial for helping the cables relax and the basket hold its shape. Lightly steam the basket with a garment steamer or wet it gently and shape it over a bowl or box to dry. Note: The thick yarn and tight gauge create a sturdy structure that will stand on its own once blocked.
- Once completely dry, your Whispering Pines Cozy Cable Catch-All is ready to hold your yarn, needles, or any other crafting essentials!
Tips for Success
- Stitch Markers: Place a marker every 16 stitches if you find it helpful to track your cable repeats.
- Cable Needle: If you don't have a cable needle, a spare double-pointed needle or even a bobby pin works perfectly.
- Color Choices: Feel free to experiment with different color combinations. A neutral cream with a bold accent color creates a striking contrast, while monochromatic tones offer a more subtle, sophisticated look.
This pattern is a wonderful way to practice cables in a functional, decorative project. The result is a beautiful, handmade basket that adds warmth and organization to any space. Happy knitting!


