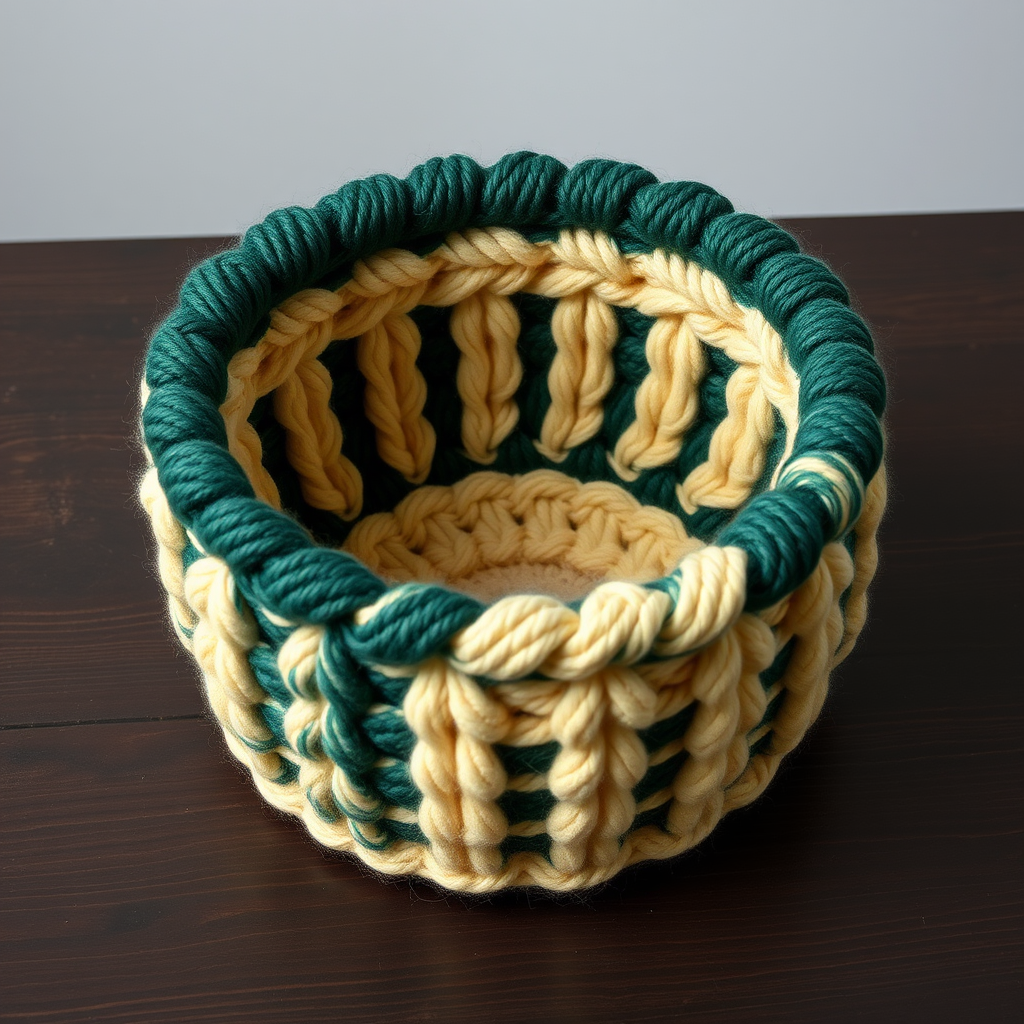
Cozy Cloud Catch-All Basket Free Pattern – Knitted Chunky Storage Basket

Cozy Cloud Catch-All Basket: A Free Chunky Knitted Storage Pattern
Transform your home decor with this plush, chunky knitted basket that combines functionality with irresistible softness. The Cozy Cloud Catch-All Basket is the perfect storage solution for blankets, toys, yarn, or any household items that need a stylish home. Featuring a beautiful seed stitch texture and a warm, neutral color palette, this handmade basket adds warmth and rustic charm to any room—from modern farmhouse living spaces to cozy bedrooms and nurseries.
This pattern is designed with beginners in mind, using simple knit and purl stitches to create a stunning textured result. The basket is knitted flat in one piece, then seamed and finished with a contrasting crocheted edge for durability and visual appeal. With clear, step-by-step instructions, you'll create a beautiful, functional piece that looks professionally made.
Materials Needed
Before you begin, gather the following supplies to ensure a smooth knitting experience:
Yarn
- Super bulky weight yarn (approximately 250–300 yards total) in two colors:
- Color A (Cream): Main body color – approximately 200–250 yards
- Color B (Oatmeal): Contrast trim color – approximately 50 yards
Needles & Hooks
- US Size 13 (9.0 mm) knitting needles – for the main body of the basket
- US Size N/P (10.0 mm) crochet hook – for the finishing edge
- Yarn needle – for weaving in ends and seaming
Additional Supplies
- Stitch markers (at least 4)
- Scissors
- Tape measure or ruler
Gauge
8 stitches and 12 rows = 4 inches in stockinette stitch (knit on US 13 needles).
Tip: Always knit a gauge swatch first to ensure your basket turns out the correct size. Adjust needle size if necessary to match gauge.
Step-by-Step Instructions
This basket is worked in three main sections: the base, the sides, and the finishing edge. Follow each step carefully, and you'll have a beautiful, functional basket in no time.
Part 1: Knitting the Base
The base of the basket is worked flat in stockinette stitch, creating a smooth, sturdy foundation.
- Cast On: Using Color A (Cream) and your US 13 knitting needles, cast on 20 stitches.
- Row 1 (Right Side): Knit all stitches across.
- Row 2 (Wrong Side): Purl all stitches across.
- Repeat Rows 1–2 until the piece measures 10 inches long from the cast-on edge. This rectangular piece forms the base of your basket.
Pro Tip: Count your rows periodically to ensure even tension. The stockinette stitch will naturally curl at the edges—this is normal and will be corrected when you pick up stitches for the sides.
Part 2: Knitting the Sides
Now you'll pick up stitches around the entire base and work in the round to create the basket walls with a beautiful seed stitch texture.
- Pick Up Stitches: With the right side of the base facing you, pick up and knit 20 stitches along each of the four edges of the base. You should have 80 stitches total on your needles.
- Join in the Round: Place a stitch marker at the beginning of the round and join your work, being careful not to twist the stitches.
- Round 1: Knit all stitches around.
- Round 2: *Knit 1, purl 1; repeat from * to end of round.
- Round 3: Knit all stitches around.
- Round 4: *Purl 1, knit 1; repeat from * to end of round.
- Repeat Rounds 1–4 until the sides measure 8 inches high from the base.
Understanding the Pattern: Rounds 2 and 4 create the seed stitch texture—a bumpy, woven-looking pattern that gives the basket its cozy, chunky appearance. The knit rounds in between help maintain structure and prevent the fabric from becoming too dense.
Part 3: Finishing the Top Edge
Once the sides reach the desired height, it's time to finish the top edge for a polished look.
- Bind Off Loosely: Bind off all stitches loosely to maintain the stretchy, plush quality of the fabric. Tip: Use a larger needle or bind off with a yarn-over between stitches to keep the edge flexible.
- Create the Rolled Rim: Fold the top edge down about 1 inch to create a rolled rim. This adds structure and a decorative touch.
- Tack the Rim: Using a yarn needle and Color A yarn, tack the folded rim down with a few invisible stitches. Space your stitches evenly around the circumference to secure the fold in place.
Part 4: Crocheted Edge (Optional but Recommended)
This contrasting trim reinforces the top edge and adds a beautiful finishing touch in Color B (Oatmeal).
- Attach Color B: Using your US N/P (10.0 mm) crochet hook, attach Color B yarn to any point along the top edge of the basket with a slip stitch.
- Single Crochet Around: Work a round of single crochet (sc) around the entire top edge of the basket. Insert your hook through both layers of the folded rim to secure it firmly.
- Join and Fasten Off: When you reach the starting point, join with a slip stitch to the first single crochet. Fasten off and weave in the yarn end securely.
Part 5: Weaving in Ends
To complete your basket, weave in all loose ends using a yarn needle. Be sure to weave ends in on the inside of the basket where they won't be visible. Trim any excess yarn.
Care Instructions
To keep your Cozy Cloud Catch-All Basket looking its best:
- Spot clean with a damp cloth and mild soap as needed
- Do not machine wash or dry—this can cause felting and distortion
- Reshape while damp and allow to air dry flat
- Store in a dry place away from direct sunlight to prevent fading
Customization Ideas
Once you've mastered this pattern, feel free to make it your own:
- Size Variations: Adjust the cast-on count and side height to create smaller or larger baskets for different storage needs
- Color Combinations: Experiment with seasonal colors or match your existing decor
- Texture Variations: Try different stitch patterns for the sides, such as ribbing or moss stitch
- Add Handles: Knit or crochet simple handles and attach them to the sides for easy carrying
This chunky knitted basket makes a wonderful handmade gift for housewarmings, weddings, or baby showers. Its practical design and beautiful texture ensure it will be treasured for years to come. Happy knitting!