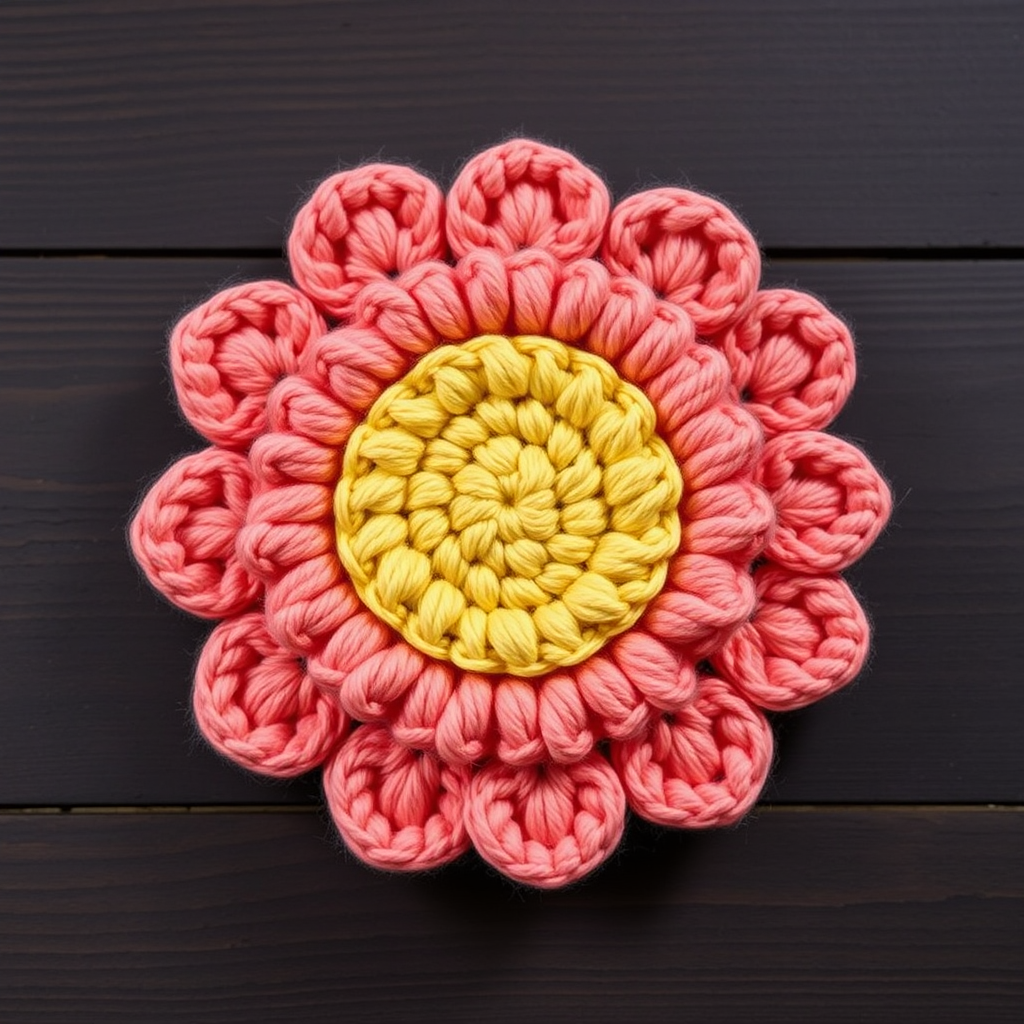
Whispering Meadow Bloom Free Pattern

Whispering Meadow Bloom: A Free Crochet Flower Pattern
Imagine a flower so lush and dimensional it seems to whisper secrets of a sunlit meadow. The Whispering Meadow Bloom is exactly that—a stunning crochet creation featuring a cloud-soft puff stitch center and gently ruffled petals. This pattern is perfect for adding a handmade touch to hats, scarves, or home decor. Whether you're a beginner looking for a rewarding project or an experienced crocheter seeking a quick, satisfying make, this flower is sure to delight. With just two colors of worsted weight yarn and a single hook, you'll create a textured, heirloom-quality bloom in no time.
Materials Needed
Before you begin, gather the following supplies. The gauge is not critical for this project, but aim for a tight, even tension to keep the puff stitches plump and well-defined.
- Yarn A (Center): 20 yards of worsted weight yarn (sample uses soft butter yellow)
- Yarn B (Petals): 30 yards of worsted weight yarn (sample uses muted dusty rose)
- Hook: H/8 (5.0 mm) crochet hook
- Yarn needle (for weaving in ends)
- Scissors
Abbreviations
- ch = chain
- sl st = slip stitch
- sc = single crochet
- dc = double crochet
- puff st = puff stitch (see special stitch below)
Special Stitch – Puff Stitch (puff st)
This pattern relies on the puff stitch to create its signature cloud-like texture. Here's how to work it:
- Yarn over, insert hook into the indicated stitch.
- Yarn over and pull up a loop (3 loops on hook).
- Repeat this step 3 more times into the same stitch (7 loops on hook).
- Yarn over and pull through all 7 loops.
- Chain 1 to close the stitch securely.
Step-by-Step Instructions
Follow these detailed instructions carefully. The flower is worked in two parts: the center base and the petals. Take your time, and you'll have a beautiful bloom.
Part 1: The Center (Yarn A)
We'll start with a magic ring to create a tight, seamless center.
- Make a magic ring. If you're unfamiliar with this technique, wrap the yarn around your fingers twice, insert the hook, and pull up a loop. Chain 1 to secure.
- Round 1: Ch 1 (does not count as a stitch). Work 6 sc into the ring. Pull the ring tight to close the circle. Sl st to the first sc to join. (6 sc)
- Round 2: Ch 1. Work 2 sc in each stitch around. Sl st to join. (12 sc)
- Round 3: Ch 1. *Sc in the next stitch, 2 sc in the next stitch.* Repeat from * to * around. Sl st to join. (18 sc)
- Round 4: Ch 1. *Sc in the next 2 stitches, 2 sc in the next stitch.* Repeat from * to * around. Sl st to join. (24 sc)
- Round 5: Ch 1. *Sc in the next 3 stitches, 2 sc in the next stitch.* Repeat from * to * around. Sl st to join. (30 sc)
- Fasten off Yarn A. This circular piece is the base of your flower. Weave in the starting tail from the magic ring, but leave the ending tail for now (you can weave it in later).
Part 2: The Petals (Yarn B)
Now we'll attach Yarn B and build the dimensional petals.
- Attach Yarn B with a sl st to any sc from Round 5 of the center. Make sure your hook is inserted under both loops of the stitch for a secure hold.
- Round 6: Ch 1. *Work a puff st in the next stitch, ch 1, skip the next stitch.* Repeat from * to * around. Sl st to the first puff st to join. (15 puff sts) Note: The ch 1 spaces between puff stitches are crucial for the next round.
- Round 7: Ch 1. *Sc in the ch-1 space from the previous round, ch 3, sc in the same space.* Repeat from * to * around. Sl st to the first sc to join. (15 small loops) These ch-3 loops will form the foundation for your petals.
- Round 8: Sl st into the first ch-3 loop. Ch 1. *In the ch-3 loop, work (sc, dc, 3 puff sts, dc, sc).* Repeat from * to * around. Sl st to the first sc to join. (15 petals) Each petal is a cluster of stitches worked into a single loop, creating a ruffled, layered effect.
- Fasten off and weave in all ends using your yarn needle. Be sure to secure the tail from Yarn A as well.
Finishing Touches
Your Whispering Meadow Bloom is almost complete! Here's how to finish it beautifully:
- Shape the petals: Gently use your fingers to shape and fluff the petals outward. The puff stitches create a textured, dimensional center, and the outer petals form a soft ruffle.
- Attach to a project: Use the yarn needle and a length of yarn to sew the flower onto a hat, scarf, or bag. Alternatively, attach a pin back to the rear of the flower to make a stunning brooch.
- Blocking (optional): If you want a more defined shape, lightly steam block the flower. Hold a steam iron a few inches away and mist the flower, then let it dry completely. This helps the petals lie flat and the puff stitches pop.
This pattern is a joy to work up and endlessly versatile. Experiment with different color combinations—think vibrant sunflower yellows with deep burgundy petals, or soft pastels for a baby shower gift. The Whispering Meadow Bloom is a quick project that yields a professional-looking result, making it an ideal gift or a charming addition to your own handmade collection. Happy crocheting!