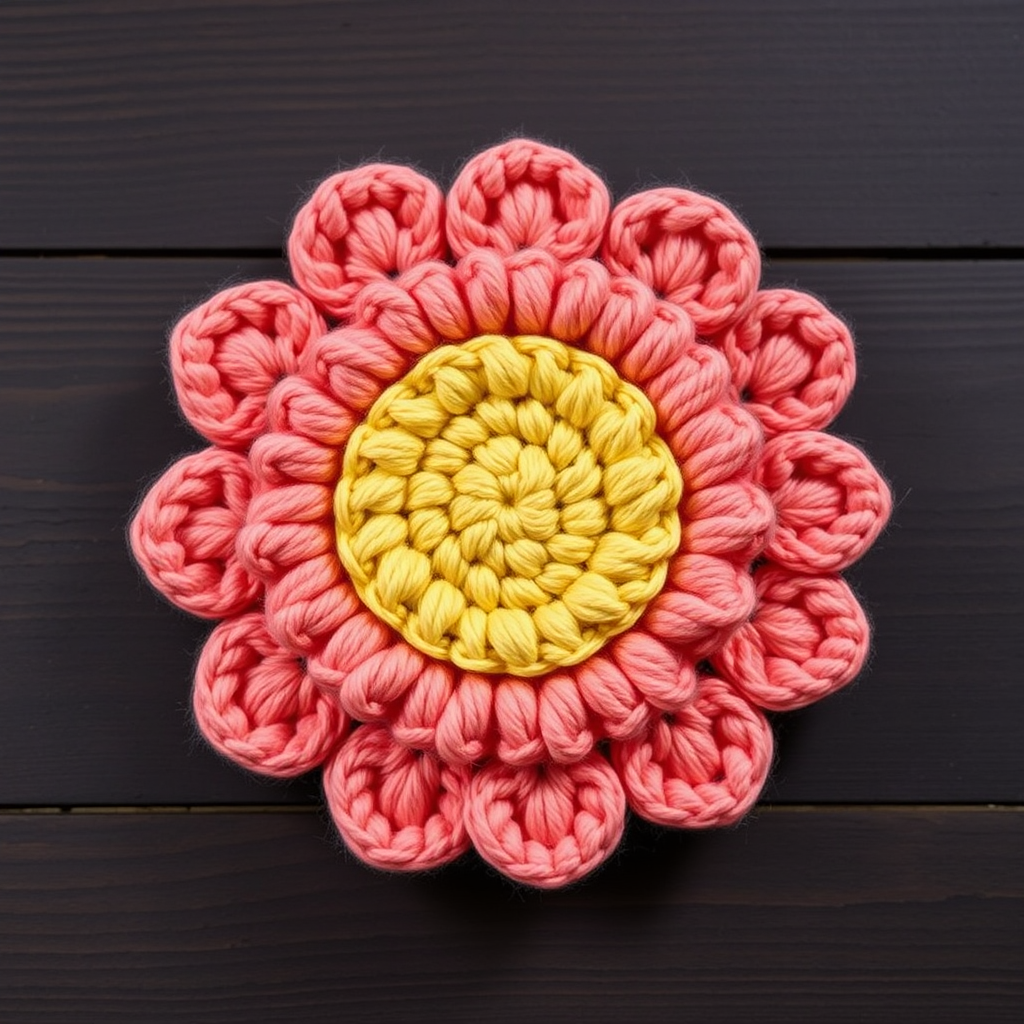
Whimsical Meadow Bloom Free Crochet Pattern

Whimsical Meadow Bloom: A Free Crochet Flower Pattern for Beginners
Are you ready to add a touch of handmade charm to your favorite accessories? This Whimsical Meadow Bloom crochet pattern is the perfect project for crafters of all skill levels. With its layered petals and plush, textured center, this flower captures the essence of a sunlit meadow in full bloom. Whether you're embellishing a cozy hat, a stylish scarf, or looking for a delightful DIY home decor accent, this beginner-friendly pattern will guide you through creating a stunning, three-dimensional floral masterpiece. Let's pick up our hooks and bring this charming bloom to life!
Materials Needed
Before we dive into the stitches, let's gather our supplies. This project is wonderfully simple and requires only a few essential tools:
- Yarn: Bulky weight yarn in three colors:
- Color A (Outer Petals): Soft butter yellow
- Color B (Inner Petals): Creamy white
- Color C (Center): Warm golden brown
- Crochet Hook: Size J/10 (6.0 mm)
- Yarn Needle: For weaving in ends and sewing layers together
- Scissors: For cutting yarn
Gauge Note: Gauge is not critical for this project. However, aim for a tight tension to prevent gaps between stitches, ensuring your flower looks full and polished.
Abbreviations (US Terms)
Familiarize yourself with these standard crochet abbreviations before starting:
- ch = chain
- sl st = slip stitch
- sc = single crochet
- hdc = half double crochet
- dc = double crochet
- tr = treble crochet
- rnd = round
Step-by-Step Instructions
Follow these detailed instructions to create your Whimsical Meadow Bloom. We'll work from the center outward, then assemble the layers for a gorgeous dimensional effect.
Part 1: The Plush Center (Color C)
This dense, textured circle forms the heart of your flower.
- Magic Ring: With Color C, make a magic ring. If you're unfamiliar with this technique, wrap the yarn around your fingers, insert your hook, and pull up a loop to begin.
- Round 1: Ch 1 (does not count as a stitch here), work 6 sc into the ring. Pull the ring tight to close the circle. Join with a sl st to the first sc. (6 sc)
- Round 2: Ch 1, work 2 sc in each sc around. Join with a sl st to the first sc. (12 sc)
- Round 3: Ch 1, work *sc in next sc, 2 sc in next sc*; repeat from * to * around. Join with a sl st to the first sc. (18 sc)
- Fasten Off: Cut Color C, leaving a long tail (about 12 inches) for sewing the layers together later.
Part 2: Inner Petal Layer (Color B)
This layer creates six delicate, scalloped petals that sit just above the outer layer.
- Magic Ring: With Color B, make a magic ring.
- Round 1: Ch 1, work 6 sc into the ring. Pull the ring tight. Join with a sl st to the first sc. (6 sc)
- Round 2: Ch 1, work 2 sc in each sc around. Join with a sl st to the first sc. (12 sc)
- Petal Formation (Front Loops Only): This round is worked only in the front loops of the stitches from Round 2. This creates petals that pop forward beautifully.
- *Ch 3, in the same front loop work 2 dc, ch 2, sl st in the same front loop. Skip the next front loop, sl st in the next front loop.*
- Repeat from * to * around. You will create 6 petals total.
- Fasten Off: Cut Color B, leaving a tail for assembly.
Part 3: Outer Petal Layer (Color A)
This layer features eight larger, ruffled petals that form the flower's dramatic base.
- Magic Ring: With Color A, make a magic ring.
- Round 1: Ch 1, work 8 sc into the ring. Pull the ring tight. Join with a sl st to the first sc. (8 sc)
- Round 2: Ch 1, work 2 sc in each sc around. Join with a sl st to the first sc. (16 sc)
- Petal Formation (Front Loops Only): Similar to the inner layer, work in the front loops only.
- *Ch 4, in the same front loop work 3 tr, ch 3, sl st in the same front loop. Skip the next front loop, sl st in the next front loop.*
- Repeat from * to * around. You will create 8 petals total.
- Fasten Off: Cut Color A, leaving a tail for assembly.
Part 4: Assembling Your Meadow Bloom
Now for the magic moment—bringing all the pieces together to create your dimensional flower.
- Layer Alignment: Place the Inner Petal Layer (Color B) on top of the Outer Petal Layer (Color A), aligning the centers. Pro Tip: Rotate the inner layer slightly so its petals sit between the outer petals, creating a beautiful staggered effect.
- Add the Center: Place the Center (Color C) on top of the Inner Petal Layer.
- Sewing: Thread your yarn needle with the long tail from the Center. Insert the needle through all three layers at the very center. Make several secure stitches to hold the layers together firmly.
- Reinforce: Use the tails from the petal layers to sew through the layers again for extra security if needed. Weave in all loose ends neatly with your yarn needle.
- Shape & Fluff: Gently fluff and shape the petals with your fingers, cupping them upward to create that lovely, organic three-dimensional look.
Congratulations! Your Whimsical Meadow Bloom is complete. This versatile flower is perfect for attaching to a hat, adorning a tote bag, or even framing as a piece of art. The soft, cozy texture and visible stitch definition make it a joy to create and display. Happy crocheting!