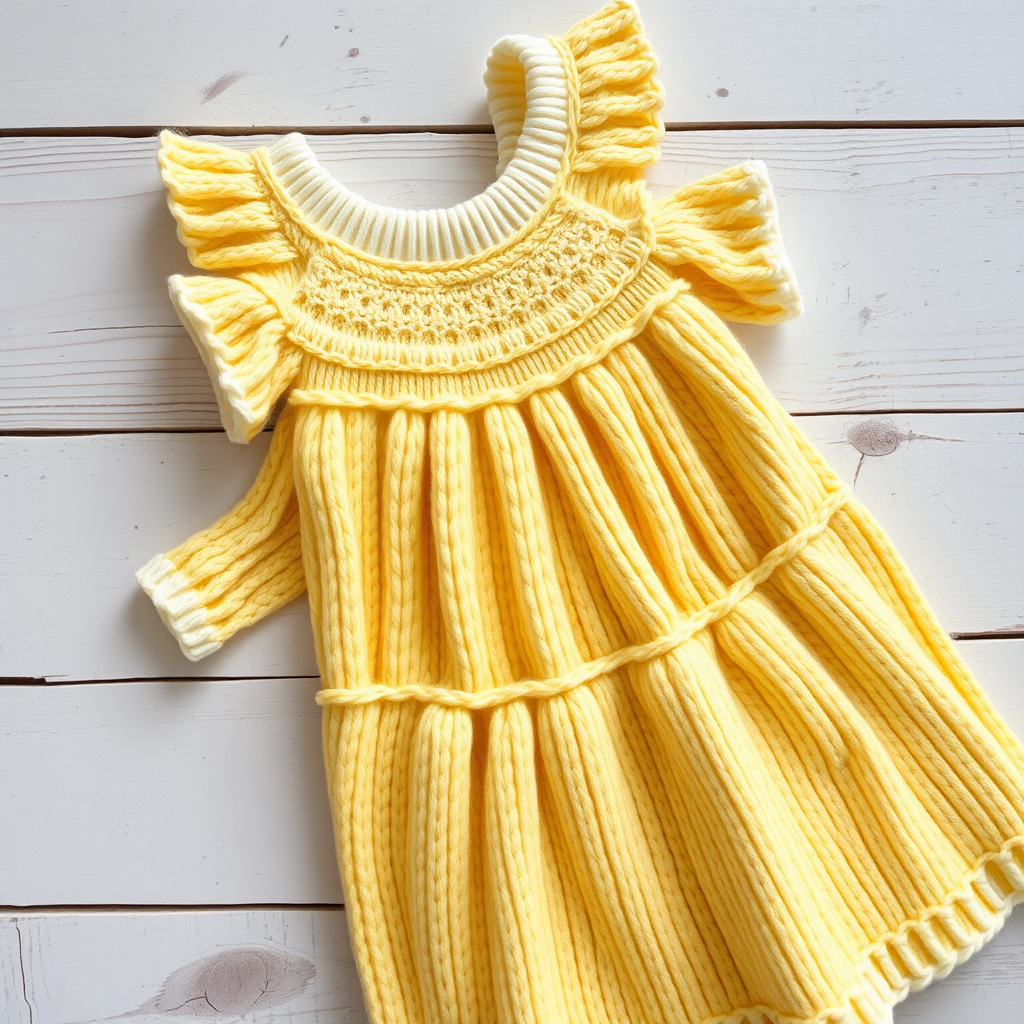
Whimsical Woodland Berry Toddler Dress Free Knitting Pattern – Textured Bramble Stitch

Whimsical Woodland Berry Toddler Dress: A Free Knitting Pattern for the Perfect Bramble Stitch Dress
Imagine a dress that captures the magic of a forest berry-picking adventure—a rich, deep raspberry bodice textured with clusters of bramble, a twirling garter stitch skirt, and sweet accents of golden strawberry and forest green. This Whimsical Woodland Berry Toddler Dress is exactly that. Knitted in a soft, breathable cotton blend, this free pattern is perfect for creating a handmade heirloom piece that your little one will adore for everyday play and special gatherings alike. Whether you're a seasoned knitter or a confident beginner ready for a textured challenge, this dress is a rewarding project that brings a touch of enchanted woodland charm to your child's wardrobe.
In this comprehensive guide, we'll walk you through every step, from gathering your materials to binding off the final stitch. Let's cast on and create something truly magical!
Materials Needed: Gathering Your Woodland Treasures
Before you begin, ensure you have all the necessary supplies. This pattern uses worsted weight cotton yarn, which is durable, breathable, and perfect for little ones.
Yarn
- Main Color (MC) – Deep Raspberry: Approximately 300 yards of worsted weight cotton blend yarn (e.g., Lion Brand 24/7 Cotton).
- Contrast A – Golden Strawberry: Approximately 100 yards.
- Contrast B – Forest Leaf Green: Approximately 50 yards.
Needles & Notions
- US Size 7 (4.5 mm) circular knitting needles in two lengths: 16-inch and 24-inch.
- US Size 7 (4.5 mm) double-pointed needles (DPNs) for the optional sleeves.
- Stitch markers
- Tapestry needle for weaving in ends
- Scissors
- Small button or tie (optional, for back neck closure)
Gauge
20 stitches and 28 rows = 4 inches in bramble stitch (blocked). Adjust your needle size if necessary to achieve this gauge to ensure the correct fit.
Step-by-Step Instructions: Knitting Your Woodland Masterpiece
This pattern is written for sizes 12-18 months (2T, 3T), with the sample shown in 2T. Instructions for different sizes are given in parentheses ( ). Follow the numbers that apply to your chosen size throughout the pattern.
Abbreviations
- K = knit
- P = purl
- K2tog = knit two together
- P2tog = purl two together
- YO = yarn over
- Sl = slip
- Kfb = knit front and back (increase 1 stitch)
- PM = place marker
- SM = slip marker
- BO = bind off
Special Stitch: The Bramble Stitch (Multiple of 4 + 2)
This stitch creates the beautiful, textured berry clusters. Practice it on a swatch first if you're new to it.
- Row 1 (RS): *K1, P1, K1 into next stitch (this increases 2 stitches), P3tog; repeat from * to last 2 sts, K2.
- Row 2 (WS): Purl all stitches.
- Row 3 (RS): *P3tog, K1, P1, K1 into next stitch; repeat from * to last 2 sts, K2.
- Row 4 (WS): Purl all stitches.
Repeat rows 1-4 for the pattern.
Bodice (Worked Flat from Bottom Up)
Using your 16-inch circular needle and MC, cast on 68 (76, 84) stitches.
Work in the bramble stitch pattern for 4 (5, 6) inches, ending with a wrong-side row. This will form the lower edge of the bodice.
Next, place markers to define the armholes: PM after 17 (19, 21) stitches from each edge. You will now have a left front section (17/19/21 sts), a back section (34/38/42 sts), and a right front section (17/19/21 sts).
Shape the Armholes
Next row (RS): Work in pattern to the first marker, BO 6 (8, 10) stitches, work to the second marker, BO 6 (8, 10) stitches, work to the end. You will now have three separate sections on your needle.
Work the Left Front
Continue working in bramble stitch on the left front stitches only (the first section). At the armhole edge (the side where you bound off), decrease 1 stitch every right-side row 3 times. To do this, work to the last 3 stitches, K2tog, K1.
Work even (without decreasing) until the armhole measures 3 (3.5, 4) inches.
Now, shape the neckline. At the neck edge (the opposite side from the armhole), BO 5 (6, 7) stitches once, then BO 2 stitches once. Work even until the armhole measures 4 (4.5, 5) inches. BO the remaining 7 (8, 9) stitches for the shoulder.
Work the Right Front
Attach your yarn at the armhole edge of the right front section. Work the same as the left front, but reverse the shaping. Decrease at the armhole edge (work K1, K2tog at the beginning of the row) and bind off for the neck at the beginning of the wrong-side rows.
Work the Back
Attach your yarn at the armhole edge of the back section. Work in bramble stitch, decreasing 1 stitch at each armhole edge every right-side row 3 times (K1, K2tog at the beginning, work to last 3 sts, K2tog, K1 at the end). Work even until the armhole measures 4 (4.5, 5) inches. BO all stitches.
Skirt (Worked in the Round from the Bodice Down)
With the right side of the bodice facing you, use your 24-inch circular needle and MC to pick up and knit 68 (76, 84) stitches along the cast-on edge of the bodice. Place a marker and join to work in the round, being careful not to twist.
Work in garter stitch for 2 rounds. To work garter stitch in the round, you will knit one round, then purl one round.
Increase round: *K2, Kfb; repeat from * around. You will now have 91 (101, 112) stitches.
Continue in garter stitch, increasing 1 stitch at the beginning and end of every 4th round (by working Kfb). To do this, Kfb in the first stitch, knit to the last stitch, Kfb in the last stitch. Continue this until the skirt measures 6 (7, 8) inches from the bodice.
Switch to Contrast A (Golden Strawberry) and work 2 rounds in garter stitch. Then, switch to Contrast B (Forest Leaf Green) and work 2 rounds in garter stitch. Finally, bind off all stitches loosely in knit.
Sleeves (Optional)
If you'd like to add the adorable puffed sleeves, use your DPNs and MC to pick up and knit 30 (34, 38) stitches evenly around the armhole opening. Place a marker and join in the round.
Work in bramble stitch in the round for 2 (2.5, 3) inches. To work bramble stitch in the round, you will need to adjust the pattern. Work the same rows as written, but since you're working in the round, you'll knit the "wrong side" rows instead of purling them. This will create the same texture.
Switch to Contrast A and work 2 rounds in garter stitch (knit one round, purl one round). Bind off all stitches loosely in knit. Repeat for the second sleeve.
Finishing Touches
Weave in all loose ends with your tapestry needle. Gently block the dress to the measurements specified, paying attention to the bodice and skirt to ensure they lie flat and the bramble stitch opens up beautifully.
If you worked the bodice flat, sew the side seams of the bodice. Finally, add a small button or a tie at the back neck opening if you desire, to make dressing easier for your little one.
And there you have it—a stunning, handcrafted Whimsical Woodland Berry Toddler Dress! This textured masterpiece is sure to become a cherished favorite. Happy knitting!