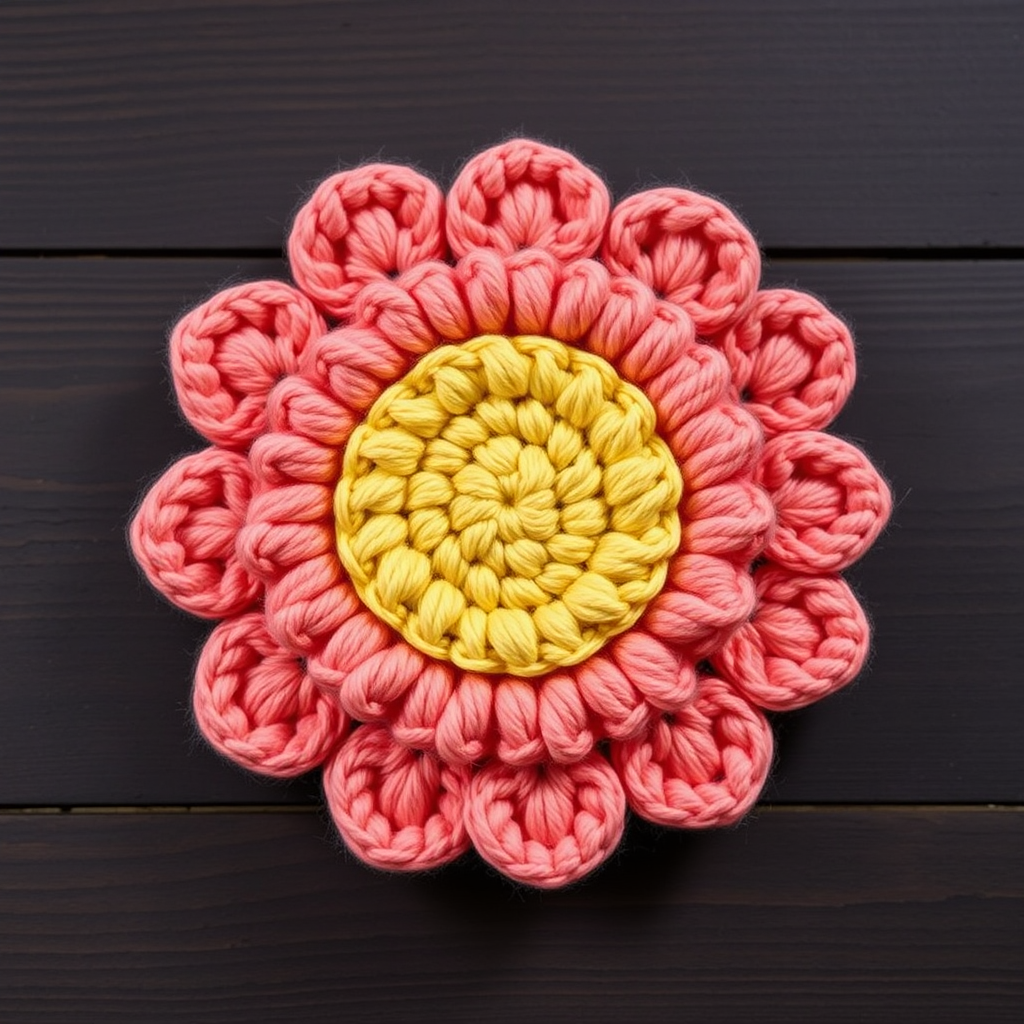
Whimsical Wisteria Bloom Brooch Free Pattern

Whimsical Wisteria Bloom Brooch: A Free Crochet Pattern
Add a touch of handmade charm to your favorite jacket, scarf, or handbag with this delightful Whimsical Wisteria Bloom Brooch. This quick and satisfying project creates a textured, cascading flower accessory that mimics the graceful drape of wisteria blossoms. Perfect for beginners and experienced crocheters alike, this pattern uses simple stitches to produce a stunning, dimensional result. In just an afternoon, you'll have a unique, handcrafted accessory that's sure to spark conversation.
Materials Needed
Before you begin, gather the following supplies. This project is wonderfully portable and requires minimal materials, making it perfect for on-the-go crafting.
- Yarn: Worsted weight yarn in two shades:
- Main Color (MC): Approximately 20 grams (e.g., soft lavender, lilac, or dusty rose)
- Accent Color (AC): Approximately 10 grams (e.g., light green or sage for leaves)
- Crochet Hook: 5 mm (H/8) crochet hook
- Yarn Needle: For weaving in ends and sewing pieces together
- Brooch Pin Back: A sew-on type pin back (approximately 1 inch long)
- Scissors: For cutting yarn
Gauge: Gauge is not critical for this project. However, aim for a tight stitch to keep the loops and petals defined and perky. If your stitches are loose, try using a slightly smaller hook (4.5 mm) to achieve a firmer fabric.
Abbreviations (US Terms)
Familiarize yourself with these standard crochet abbreviations before starting:
- ch = chain
- sl st = slip stitch
- sc = single crochet
- hdc = half double crochet
- dc = double crochet
- tr = treble crochet
- rnd = round
Step-by-Step Instructions
Part 1: Flower Center (Make 1)
This forms the base of your brooch. Work in continuous rounds, joining with a slip stitch at the end of each round.
- Rnd 1: With your main color (MC), make a magic ring. Ch 1 (does not count as a stitch), work 6 sc into the ring. Pull the ring tight to close the center. Join with a sl st to the first sc. (6 sc)
- Rnd 2: Ch 1, work 2 sc in each sc around. Join with a sl st to the first sc. (12 sc)
- Rnd 3: Ch 1, *sc in the next sc, 2 sc in the next sc*; repeat from * to * around. Join with a sl st to the first sc. (18 sc)
- Fasten off and weave in the end securely. Your flower center should be a flat, circular disc.
Part 2: Loopy Petals (Worked Around the Center)
This creates the puffy, textured petals that radiate from the center.
- Attach your MC yarn to any sc on Rnd 3 of the flower center with a sl st.
- Rnd 4: Ch 1, *work 5 dc in the next sc, skip the next sc, sl st in the next sc*; repeat from * to * around. You will create 6 distinct petal clusters. (6 petals)
- Fasten off and weave in the end. The petals will naturally curl and puff, giving the flower a whimsical, dimensional look.
Part 3: Cascading Loops (Make 3 Separate Pieces)
These loops create the signature wisteria-like fringe that drapes below the flower. Each loop is made by working 3 sc into each chain stitch, which creates a dense, twisted cord.
- Loop 1 (Short): With MC, ch 15. Work 3 sc in the 2nd ch from the hook, then work 3 sc in each ch across. Fasten off, leaving a long tail (approx. 12 inches) for sewing.
- Loop 2 (Medium): With MC, ch 20. Work 3 sc in the 2nd ch from the hook, then work 3 sc in each ch across. Fasten off, leaving a long tail.
- Loop 3 (Long): With MC, ch 25. Work 3 sc in the 2nd ch from the hook, then work 3 sc in each ch across. Fasten off, leaving a long tail.
Pro Tip: The dense 3-sc-per-chain technique makes the loops curl naturally, creating a beautiful twisted fringe effect.
Part 4: Leaves (Make 2)
These simple leaves add a realistic, botanical touch to your brooch.
- With your accent color (AC), ch 8.
- Row 1: Work 1 sc in the 2nd ch from the hook, 1 hdc in the next ch, 1 dc in the next ch, 1 tr in the next ch, 1 dc in the next ch, 1 hdc in the next ch, 1 sc in the last ch. (You are now at the end of the chain.)
- Ch 1, turn. Work 1 sc in the same last ch (the one you just worked into), then work 1 hdc, 1 dc, 1 tr, 1 dc, 1 hdc, 1 sc along the other side of the original chain. This creates an oval leaf shape.
- Sl st to the first sc to join. Fasten off, leaving a long tail for sewing.
Part 5: Assembly
Now it's time to bring all the pieces together to create your beautiful brooch.
- Attach the Cascading Loops: Turn the flower center over so the back is facing you. Arrange the three loops underneath the flower center, with the longest loop at the bottom and the shorter ones above it, so they cascade downward like wisteria blossoms. Using the long tails, sew each loop securely to the back of the flower center. Make sure they are firmly attached.
- Attach the Leaves: Position the leaves on the back of the flower, one on each side, angled outward like a sprig. Sew them securely using their tails.
- Attach the Brooch Pin: Position the brooch pin back horizontally on the back of the flower center. Sew it firmly in place using matching thread or yarn. Ensure the pin mechanism is not obstructed by yarn and can open and close easily.
- Weave in All Ends: Use your yarn needle to weave in any remaining loose ends on the back of the brooch, being careful not to pull them through to the front.
Part 6: Finishing Touches
- Shape Your Brooch: Gently shape the loops and petals with your fingers. Fluff the petals outward and let the loops drape naturally for a wisteria-like effect.
- Final Inspection: Check that all pieces are securely attached and the pin back is functional.
Your Whimsical Wisteria Bloom Brooch is now complete! Pin it to a lapel, a beret, a tote bag, or even a scarf for an instant handmade upgrade. This pattern is wonderfully versatile—experiment with different color combinations to match your wardrobe or the seasons. Happy crocheting!