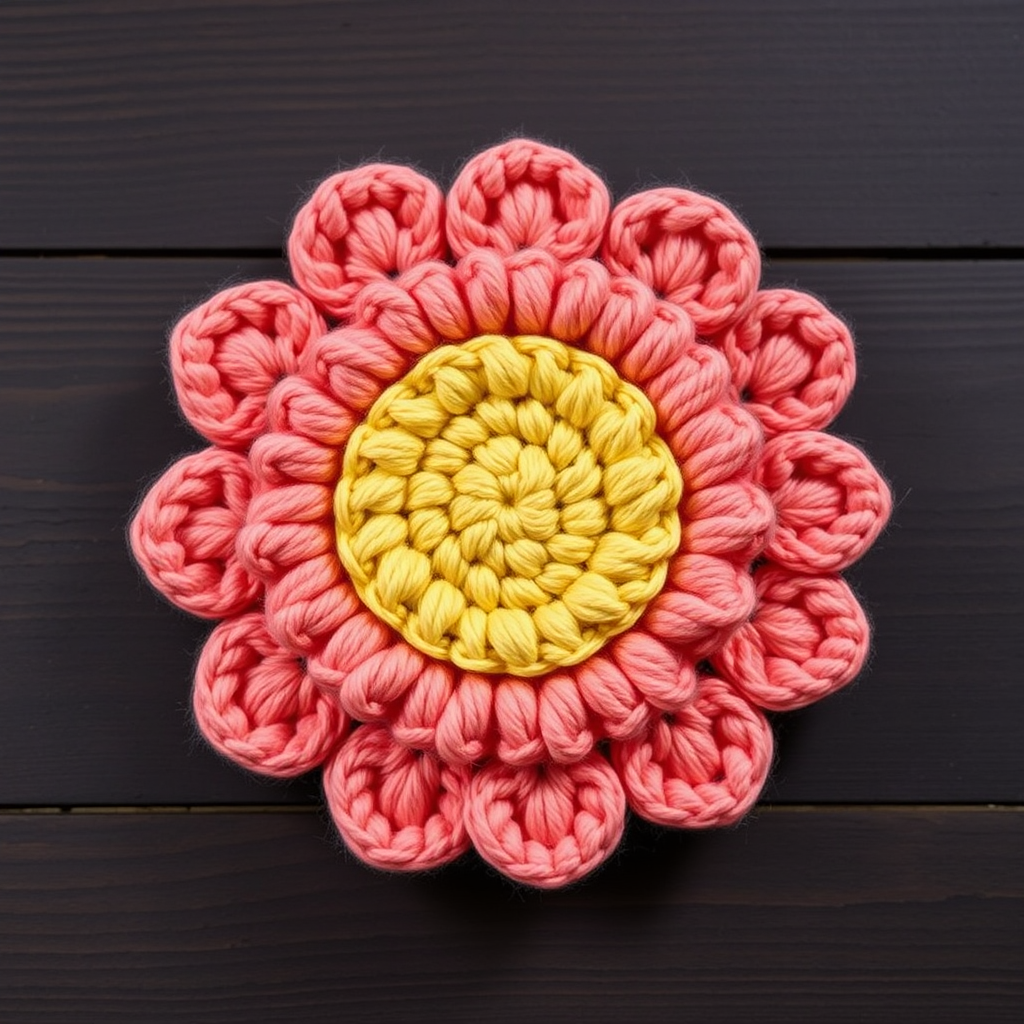
Whimsical Meadow Blossom Crochet Appliqué – Free Pattern

Whimsical Meadow Blossom Crochet Appliqué – Free Pattern
There’s something truly magical about transforming a simple strand of yarn into a delicate, dimensional bloom. This Whimsical Meadow Blossom Crochet Appliqué is the perfect project for beginners and seasoned makers alike. With just a few basic stitches, you’ll create a charming, textured flower that adds a handmade touch to hats, bags, scarves, or even home décor. The layered design—featuring a golden center and soft rose petals—creates a full, tactile blossom that feels as cozy as it looks. Best of all, this free pattern is quick to work up, making it an ideal stash-buster or a heartfelt handmade gift.
Whether you’re new to crochet or looking for a satisfying weekend project, this appliqué is designed to be simple, forgiving, and endlessly versatile. Let’s dive in and craft a little meadow magic together!
Materials Needed
Before you begin, gather these simple supplies. The gauge is not critical for this project—just aim for a tight, neat stitch formation so your petals hold their shape beautifully.
- Yarn: Worsted weight yarn in two colors:
- Color A (main petal color): Soft rose pink (or your preferred shade)
- Color B (center color): Golden yellow (or a contrasting hue)
- Crochet Hook: 5 mm (H/8) crochet hook
- Yarn Needle: For weaving in ends and attaching the appliqué to your project
- Scissors: For cutting yarn
Note: Worsted weight yarn is a great choice for beginners because it’s easy to handle and shows stitch definition clearly. If you’d like a smaller or larger flower, simply adjust your yarn weight and hook size accordingly.
Abbreviations
Familiarize yourself with these standard crochet abbreviations before starting:
- ch = chain
- sl st = slip stitch
- sc = single crochet
- hdc = half double crochet
- dc = double crochet
- tr = treble crochet
- magic ring = adjustable loop (also called magic circle)
If you’re new to the magic ring, don’t worry—it’s easier than it sounds. Simply wrap the yarn around your finger twice, insert your hook, and pull up a loop to begin working your first round. Alternatively, you can ch 4 and join with a sl st to form a ring, then work your stitches into the center.
Step-by-Step Instructions
Follow these detailed steps to create your Whimsical Meadow Blossom. Take your time, and remember—crochet is meant to be relaxing. Enjoy the process!
Round 1: The Center Foundation
With Color B (golden yellow), make a magic ring. Work 6 sc into the ring. Pull the ring tight to close the center. Join with a sl st to the first sc. You should now have 6 single crochet stitches in a small circle.
Pro tip: Pull the magic ring tail firmly to close the center completely—this ensures there’s no gap in the middle of your flower.
Round 2: Increasing the Center
Ch 1 (this does not count as a stitch). Work 2 sc in each sc around the circle. This means you’ll work two single crochets into every stitch from Round 1. Join with a sl st to the first sc. You should now have 12 sc total.
Why this matters: This increase round makes the center slightly larger, creating a nice base for the petals to attach to.
Round 3: Petal Base
Ch 1. *Sc in the next sc, then 2 sc in the next sc.* Repeat from * to * around the circle. Join with a sl st to the first sc. You should now have 18 sc total.
This round spaces out the increases evenly, giving you a flat, circular base that will support both layers of petals.
Round 4: First Petal Layer (Small, Pointed Petals)
Now we’ll create the inner layer of petals in Color B. This is where the flower starts to take shape!
- Ch 4 (this counts as your first treble crochet).
- Work 3 tr in the same stitch (the stitch at the base of your ch-4).
- Ch 2, then sl st in the same stitch. This forms a tiny picot tip on your petal.
- *Skip the next 2 sc. In the next sc, work (4 tr, ch 2, sl st in the same st).*
- Repeat from * to * around the circle. You should have 6 small petals total.
- Join with a sl st to the top of the initial ch-4.
Fasten off Color B and weave in the end securely (or leave it to weave in later).
Understanding the picot: The ch-2 and sl st combination creates a tiny decorative point at the tip of each petal. This gives the inner layer a delicate, whimsical look.
Round 5: Second Petal Layer (Larger, Rounded Petals)
Now we’ll switch to Color A (soft rose pink) to create the outer, fuller petals. These will sit behind the inner petals, giving your flower a lush, dimensional appearance.
- Attach Color A with a sl st in any ch-2 picot space from Round 4. (The picot spaces are the little loops created by the ch-2 at the tip of each inner petal.)
- Ch 3 (this counts as your first double crochet).
- Work 5 dc in the same space.
- Ch 1, then sl st in the same space. This forms a rounded petal with a small gap at the top.
- *In the next picot space, work (6 dc, ch 1, sl st in the same space).*
- Repeat from * to * around the circle. You should have 6 larger petals total.
- Join with a sl st to the top of the initial ch-3.
Fasten off Color A and weave in all ends securely.
Why 6 dc in the repeat but 5 dc in the first petal? The initial ch-3 counts as a dc, so the first petal actually has 6 dc total (ch-3 + 5 dc). This keeps all petals uniform in size.
Finishing Touches
Your Whimsical Meadow Blossom is almost complete! Here’s how to finish it beautifully:
- Weave in all ends using your yarn needle. Be sure to weave them through the back of the flower so they’re invisible from the front.
- Block gently if desired. To flatten the petals and enhance their shape, you can lightly steam block or wet block the flower. Simply pin it to a flat surface, mist with water, and let it dry completely. This step is optional but gives a more polished look.
- Attach to your project. Use your yarn needle and a matching thread (or a strand of the same yarn) to sew the appliqué onto a hat, bag, scarf, headband, or any other item. Place a few stitches through the center and around the edges to secure it firmly.
Creative Ideas for Your Appliqué
This pattern is wonderfully versatile. Here are a few ways to use your Whimsical Meadow Blossom:
- Embellish a beanie: Sew it onto a plain hat for an instant pop of color.
- Decorate a tote bag: Add a single flower or a cluster of blooms for a boho vibe.
- Scarf accent: Attach it to the corner of a scarf for a charming detail.
- Hair accessory: Glue or sew it onto a hair clip or headband.
- Home décor: Use it as a decorative element on pillows, curtains, or even as a coaster.
- Gift wrapping: Attach it to a gift box or card for a handmade touch.
Feel free to experiment with different color combinations—pastels for a soft look, brights for a playful vibe, or neutrals for a modern aesthetic. The possibilities are endless!
Final Thoughts
Congratulations! You’ve just created a beautiful, textured flower appliqué that’s sure to bring a smile to anyone who sees it. This pattern is a wonderful way to practice basic stitches while producing something truly special. Whether you’re embellishing a gift or adding a personal touch to your own wardrobe, this Whimsical Meadow Blossom is a delightful addition to any maker’s repertoire.
Happy crocheting, and may your days be filled with handmade whimsy!