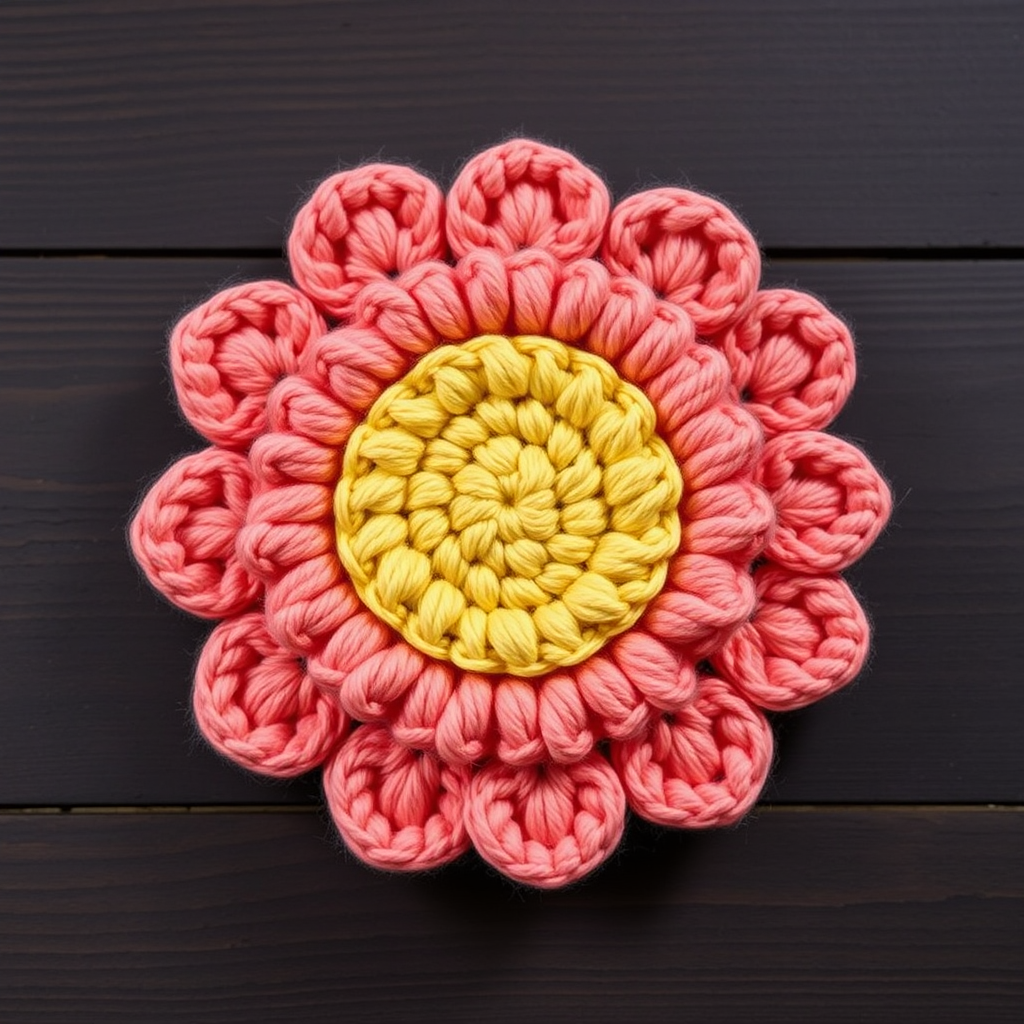
Enchanted Lotus Blossom Free Pattern

Enchanted Lotus Blossom: A Free Boho Crochet Flower Pattern
Are you ready to create a stunning, layered lotus flower that will add a touch of boho elegance to any space or accessory? This Enchanted Lotus Blossom pattern is the perfect project for crocheters looking to expand their skills while crafting something truly beautiful. With rich jewel tones and delicate texture, this flower is a showstopper that can be used as a wall hanging, a brooch, a bag embellishment, or even a decorative centerpiece.
This free pattern is designed to be accessible for beginners while still offering a rewarding challenge. The lotus is worked in continuous spirals for the center and joined rounds for the petals, creating a dimensional, sculptural look that is both elegant and intricate. Let's dive in and create this gorgeous bloom together!
Materials Needed
Before you begin, gather the following materials to ensure a smooth and enjoyable crochet experience:
- Yarn: Worsted weight cotton yarn in three colors:
- Color A (Deep Magenta): For the center of the flower
- Color B (Dusty Rose): For the inner petals
- Color C (Emerald Green): For the outer petals
- Hook: G/6 (4.0 mm) crochet hook
- Stitch marker (to track rounds)
- Yarn needle (for weaving in ends)
- Scissors
Gauge: First 3 rounds of center = 2 inches in diameter. (Gauge is not critical for this project, but maintaining consistent tension will help your petals lay flat and even.)
Step-by-Step Instructions
This lotus is worked in continuous spirals for the center and joined rounds for the petals. Use a stitch marker to track your rounds, especially when working in the spiral.
Center (Color A - Deep Magenta)
Round 1: Make a magic ring, work 6 single crochet (sc) into the ring. Pull the tail to close the ring tightly. (6 stitches)
Round 2: Work 2 sc in each stitch around. (12 stitches)
Round 3: *Sc in the next stitch, 2 sc in the next stitch*; repeat from * to * around. (18 stitches)
Round 4: *Sc in the next 2 stitches, 2 sc in the next stitch*; repeat from * to * around. (24 stitches)
Round 5: *Sc in the next 3 stitches, 2 sc in the next stitch*; repeat from * to * around. (30 stitches)
Fasten off Color A and weave in the end securely. Your center should be a flat, circular disc.
Inner Petals (Color B - Dusty Rose)
Round 6: Join Color B with a slip stitch (sl st) in any stitch of Round 5. Chain 3 (this counts as your first double crochet, dc). Work 1 dc in the same stitch, chain 2, then 2 dc in the same stitch. This creates your first petal base. *Skip the next 4 stitches, then work (2 dc, ch 2, 2 dc) in the next stitch*; repeat from * to * around. Join with a sl st to the top of the beginning chain-3. You should now have 6 petal bases.
Round 7: Slip stitch into the next chain-2 space. In that space, work the following: (Chain 3, 4 dc, chain 2, 5 dc). This forms your first inner petal. Slip stitch into the next chain-2 space. In each subsequent chain-2 space around, work (5 dc, ch 2, 5 dc). Join with a sl st to the first dc of the round. You will have 6 completed inner petals.
Fasten off Color B and weave in the ends.
Outer Petals (Color C - Emerald Green)
Round 8: Join Color C with a sl st in any single crochet of Round 5 (these are the stitches located between the inner petals). Chain 4 (this counts as your first treble crochet, tr). Work 1 tr in the same stitch, chain 3, then 2 tr in the same stitch. This creates your first outer petal base. *Skip the next 4 stitches, then work (2 tr, ch 3, 2 tr) in the next stitch*; repeat from * to * around. Join with a sl st to the top of the beginning chain-4. You should now have 6 outer petal bases.
Round 9: Slip stitch into the next chain-3 space. In that space, work the following: (Chain 4, 6 tr, chain 3, 7 tr). This forms your first outer petal. Slip stitch into the next chain-3 space. In each subsequent chain-3 space around, work (7 tr, ch 3, 7 tr). Join with a sl st to the first tr of the round. You will have 6 completed outer petals.
Fasten off Color C and weave in all remaining ends.
Finishing Touches
To give your Enchanted Lotus Blossom its beautiful, sculptural shape, you'll want to block it. Gently pin the petals open on a blocking mat or a towel, arranging them so they are evenly spaced and lay flat. Use a steam iron or a garment steamer to gently steam the flower, being careful not to touch the yarn directly with the iron. Allow the flower to dry completely before removing the pins. This step will set the shape and enhance the stitch definition, giving your lotus a professional, polished finish.
Once dry, your Enchanted Lotus Blossom is ready to be admired! Attach it to a hair clip, sew it onto a bag, frame it as art, or use it as a beautiful centerpiece for a table setting. The possibilities are endless with this versatile and gorgeous creation.
Happy crocheting, and enjoy your beautiful new bloom!