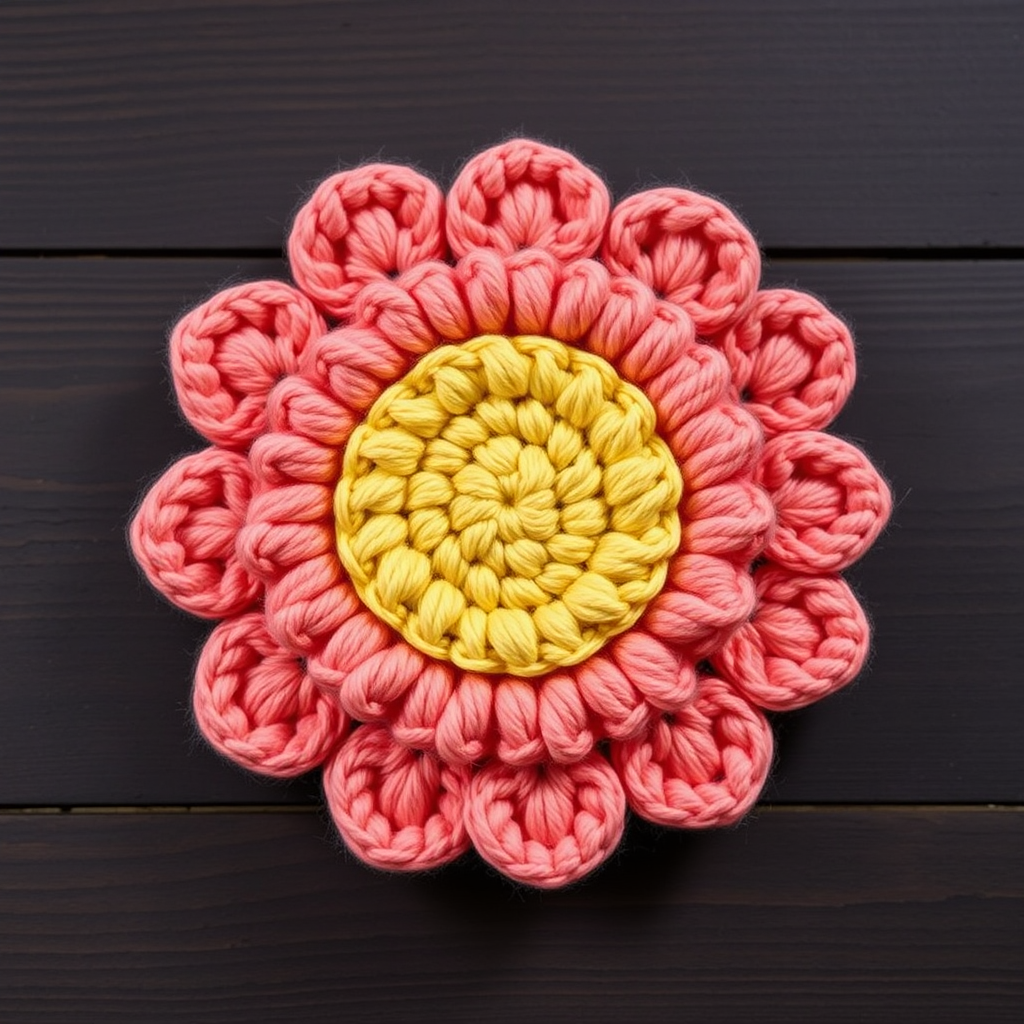
Velvet Bloom Crochet Chrysanthemum Free Pattern
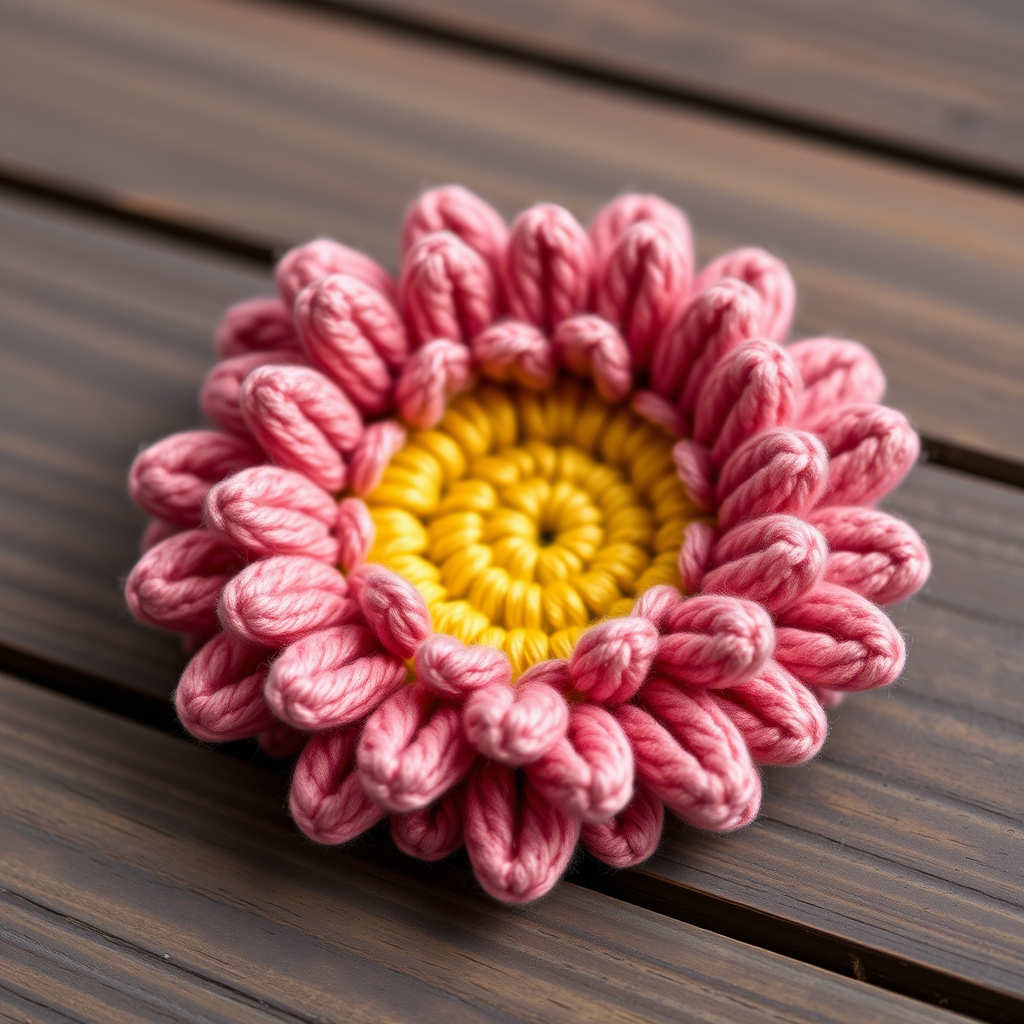
Velvet Bloom: A Free Crochet Chrysanthemum Pattern with a Plush Twist
There’s something magical about a flower that never wilts—especially when it’s soft enough to squeeze. Today, I’m thrilled to share a free pattern for a Velvet Bloom Crochet Chrysanthemum, a lush, three-dimensional floral accent that combines classic crochet structure with a modern, tactile loop-stitch technique. Whether you’re looking to add a handmade touch to your home decor, create a one-of-a-kind brooch, or simply enjoy a satisfying afternoon project, this pattern delivers. The result is a stunning 3D flower with a plush, velvet-like texture that begs to be touched. Let’s dive into the details and get those hooks ready!
Why You’ll Love This Pattern
This isn’t your average flat crochet flower. The loop stitch creates elongated, fuzzy loops that mimic the delicate, feathery petals of a real chrysanthemum. The finished piece measures approximately 3 inches in diameter and 1.5 inches tall, making it perfect for embellishing hats, bags, headbands, or even framing as a tiny piece of art. Plus, the pattern is beginner-friendly—if you know basic single crochet and increases, you’re already 90% there. The gauge isn’t critical, so you can relax and enjoy the process.
Materials Needed
Before we begin, gather your supplies. Here’s what you’ll need to create your own Velvet Bloom:
- Yarn: Worsted weight (category 4) yarn in two colors:
- Main petal color: (e.g., dusty rose, lavender, or cream) – For a true velvet effect, opt for a chenille or velvet yarn (like Bernat Velvet or Lion Brand Chenille Thick & Quick). This is key for that plush texture.
- Center color: (e.g., golden yellow, warm brown, or soft peach) – A standard worsted weight yarn works perfectly here.
- Crochet Hooks: You’ll need two sizes:
- H/8 (5.0 mm) hook for the petals
- I/9 (5.5 mm) hook for the center
- Other Tools: Yarn needle for weaving in ends and sewing petals, scissors, and optionally a stitch marker.
Pro tip: If you’re using a velvet/chenille yarn, avoid frogging (ripping out) your work—it can be tricky to unravel. Take your time and count your stitches carefully.
Step-by-Step Instructions
Follow these detailed instructions to create your chrysanthemum. We’ll start with the center, then move to the petals, and finally assemble everything.
Part 1: Crochet the Center (Make 1)
The center is a simple, flat disc worked in continuous rounds. Use your I/9 (5.5 mm) hook and the center color yarn.
- Round 1: Make a magic ring. Chain 1 (does not count as a stitch), then work 6 single crochet (sc) into the ring. Pull the tail to tighten the ring closed. Slip stitch (sl st) to the first sc to join. You should have 6 stitches.
- Round 2: Chain 1. Work 2 sc into each stitch around (this is an increase). Slip stitch to the first sc to join. You now have 12 stitches.
- Round 3: Chain 1. *Work 2 sc into the next stitch, then 1 sc into the next stitch.* Repeat from * to * around. Slip stitch to the first sc to join. You now have 18 stitches.
- Round 4: Chain 1. *Work 2 sc into the next stitch, then 1 sc into each of the next 2 stitches.* Repeat from * to * around. Slip stitch to the first sc to join. You now have 24 stitches.
- Finish: Fasten off, leaving a tail of about 6 inches. Weave this tail through the back of the center to secure it, but don’t cut it yet—you can use it later to help attach the petals if needed.
Your center should be a flat, round disc about 1.5 inches in diameter. Set it aside.
Part 2: Crochet the Petals (Make 12–14)
Each petal is worked flat, back and forth in rows. You’ll use your H/8 (5.0 mm) hook and the petal color yarn. The magic happens in Row 2, where we create the loop stitch for that fuzzy texture.
- Foundation Chain: Chain 6.
- Row 1: Single crochet (sc) in the 2nd chain from the hook, then sc in each of the remaining chains across. You should have 5 sc stitches. Chain 1, turn.
- Row 2 (Loop Stitch Row): This is the star of the show! For each of the next 5 stitches, work a loop stitch as follows:
- Insert your hook into the next stitch.
- Yarn over, but instead of pulling through immediately, pull up a loop to a height of about 1 inch. (You can wrap the yarn around your finger or a pencil to keep it even.)
- Yarn over again and pull through both loops on your hook to complete the single crochet. This leaves a long loop on the front of your work.
- Row 3: Work 1 sc into the top of each loop stitch from the previous row. (Make sure you’re working into the stitch itself, not the long loop in front.) You should have 5 sc stitches. Chain 1, turn.
- Row 4 (Decrease): Work a sc2tog (single crochet two together) over the first two stitches. Then sc in the next stitch. Then sc2tog over the last two stitches. You should have 3 sc stitches. Chain 1, turn.
- Row 5: Work a sc2tog over the first two stitches, then sc in the last stitch. You should have 2 sc stitches. Chain 1, turn.
- Row 6: Work a sc2tog over the two remaining stitches. You should have 1 sc stitch.
- Finish: Fasten off, leaving a long tail (about 8–10 inches) for sewing the petal to the center.
Repeat this process to make 12 to 14 petals. The more petals you make, the fuller your chrysanthemum will look. I recommend making 14 for a lush, dense bloom.
Part 3: Assembly – Bringing It All Together
Now for the fun part—watching your flower come to life!
- Arrange the Petals: Lay your center flat with the right side facing up. Begin arranging your petals around the edge of the center, slightly overlapping them. Start with an outer layer, placing petals evenly around the circumference. You can add a second, inner layer on top for extra depth, staggering them so they don’t sit directly on top of the outer petals.
- Sew the Petals: Using the long tail from each petal and your yarn needle, sew each petal securely to the back of the center. Insert the needle through the base of the petal and into the back of the center disc. Make a few firm stitches to anchor it. Repeat for all petals. Don’t worry if the back looks a bit messy—it will be hidden.
- Fluff the Loops: Once all petals are attached, use your fingers to gently fluff and separate the loops on each petal. This is what gives the chrysanthemum its full, dimensional, and fuzzy appearance. Take your time here—this step makes a huge difference in the final look.
- Optional Finishing Touch: If you’re planning to use your flower as a brooch, hair accessory, or embellishment, consider adding a felt or yarn backing to the back of the flower for a neat, professional finish. Simply cut a circle of felt slightly smaller than the flower and sew it on, or crochet a simple circle and attach it.
Tips for Perfect Results
- Tension is key: Keep your tension tight, especially when working the loop stitches. This ensures the loops stand up nicely and don’t look floppy.
- Consistent loop height: Try to make all your loops the same height (about 1 inch). You can use a small piece of cardboard or a ruler as a guide.
- Experiment with colors: While dusty rose and golden yellow are classic, this pattern looks stunning in any color combination. Try a white petal with a bright orange center for a daisy-like look, or go monochromatic for a modern vibe.
Ways to Use Your Velvet Bloom
This flower is incredibly versatile. Here are a few ideas to get you started:
- Sew it onto a plain headband or hair clip for a boho-chic accessory.
- Attach it to a brooch pin for a unique lapel decoration.
- Use it as a decorative accent on a throw pillow or blanket.
- Create a bouquet of them in different colors for a forever-fresh centerpiece.
- Add it to a gift wrap for a personal, handmade touch.
I hope you enjoy making this Velvet Bloom as much as I enjoyed designing it. There’s something deeply satisfying about watching a simple ball of yarn transform into a plush, tactile flower. If you make one, I’d love to see it! Share your creations on social media with the hashtag #VelvetBloomCrochet. Happy hooking, and may your days be filled with soft, handmade beauty!