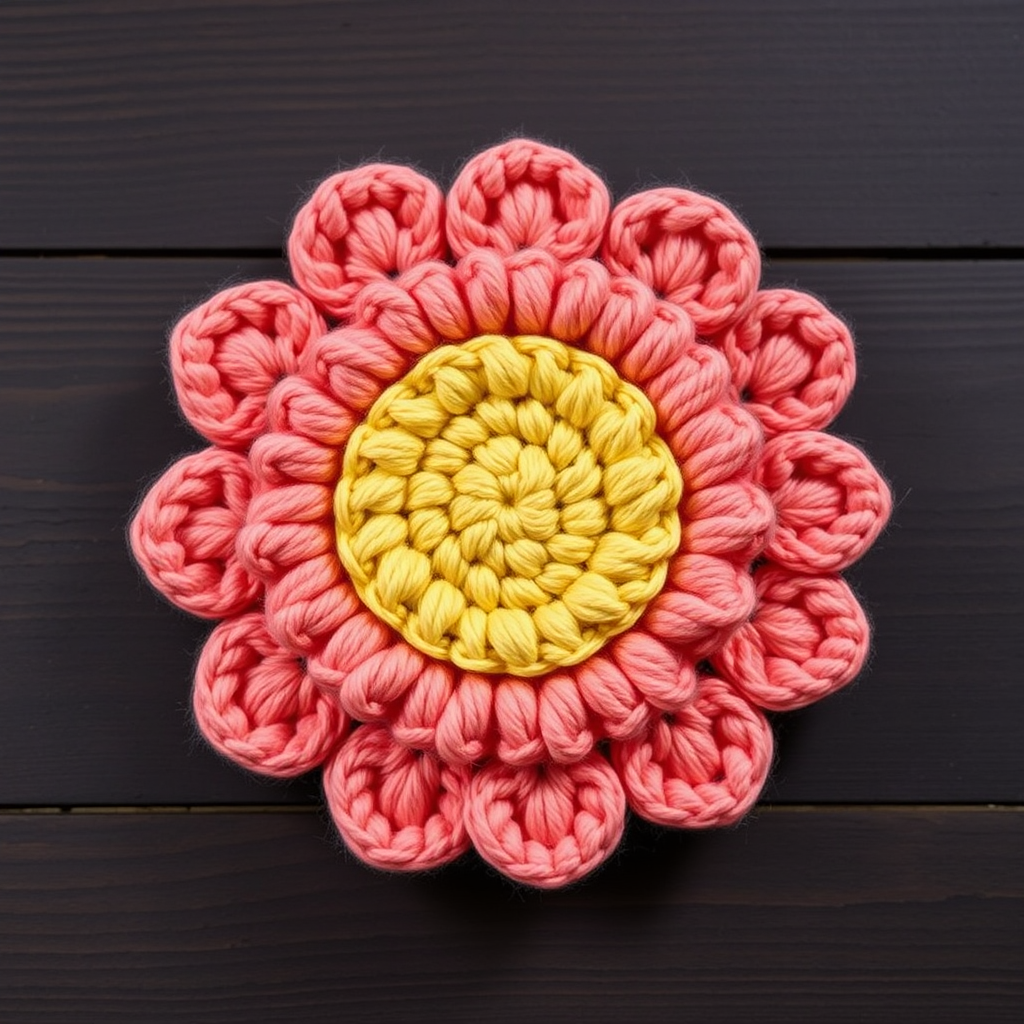
Enchanted Meadow Bloom Free Pattern

Enchanted Meadow Bloom: A Beginner-Friendly Layered Crochet Flower
Bring a touch of whimsical wildflower charm to your next project with this free crochet pattern for the Enchanted Meadow Bloom. This delightful flower features two distinct layers of textured petals that create a dimensional, organic look, reminiscent of a stylized bloom from a sun-drenched meadow. It's the perfect embellishment for hats, scarves, bags, or even as a charming brooch to brighten any outfit. Best of all, this pattern is designed with beginners in mind, using only basic stitches and simple techniques to create a stunning result.
This pattern offers a fresh twist on the classic crochet blossom. The inner layer of soft sage green petals is small and rounded, while the outer layer of dusty rose petals is larger and more elongated, created with treble crochet stitches for a beautiful ruffled effect. The sunny yellow center adds a cheerful pop of color, tying the whole design together. With clear, step-by-step instructions, you'll have your own Enchanted Meadow Bloom in no time.
Materials Needed
Before you begin, gather the following materials. This project is perfect for using up small amounts of worsted weight yarn from your stash.
- Yarn: Worsted weight cotton yarn in three colors:
- Color A (Petal Base): Soft sage green
- Color B (Middle Petals): Dusty rose
- Color C (Center): Sunny yellow
- Crochet Hook: US Size G/6 (4.0 mm) crochet hook
- Stitch Marker: To keep track of your rounds
- Yarn Needle: For weaving in ends
- Scissors: For cutting yarn
Note on Gauge: Gauge is not critical for this project. The most important thing is to aim for a tight, firm fabric. This will help the petals hold their shape beautifully and prevent them from looking floppy.
Step-by-Step Instructions
This flower is worked in continuous rounds, with petals added in layers. Use a stitch marker to keep track of your rounds. Let's get started!
Round 1: The Magic Ring Center
With color C (sunny yellow), make a magic ring. If you're not familiar with the magic ring technique, you can alternatively chain 4 and slip stitch into the first chain to form a ring.
- Work 6 single crochet (sc) into the ring.
- Pull the ring tight to close the center. (6 stitches)
Round 2: Increasing the Center
Now we'll increase the size of the center circle.
- Work 2 single crochet (sc) in each stitch around.
- You should now have 12 stitches. Place your stitch marker to mark the beginning of the round.
Round 3: Final Center Increase
We'll add one more round of increases to complete the center.
- *Single crochet (sc) in the next stitch, then work 2 single crochet (sc) in the next stitch*.
- Repeat from * around the circle.
- You should now have 18 stitches.
- Fasten off color C and weave in the end securely with your yarn needle.
Round 4: First Petal Layer (Color A - Sage Green)
Now we'll create the inner layer of small, rounded petals. This is where the flower really starts to take shape.
- Attach color A (soft sage green) with a slip stitch in any stitch of Round 3.
- *Chain 3. In the same stitch, work 2 double crochet (dc). Chain 3. Slip stitch in the same stitch.*
- Skip the next 2 stitches. Slip stitch in the next stitch.
- Repeat from * around the circle. You will create 6 small petals in total.
- Fasten off color A and weave in the ends.
Pro Tip: The "skip next 2 stitches" is what creates the space between the petals and positions them evenly around the center.
Round 5: Second Petal Layer (Color B - Dusty Rose)
This round creates the larger, more dramatic outer petals that sit behind the first layer, giving the flower its dimensional, layered look.
- Attach color B (dusty rose) with a slip stitch in the space between any two petals of the previous round. This is the space created by the skipped stitches in Round 4.
- *Chain 4. In the same space, work 3 treble crochet (tr). Chain 4. Slip stitch in the same space.*
- Skip the next petal (the entire petal from Round 4). Slip stitch in the next space between petals.
- Repeat from * around the circle. You will create 6 larger petals that sit beautifully behind the first layer.
- Fasten off color B and weave in all remaining ends.
Understanding Treble Crochet (tr): The treble crochet is a taller stitch than the double crochet. To make one, yarn over twice, insert your hook into the stitch, yarn over and pull through (4 loops on hook), yarn over and pull through 2 loops (3 loops on hook), yarn over and pull through 2 loops (2 loops on hook), yarn over and pull through the last 2 loops.
Finishing Touches
Your Enchanted Meadow Bloom is almost complete! Here's how to finish it off.
- Gently shape the petals with your fingers, fluffing them outwards and upwards to give them a natural, organic look.
- Your flower is now complete and measures approximately 4 inches in diameter.
- You can sew it directly onto a hat, scarf, or bag as a beautiful embellishment.
- Alternatively, attach a pin backing to the back of the flower to create a unique, handmade brooch.
Congratulations! You've created your very own Enchanted Meadow Bloom. This versatile pattern is perfect for adding a handmade touch to any project. The layered petals and textured design make it a standout piece that's sure to be admired. Happy crocheting!