Aurora Borealis Wreath Skirt Free Pattern
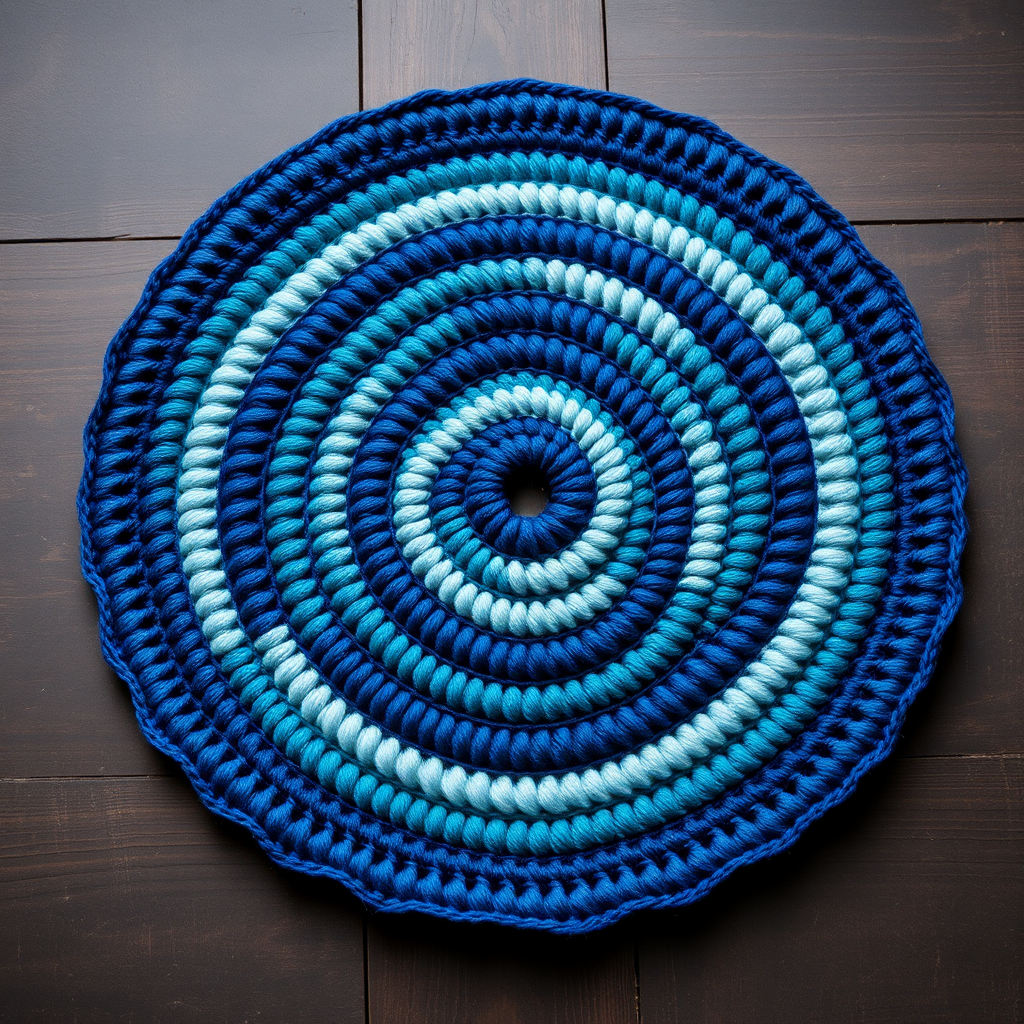
Bring the Magic of the Northern Lights to Your Holiday Home
Imagine your Christmas tree base wrapped in a shimmering, cozy display of color—that's the magic of the Aurora Borealis Wreath Skirt. This stunning crochet project transforms your holiday hearth into a northern lights display, using clever color pooling and a plush, super bulky yarn to create a modern, statement piece. Whether you're a seasoned crocheter or a confident beginner looking for a rewarding project, this free pattern is designed to be both impressive and achievable. The result is a dense, textured skirt that adds warmth and a touch of ethereal beauty to any room.
Materials Needed
Before you begin, gather these simple supplies. The beauty of this project lies in its simplicity—you only need yarn and a hook!
- Yarn: Super Bulky (Weight 6) yarn in three colors:
- Color A (Midnight Blue): Approximately 150g
- Color B (Teal): Approximately 125g
- Color C (Silver/White): Approximately 125g
- Crochet Hook: N/15 (10 mm) hook. This larger hook is essential for achieving the correct gauge and a soft, drapey fabric.
- Other: Yarn needle for weaving in ends, scissors.
Gauge & Size
Gauge: 4 double crochet (dc) stitches x 2 rows = 4 inches (10 cm) in the pattern stitch. Always check your gauge to ensure your skirt is the correct size.
Finished Size: The pattern creates a flat circle that measures approximately 36-40 inches in diameter, perfect for wrapping around a standard tree base.
Step-by-Step Instructions
This skirt is worked in continuous rounds from the center outward, creating a flat circle. The first 12 rounds increase evenly to form the base, then you'll switch to a simple color-blocking pattern for the body. Let's get started!
Foundation & Increases (Rounds 1-12)
Foundation: Make a magic ring. (If you're not familiar with a magic ring, you can ch 4 and sl st to form a loop, but a magic ring gives a tighter, neater center.)
Round 1: Ch 3 (counts as your first dc), work 11 dc into the ring. Pull the tail to tighten the ring closed. Join with a slip stitch (sl st) to the top of the beginning ch-3. (12 dc)
Round 2: Ch 3 (counts as dc), dc in the same stitch (this is your increase). Work 2 dc in each stitch around. Join with a sl st to the top of the ch-3. (24 dc)
Round 3: Ch 3, dc in the same stitch, dc in the next stitch. *2 dc in the next stitch, dc in the next stitch.* Repeat from * to * around. Join. (36 dc)
Round 4: Ch 3, dc in the same stitch, dc in the next 2 stitches. *2 dc in the next stitch, dc in the next 2 stitches.* Repeat around. Join. (48 dc)
Round 5: Ch 3, dc in the same stitch, dc in the next 3 stitches. *2 dc in the next stitch, dc in the next 3 stitches.* Repeat around. Join. (60 dc)
Round 6: Ch 3, dc in the same stitch, dc in the next 4 stitches. *2 dc in the next stitch, dc in the next 4 stitches.* Repeat around. Join. (72 dc)
Round 7: Ch 3, dc in the same stitch, dc in the next 5 stitches. *2 dc in the next stitch, dc in the next 5 stitches.* Repeat around. Join. (84 dc)
Round 8: Ch 3, dc in the same stitch, dc in the next 6 stitches. *2 dc in the next stitch, dc in the next 6 stitches.* Repeat around. Join. (96 dc)
Round 9: Ch 3, dc in the same stitch, dc in the next 7 stitches. *2 dc in the next stitch, dc in the next 7 stitches.* Repeat around. Join. (108 dc)
Round 10: Ch 3, dc in the same stitch, dc in the next 8 stitches. *2 dc in the next stitch, dc in the next 8 stitches.* Repeat around. Join. (120 dc)
Round 11: Ch 3, dc in the same stitch, dc in the next 9 stitches. *2 dc in the next stitch, dc in the next 9 stitches.* Repeat around. Join. (132 dc)
Round 12: Ch 3, dc in the same stitch, dc in the next 10 stitches. *2 dc in the next stitch, dc in the next 10 stitches.* Repeat around. Join. (144 dc)
Creating the Aurora Color Bands (Rounds 13-30)
Now for the fun part—the color pooling! You will now work in continuous rounds (do not join with a slip stitch at the end of each round). Just keep crocheting in a spiral. This creates a seamless, beautiful color transition.
Round 13-14: With Color A (Midnight Blue), dc in each stitch around. (144 dc)
Round 15-16: Switch to Color B (Teal), dc in each stitch around. (144 dc)
Round 17-18: Switch to Color C (Silver/White), dc in each stitch around. (144 dc)
Repeat the color sequence: You will now repeat the A, B, C color bands two more times to create a total of 6 color bands (18 rounds).
- Rounds 19-20: Color A
- Rounds 21-22: Color B
- Rounds 23-24: Color C
- Rounds 25-26: Color A
- Rounds 27-28: Color B
- Rounds 29-30: Color C
When changing colors, simply drop the old color and pick up the new one. You can carry the yarn up the inside of the work, or cut and weave in ends at the end—whichever you prefer.
Finishing Edging
Final Round: With Color C, ch 1 (does not count as a stitch), work 1 single crochet (sc) in each stitch around. Join with a sl st to the first sc. Fasten off and weave in all loose ends securely.
Optional Finishing Touches
To make your skirt functional around a tree trunk, you have two easy options:
- Button Closure: Sew a large button to one end of the skirt and create a simple chain loop on the other end to wrap around the trunk.
- Open Circle: Simply leave the skirt as a flat disc and tuck the center hole around the base of the tree. The weight of the yarn will hold it in place beautifully.
Your Cozy Masterpiece Awaits
And there you have it—a stunning, handcrafted Aurora Borealis Wreath Skirt that will be the envy of every holiday guest. The combination of the chunky yarn and the rhythmic color changes makes this a relaxing and rewarding project. The dense, plush texture not only looks beautiful but also protects your floors. We can't wait to see your version of this northern lights-inspired creation. Happy crocheting!


