Whispering Pines Textured Fingerless Gloves Free Pattern
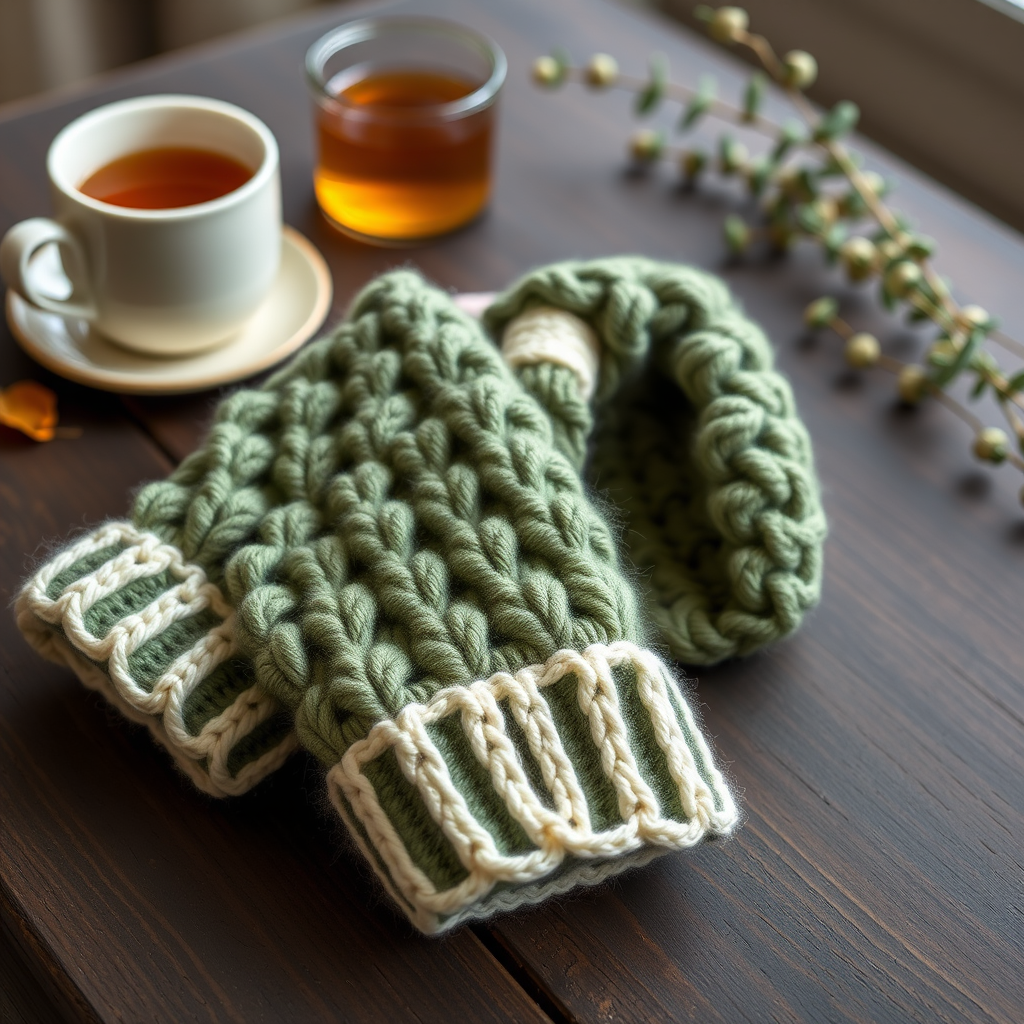
Whispering Pines Textured Fingerless Gloves: A Free Crochet Pattern
Wrap your hands in the cozy embrace of forest-inspired texture with these elegant fingerless gloves. Featuring a unique blend of puff stitches and ribbed cuffs, this pattern offers a modern twist on a classic accessory—perfect for chilly mornings, creative afternoons, or a thoughtful handmade gift. The combination of sage green and cream creates a sophisticated, nature-inspired palette that pairs beautifully with autumn and winter wardrobes.
Whether you're a seasoned crocheter looking for a quick weekend project or a confident beginner ready to learn a new stitch, these gloves are designed to delight. The puff stitch adds a dimensional, pine-needle-like texture that's both visually striking and wonderfully warm. Let's dive into this free pattern and create something beautiful together.
Materials Needed
Before you begin, gather the following supplies. This project uses simple, readily available materials:
- Yarn: Worsted weight (4) yarn in two colors:
- Main Color (MC): Sage Green – approximately 120–150 yards
- Contrast Color (CC): Cream – approximately 30–40 yards
- Hook: 5.0 mm (H) crochet hook
- Other: Yarn needle for weaving in ends, scissors, and a tape measure (optional, for checking gauge)
Gauge: 16 hdc x 12 rows = 4 inches (10 cm) in half double crochet. Gauge is important for achieving the correct finished size, so take a moment to check your tension before starting.
Sizes & Special Stitches
This pattern includes two sizes to ensure a comfortable fit for most hands:
- Small/Medium: Finished circumference 7 inches, length 8 inches
- Medium/Large: Finished circumference 8 inches, length 8 inches
Special Stitch – Puff Stitch (PS): This is the star of the pattern, creating the beautiful textured bumps. Here's how to work it:
- Yarn over, insert hook into the designated stitch.
- Yarn over and pull up a loop (3 loops on hook).
- Yarn over, insert hook into the same stitch.
- Yarn over and pull up a loop (5 loops on hook).
- Yarn over, insert hook into the same stitch one more time.
- Yarn over and pull up a loop (7 loops on hook).
- Yarn over and pull through all 7 loops on the hook.
- Chain 1 to close and secure the puff stitch.
Pro tip: When working the puff stitch, keep your tension relaxed so the hook can easily pull through all loops. The chain 1 at the end is essential—it creates the "eye" of the puff and prevents the stitch from puckering.
Step-by-Step Instructions
Follow these detailed instructions to create your first glove. The pattern is worked in the round from the cuff up, then repeated for the second glove. Take your time, and enjoy the rhythmic, meditative flow of the stitches.
Cuff (Make 2)
The cuff is worked flat in rows, then folded and joined to form a ring. This creates a snug, ribbed edge that fits comfortably around your wrist.
- With MC, chain 10 (12).
- Row 1: Hdc in the 3rd ch from hook and in each ch across. Turn. (8 (10) hdc)
- Rows 2–24 (28): Ch 2 (counts as hdc), hdc in the back loop only of each hdc across. Turn. Do not fasten off.
- Fold the cuff in half lengthwise, with the right sides facing each other. Slip stitch the short ends together to form a ring. Fasten off.
- Turn the cuff right side out. The ribbed texture should now run vertically around the cuff.
Note: The back-loop-only technique creates the stretchy, ribbed effect. If your cuff feels too tight or too loose, adjust your hook size by 0.5mm rather than changing the stitch count.
Main Body (Make 2)
Now we'll build the textured body of the glove, working in continuous rounds from the top of the cuff.
- Round 1: With the right side facing, join MC with a slip stitch to the top edge of the cuff. Ch 1, work 24 (28) sc evenly around the top edge. Join with a sl st to the first sc. (24 (28) sc)
- Round 2: Ch 1, sc in the same st, *skip next st, PS in next st, skip next st, sc in next st; repeat from * around, ending with PS in the last st. Join with a sl st to the first sc. (6 (7) PS, 6 (7) sc)
- Round 3: Ch 1, sc in the same st, *PS in the next sc, sc in the next PS; repeat from * around, ending with sc in the last PS. Join. (6 (7) PS, 6 (7) sc)
- Rounds 4–11: Repeat Round 3. At the end of Round 11, fasten off MC.
Notice how the puff stitches and single crochets alternate in a checkerboard pattern. This creates the beautiful, textured fabric that gives these gloves their name. Keep your stitch count consistent—if you find yourself with an extra or missing stitch, count back to ensure you're following the pattern correctly.
Thumb Opening
This section creates the opening for your thumb. The contrast color adds a stylish accent while making the opening easy to identify.
- Round 12: Join CC with a sl st to the first sc. Ch 1, sc in the same st, *PS in the next sc, sc in the next PS; repeat from * around until you have worked 4 (5) sc and 4 (5) PS. Ch 3 (4), skip the next 3 (4) stitches (this forms the thumb opening), sc in the next sc, continue the pattern around. Join with a sl st to the first sc. (Remaining stitches: 4 (5) PS, 4 (5) sc, plus the chain space)
- Round 13: Ch 1, sc in the same st, *PS in the next sc, sc in the next PS; repeat from * around, working sc in each chain of the thumb opening. Join. (6 (7) PS, 6 (7) sc)
- Rounds 14–18: Continue in the pattern as established (repeat Round 3). Fasten off at the end of Round 18.
The chain space in Round 12 creates a gap that your thumb will slip through. When you work into the chains in Round 13, make sure to insert your hook under the top loop of each chain to keep the tension even.
Top Edging
A simple single crochet border finishes the gloves neatly and prevents stretching at the top edge.
- Round 19: Join MC with a sl st to any sc. Ch 1, sc in the same st and in each stitch around. Join with a sl st to the first sc. Fasten off.
Finishing
Complete your gloves with these final touches:
- Weave in all ends using a yarn needle. Be sure to secure them well so they don't unravel with wear.
- Block lightly if desired. A gentle steam block or a light mist with water will help even out the puff stitches and give the gloves a professional finish.
- Repeat the entire process for the second glove. Important: Ensure the thumb opening is on the correct side. If you want the gloves to be mirror images (left and right), you'll need to adjust the placement of the thumb opening in Round 12. For a simple, non-handed version, both gloves can be worked identically.
To create a true left and right glove, work the thumb opening on opposite sides of the round. For the first glove, work the pattern as written. For the second glove, work the thumb opening at the opposite point in the round—simply count your stitches and place the chain space symmetrically.
Wear Them with Pride
Your Whispering Pines Textured Fingerless Gloves are now complete! These gloves are perfect for keeping your hands warm while leaving your fingers free for typing, texting, crafting, or turning pages. The sage green and cream color combination evokes a peaceful forest walk, while the puff stitch texture adds a touch of handmade charm to any outfit.
I'd love to see your finished gloves! Share your photos on social media using the hashtag #WhisperingPinesGloves, and tag me so I can admire your work. Happy crocheting!


