Whispering Pines Infinity Scarf Free Pattern – Chunky Crochet Loop
Whispering Pines Infinity Scarf Free Pattern – Chunky Crochet Loop
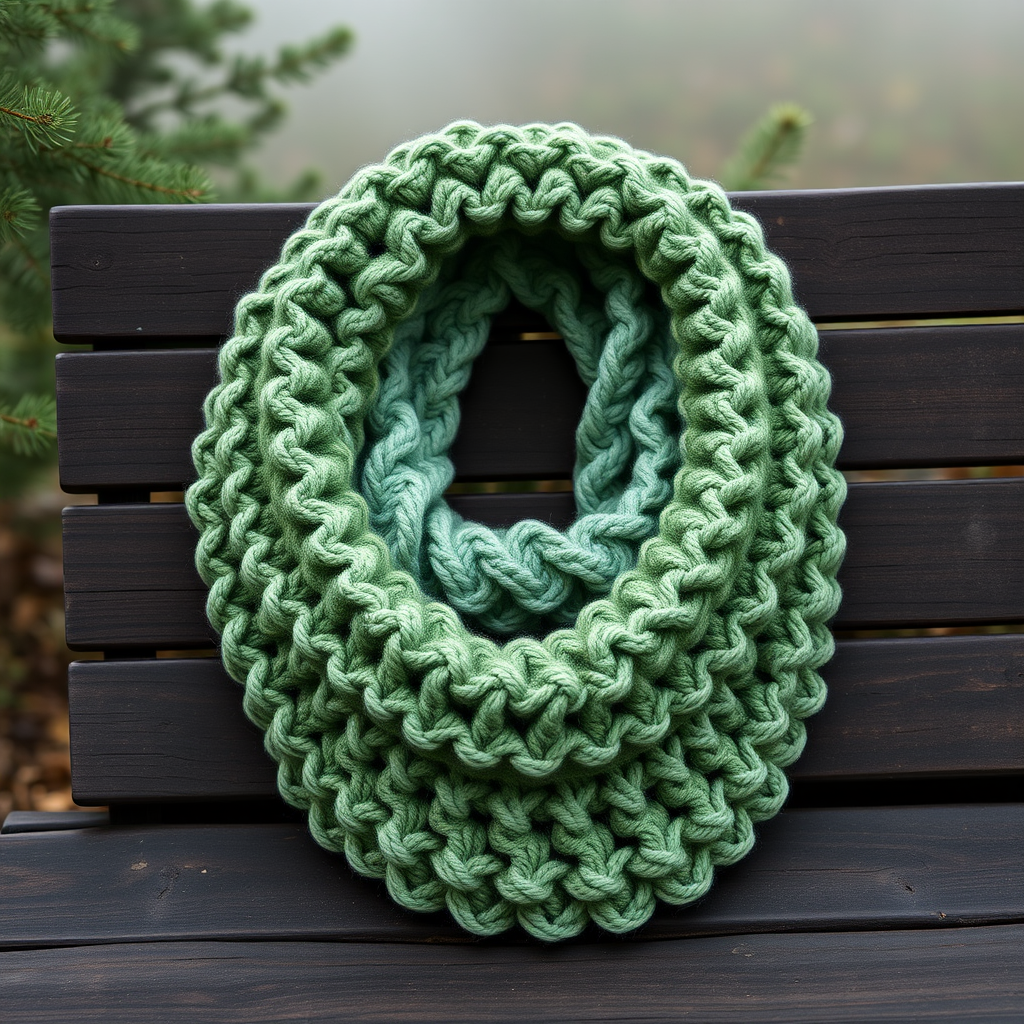
Wrap yourself in the serene beauty of a misty forest with this chunky crochet infinity scarf, featuring a mesmerizing ripple texture that mimics pine needles swaying in the breeze. This cozy loop is the perfect blend of modern style and timeless comfort, making it a must-have accessory for chilly days. Whether you're a seasoned crocheter or looking to challenge yourself with a new texture, this pattern delivers a stunning, wearable piece that feels like a warm woodland hug.
Why You'll Love This Pattern
This infinity scarf isn't just another winter accessory—it's a statement piece. The Pine Ripple Stitch creates a rich, dimensional fabric that catches the light beautifully, while the super bulky yarn ensures your project works up quickly. The gradient of forest greens adds depth and visual interest, making each scarf unique. Plus, it's a one-piece construction (no complicated shaping), so you can focus on enjoying the rhythmic stitch pattern.
Materials Needed
Before you begin, gather these supplies to ensure a smooth crocheting experience:
- Yarn: Super Bulky Weight Yarn (Size 6) – 2 skeins of 150g each (approx. 300g total) in a gradient of forest greens (e.g., 'Misty Pine', 'Deep Moss', 'Frosted Sage'). If you can't find a gradient, choose two complementary shades and alternate them every few rows for a similar effect.
- Hook: 10mm (N/P-15) crochet hook
- Notions: Yarn needle for seaming, scissors, stitch markers (optional but helpful)
- Gauge: 8 stitches x 6 rows = 4 inches in half double crochet (hdc). Always check your gauge to ensure your finished scarf matches the intended size.
Skill Level & Finished Size
- Skill Level: Intermediate (requires familiarity with post stitches)
- Finished Size: Approximately 60 inches in circumference and 10 inches wide (after seaming)
Stitches & Abbreviations
Here's a quick reference for the stitches used in this pattern:
- ch: chain
- hdc: half double crochet
- sc: single crochet
- dc: double crochet
- fpdc: front post double crochet
- bpdc: back post double crochet
- sl st: slip stitch
Special Stitch: Pine Ripple Stitch
This pattern uses a repeating two-row sequence to create the ripple effect. It's worked over a multiple of 4 + 2 stitches.
- Row 1 (Ripple): *fpdc on next st, bpdc on next st, dc in next 2 sts*; repeat from * to end of row.
- Row 2 (Ripple): *bpdc on next st, fpdc on next st, hdc in next 2 sts*; repeat from * to end of row.
Pro tip: The post stitches (fpdc/bpdc) create the raised ridges, while the dc/hdc fill in the valleys. Keep your tension consistent for a uniform ripple.
Step-by-Step Instructions
Follow these detailed steps to create your Whispering Pines Infinity Scarf. Take your time, and don't hesitate to refer back to the stitch guide above.
Foundation Row
Chain 42 loosely (or any multiple of 4 + 2 to achieve your desired width). Tip: Use a larger hook for the foundation chain if you tend to crochet tightly—this keeps the edge stretchy.
Row 1: Setting the Base
Hdc in the 3rd ch from hook (the skipped chains count as your first hdc) and in each ch across. You should have 40 hdc total. Turn your work.
Row 2: Beginning the Ripple
Ch 2 (counts as hdc here and throughout), hdc in the same st (this increases at the edge to keep it flat). Then, work the ripple pattern: *fpdc on next st, bpdc on next st, hdc in next 2 sts*; repeat from * to the last 2 sts. Finish with fpdc on the next st, hdc in the last st. You'll have 40 sts. Turn.
Row 3: Alternating the Texture
Ch 2, hdc in same st. Now work the reverse ripple: *bpdc on next st, fpdc on next st, hdc in next 2 sts*; repeat from * to last 2 sts. Finish with bpdc on next st, hdc in last st. 40 sts. Turn.
Rows 4–25: Building the Length
Repeat Rows 2 and 3 alternately until the scarf measures approximately 60 inches in length (or your desired length). Note: The fabric will naturally ripple, creating a beautiful textured wave. Don't panic if it looks wavy—that's the magic of this stitch!
Counting tip: Each ripple row (Row 2 or 3) adds about 1 inch of length. So, 30 rows of the pattern (15 repeats of Rows 2 & 3) will give you roughly 60 inches.
Final Row: Neat Edge
Ch 1, sc in each st across. You'll have 40 sc. Fasten off, leaving a long tail (at least 18 inches) for seaming.
Seaming: Joining the Ends
Fold the scarf in half lengthwise, with the right sides together (the side you want facing out should be inside the fold). Using the long tail and a yarn needle, whip stitch the two short ends together. Tip: Match the stitches carefully—align the sc edges so they meet evenly. Use a stitch marker to hold the ends together if needed.
Weave in all ends securely with your yarn needle, making sure to hide them within the fabric so they don't show on the outside.
Finishing Touches
Turn the scarf right side out. Gently steam block if desired to enhance the stitch definition and relax the yarn. How to steam block: Hold a steam iron about 1 inch above the scarf and release steam evenly. Let it dry completely before wearing. Your Whispering Pines Infinity Scarf is ready to wear!
Tips for Success
- Consistent Tension: Post stitches can be tricky. Practice on a small swatch first if you're new to fpdc/bpdc.
- Count Your Stitches: After each row, count to ensure you still have 40 stitches. It's easy to accidentally drop or add one with post stitches.
- Customize It: Want a wider scarf? Chain more (in multiples of 4 + 2). Want a shorter loop? Stop repeating rows earlier.
- Yarn Substitution: If you can't find super bulky, you can hold two strands of worsted weight yarn together for a similar effect—just check your gauge.
This pattern is perfect for cozy winter days, thoughtful handmade gifts, or a little self-care crafting session. The rhythmic ripple stitch is meditative once you get into the flow, and the result is a stunning, textured scarf that will be treasured for years. Happy crocheting!


