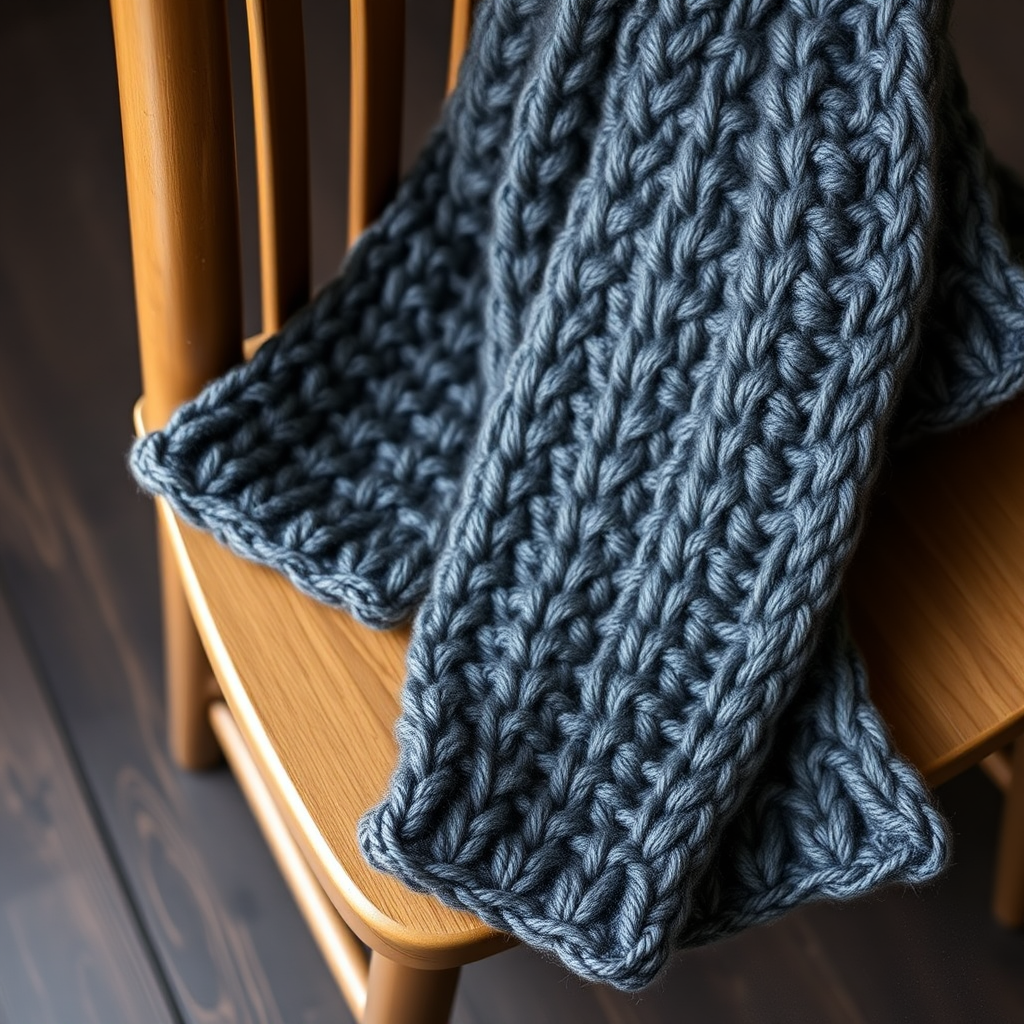
Whispering Pines Endless Wrap Free Pattern

Wrap Yourself in Cozy Forest Vibes: The Whispering Pines Endless Wrap
Imagine wrapping yourself in the serene, calming beauty of a pine forest on a crisp autumn day. That's the feeling you'll get every time you wear the Whispering Pines Endless Wrap. This isn't just another crochet scarf; it's a modern, nature-inspired accessory designed to be your new favorite cozy companion. The rich, heathered green yarn and elegant, textured ribbing create a stunning piece that looks far more complex than it actually is. Whether you're a seasoned crocheter or a confident beginner looking for a rewarding project, this seamless infinity scarf is the perfect way to add a touch of handmade luxury to your wardrobe. Let's dive in and create this beautiful, functional piece of art together.
Materials Needed: Your Crochet Toolkit
Before we begin our crafting journey, let's gather all the necessary supplies. Having everything ready will make the process smooth and enjoyable. This project is wonderfully portable and requires minimal materials.
- Yarn: Worsted weight (Category 4) yarn in a heathered forest green. You will need approximately 300-350 yards. The sample uses Lion Brand Yarn 'Heartland' in the color 'Olympic', which provides a beautiful, subtle heathered effect perfect for this design.
- Crochet Hook: A size J/10 (6.0 mm) crochet hook. This size creates the perfect drape and stitch definition for worsted weight yarn.
- Other Tools: A yarn needle for weaving in ends, and a pair of scissors. A stitch marker (optional, but helpful if you choose to work in a spiral).
Gauge: 14 double crochet stitches x 8 rows = 4 inches. While exact gauge isn't critical for a scarf, maintaining a consistent tension throughout your project is key to achieving a uniform and professional-looking drape.
Step-by-Step Instructions: Creating Your Endless Wrap
This pattern is worked in the round to create a seamless, endless loop. The magic lies in the simple repetition of front post and back post double crochet stitches, which build a beautifully textured, ribbed fabric that is both stretchy and structured. Don't be intimidated by the post stitches—they are easy to learn and incredibly rewarding.
Special Stitches to Master
Before we start, let's familiarize ourselves with the two special stitches that create the beautiful texture of this wrap.
- Front Post Double Crochet (FPdc): Yarn over, insert your hook from the front to the back and then to the front again around the "post" (the vertical part) of the next stitch in the row below. Yarn over and pull up a loop (you'll have 3 loops on your hook). Yarn over and pull through two loops, yarn over and pull through the remaining two loops. This stitch pushes the post to the front, creating a raised ridge.
- Back Post Double Crochet (BPdc): Yarn over, insert your hook from the back to the front and then to the back again around the post of the next stitch. Yarn over and pull up a loop (3 loops on hook). Yarn over and pull through two loops, yarn over and pull through the remaining two loops. This stitch pushes the post to the back, creating a recessed groove.
Getting Started: The Foundation
Let's begin by creating the foundation ring that will form the circumference of your infinity scarf.
Foundation: Chain (ch) 120. Carefully join with a slip stitch (sl st) to the first chain you made, ensuring that your chain is not twisted. This forms a large ring.
Round 1: Building the Base
This round establishes a solid base of double crochet stitches for our post stitches to grip onto.
Round 1: Chain 2 (this counts as your first double crochet). Work 1 double crochet (dc) in each chain around the entire ring. Join with a slip stitch to the top of the beginning chain-2. You should now have a total of 120 double crochet stitches.
Round 2: Introducing the Texture
Now we begin the alternating pattern that creates the ribbed effect. We'll start with a standard double crochet to maintain the stitch count correctly.
Round 2: Chain 2 (counts as your first dc). Work 1 dc in the same stitch as the join (this is your first stitch). Now, work *Front Post Double Crochet (FPdc) around the post of the next stitch, then Back Post Double Crochet (BPdc) around the post of the next stitch*. Repeat from * to * all the way around. You will end the round having worked a BPdc around the last stitch. Join with a slip stitch to the top of the beginning chain-2. You will have 120 stitches total, which includes your starting chain-2 and the alternating post stitches.
Round 3 and Beyond: The Pattern Repeat
This is the magic round that creates the seamless, woven look. We will now work the post stitches in the opposite manner to what they appear, creating the beautiful braided effect.
Round 3: Chain 2 (counts as your first dc). Now, work a FPdc around the post of the first stitch from the previous round (which is the chain-2). Then, work a BPdc around the post of the next stitch (which was a FPdc in the previous round). Continue alternating in this manner—FPdc around the next stitch, BPdc around the next stitch—all the way around the round. When you reach the last stitch, it should be a BPdc. Join with a slip stitch to the top of the beginning chain-2.
Repeat Round 3 until your scarf measures approximately 8-10 inches in width, or until you reach your desired width. The scarf will naturally curl into a tube, but you can gently stretch it flat to measure its width accurately.
Finishing Touches
Once you've achieved your desired width, it's time to finish off your beautiful creation.
Finishing: Fasten off your yarn, leaving a tail of about 6 inches. Thread this tail onto your yarn needle and weave it carefully through the stitches on the wrong side of your work to secure it. Weave in all other loose ends. To wear, simply wrap the infinity scarf around your neck twice for a cozy, snug fit, or let it hang loose as a long, elegant loop.
Pro-Tip for a Seamless Look: If you prefer a completely invisible seam, you can work this pattern in a continuous spiral without joining at the end of each round. Simply continue alternating FPdc and BPdc, and use a stitch marker to keep track of the beginning of each round. When you reach your desired width, slip stitch to the next stitch to close the spiral, then fasten off and weave in your ends.
This pattern is wonderfully forgiving and easy to memorize, making it the perfect project for mindful crocheting while you relax, watch your favorite show, or travel. The rhythmic repetition of the post stitches is almost meditative, and the result is a stunning, high-quality accessory that you'll be proud to say you made yourself. Happy crocheting!