Whimsical Woodland Sprite Amigurumi Free Pattern – Enchanted Yarn Companion
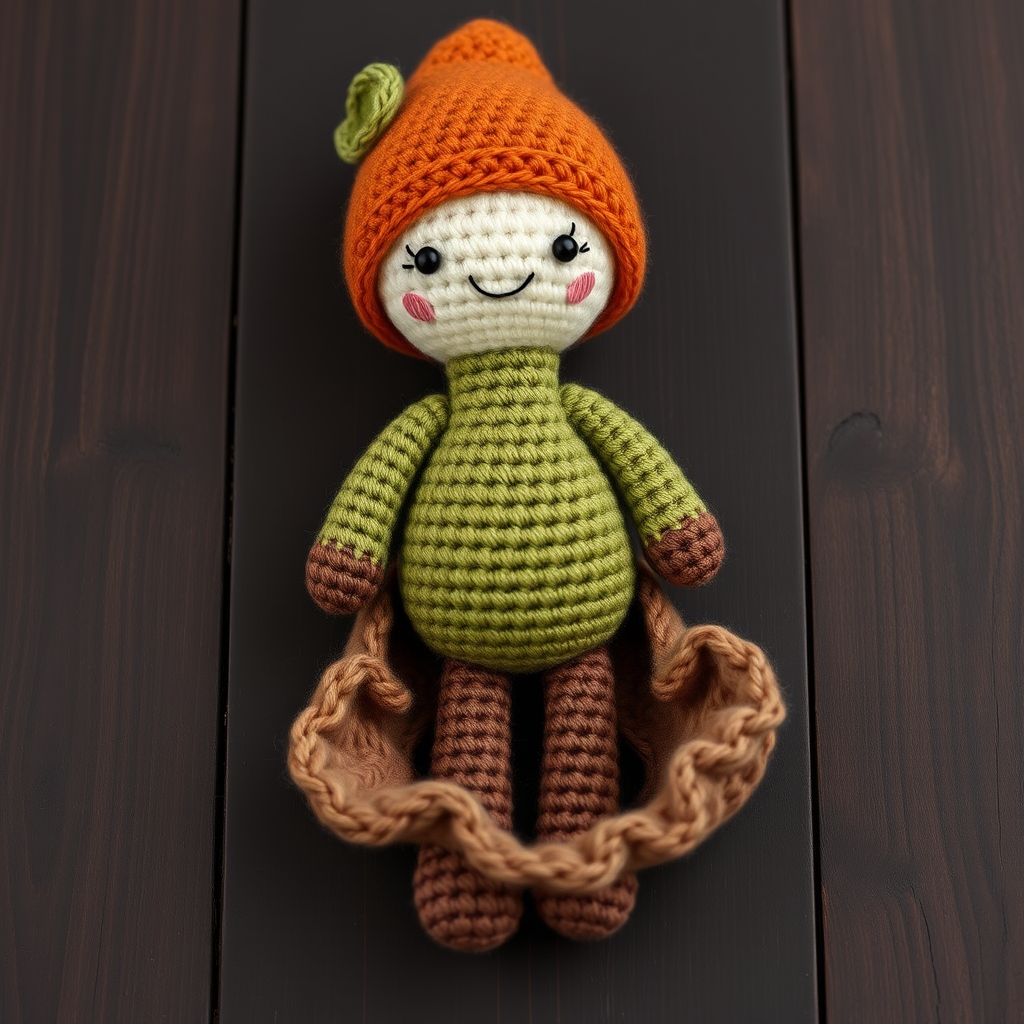
Whimsical Woodland Sprite Amigurumi Free Pattern – Enchanted Yarn Companion
Bring a touch of forest magic to your yarn collection with this charming woodland sprite amigurumi. This beginner-friendly crochet pattern creates a cozy, textured companion with a whimsical leaf cap and gentle embroidered smile. Perfect for gifting, decorating a nursery, or adding a sprinkle of enchantment to your own shelf, this little sprite is sure to become a treasured handmade keepsake.
Materials Needed
Before you begin, gather the following supplies to ensure a smooth and enjoyable crochet experience:
- Yarn: Worsted weight cotton or acrylic yarn in earthy tones – brown (for arms and legs), moss green (for body), cream (for head), rust orange (for cap), and a small amount of contrasting yarn (black or dark brown) for facial details.
- Crochet Hook: 3.5mm (E) hook – the perfect size for tight, sturdy stitches.
- Stuffing: Polyester fiberfill or any soft stuffing material.
- Yarn Needle: For sewing pieces together and weaving in ends.
- Scissors: For cutting yarn.
- Stitch Marker (optional): Helpful for keeping track of rounds.
Note on gauge: Gauge is not critical for amigurumi, but maintain tight tension throughout to prevent stuffing from showing through your stitches.
Step-by-Step Instructions
Follow these detailed instructions carefully. Work in continuous rounds unless otherwise stated, and use a stitch marker to track the beginning of each round.
Head
Using cream yarn:
- R1: Magic ring, 6 sc (6 stitches)
- R2: Inc in each st around (12 stitches)
- R3: (sc, inc) around (18 stitches)
- R4: (2 sc, inc) around (24 stitches)
- R5-7: sc in each st around (24 stitches) – three rounds straight
- R8: (2 sc, dec) around (18 stitches)
- R9: (sc, dec) around (12 stitches)
Stuff the head firmly with fiberfill, shaping it into a smooth, round ball. Do not overstuff – you want it firm but not lumpy.
- R10: dec around (6 stitches)
Fasten off, leaving a long tail. Weave the tail through the remaining stitches and pull tight to close the hole. Weave in the end securely.
Body
Using moss green yarn:
- R1: Magic ring, 6 sc (6 stitches)
- R2: Inc in each st around (12 stitches)
- R3: (sc, inc) around (18 stitches)
- R4-6: sc in each st around (18 stitches) – three rounds straight
- R7: (sc, dec) around (12 stitches)
Stuff the body lightly, shaping it into a pear-like form – slightly wider at the bottom, tapering toward the top.
- R8: dec around (6 stitches)
Fasten off, leaving a long tail for sewing. Do not close the hole completely – you'll attach the head here.
Arms (make 2)
Using brown yarn:
- R1: Magic ring, 5 sc (5 stitches)
- R2-4: sc in each st around (5 stitches) – three rounds straight
Fasten off, leaving a long tail. Do not stuff the arms – they should remain flat and flexible.
Legs (make 2)
Using brown yarn:
- R1: Magic ring, 6 sc (6 stitches)
- R2: (sc, inc) around (9 stitches)
- R3-4: sc in each st around (9 stitches) – two rounds straight
Stuff the legs lightly – just enough to give them shape without making them stiff.
Fasten off, leaving a long tail for sewing.
Leaf Cap
Using rust orange yarn, work in continuous rounds:
- R1: Magic ring, 6 sc (6 stitches)
- R2: (sc, inc) around (9 stitches)
- R3: (2 sc, inc) around (12 stitches)
- R4: (3 sc, inc) around (15 stitches)
- R5: (4 sc, inc) around (18 stitches)
- R6: (5 sc, inc) around (21 stitches)
- R7: (6 sc, inc) around (24 stitches)
- R8: sc in each st around (24 stitches)
Fasten off, leaving a long tail for sewing. The cap should fit snugly over the top of the head, like a little mushroom or acorn top.
Leaf Detail (optional)
Using moss green yarn:
- Chain 6.
- Sc in 2nd ch from hook, hdc in next ch, dc in next ch, hdc in next ch, sc in last ch.
Fasten off, leaving a tail for sewing. This creates a small, pointed leaf shape.
Assembly
Now it's time to bring your sprite to life! Follow these steps carefully:
- Attach head to body: Using the long tail from the body, sew the head to the top opening of the body. Use a whip stitch or invisible seam, going through the stitches of both pieces. Make sure the head is centered and secure.
- Attach arms: Position the arms on the sides of the body at approximately R5 (the fifth round from the top). Sew each arm securely using its long tail. The arms should stick out slightly, giving the sprite an open, welcoming posture.
- Attach legs: Position the legs at the bottom of the body, slightly apart for stability. Sew each leg securely using its long tail. Make sure the sprite can stand upright on its own.
- Attach the cap: Place the leaf cap on the head, slightly tilted for a whimsical look. Sew it in place using the long tail, going through the cap and the head stitches. Make sure it's secure but not too tight – you want it to sit naturally.
- Add the leaf detail: Sew the small leaf to the side of the cap, near the bottom edge. Position it so it looks like it's sprouting from the cap.
- Embroider the face: Using black or dark brown yarn and a yarn needle, embroider two small eyes and a gentle smile. For the eyes, make small French knots or a few straight stitches. For the smile, make a small curved line with backstitch or surface slip stitch. Keep the face simple and sweet.
- Add optional charm: If desired, sew a tiny acorn or mushroom charm to the sprite's body or cap for extra whimsy.
Finishing Touches
Once assembled, give your woodland sprite a gentle once-over. Weave in any remaining loose ends, trim excess yarn, and fluff the stuffing to ensure even distribution. Your enchanted yarn companion is now ready to bring a little forest magic to your home!
This pattern is perfect for beginners – the techniques used are basic (magic ring, single crochet, increases, decreases) and the assembly is straightforward. The result is a delightful, one-of-a-kind creation that makes a wonderful gift or a charming addition to your own collection. Happy crocheting!


