Whimsical Woodland Slouchy Beanie Free Pattern
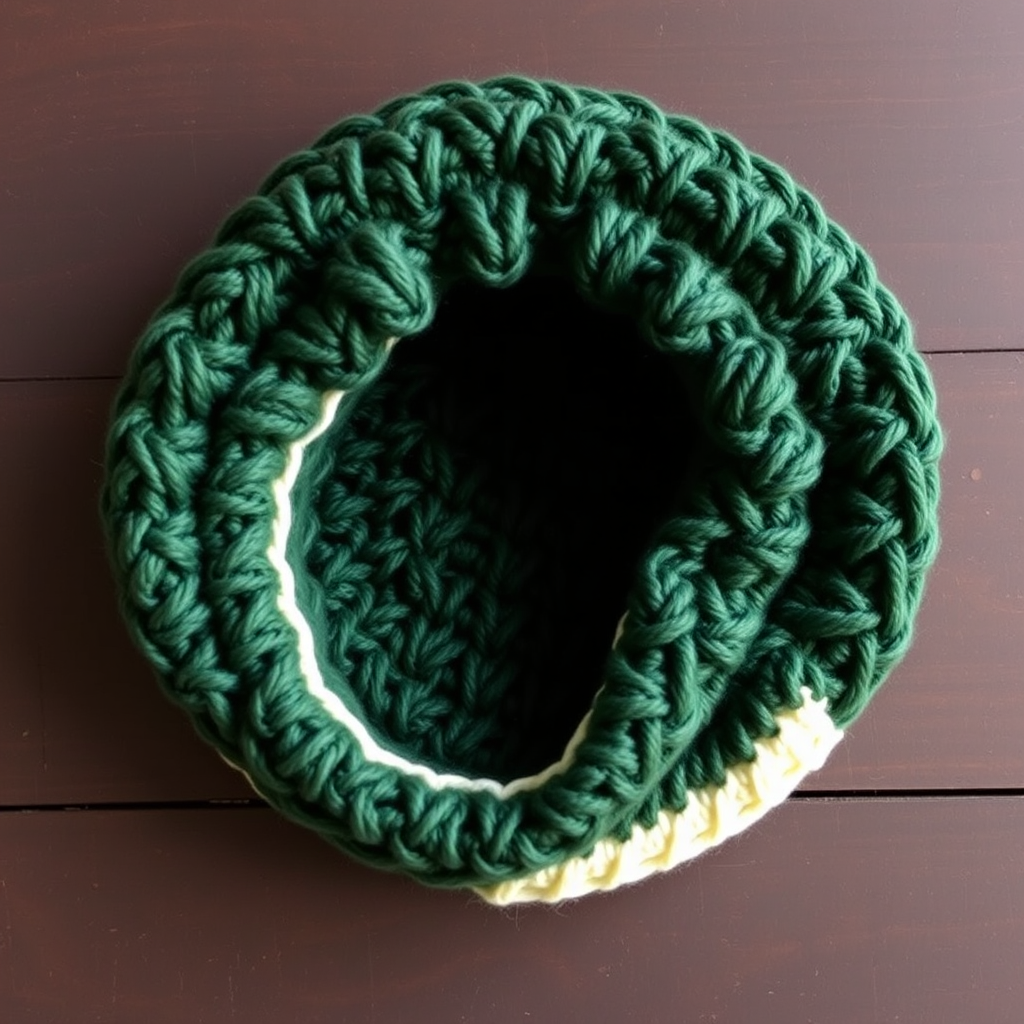
Whimsical Woodland Slouchy Beanie: Free Crochet Pattern
Embrace the beauty of the forest with this stunning Whimsical Woodland Slouchy Beanie. Featuring a gorgeous, textured leaf stitch that cascades down the crown, this cozy accessory is perfect for nature lovers and anyone seeking a stylish, handmade winter hat. The combination of rich forest green and a crisp cream trim creates a rustic, organic look that pairs beautifully with any autumn or winter wardrobe. Whether you're an experienced crocheter or a confident beginner ready for a new challenge, this free pattern will guide you through every step to create a warm, slouchy masterpiece.
This slouchy beanie is worked from the top down in continuous rounds, creating a seamless, polished finish. The intricate-looking cross-stitch pattern is surprisingly simple to master and produces a beautifully textured, diamond-like motif reminiscent of overlapping leaves. Grab your hook, and let's get started on crafting your new favorite winter hat!
Materials Needed
Before you begin, gather the following supplies to ensure a smooth and enjoyable crochet session:
- Yarn: Worsted weight yarn in two colors:
- Main Color (MC): Forest Green – approximately 250 grams (about 500 yards)
- Contrast Color (CC): Cream – approximately 50 grams (about 100 yards)
- Crochet Hook: 5.5 mm (I/9) crochet hook
- Stitch Markers (to mark the beginning of each round)
- Yarn Needle (for weaving in ends)
- Scissors
- Optional: Pom-pom maker (for a decorative CC yarn pom-pom)
Gauge: 4 inches = 14 stitches and 10 rows in leaf stitch pattern. Always check your gauge to ensure the correct fit.
Step-by-Step Instructions
Important Notes: This pattern is worked in the round from the top down. Place a stitch marker at the beginning of each round to keep track of your progress. Chain stitches at the beginning of rounds do not count as stitches unless explicitly stated.
Creating the Crown (Increasing Rounds)
We begin by creating a flat circle that will form the top of the beanie.
Round 1: With MC, make a magic ring. Ch 2 (does not count as a stitch here or throughout). Work 8 double crochet (dc) into the ring. Pull the tail tight to close the ring. Join with a slip stitch to the first dc. (8 sts)
Round 2: Ch 2. Work 2 dc in each stitch around. Join with a slip stitch. (16 sts)
Round 3: Ch 2. *Dc in the next stitch, 2 dc in the next stitch.* Repeat from * to * around. Join. (24 sts)
Round 4: Ch 2. *Dc in the next 2 stitches, 2 dc in the next stitch.* Repeat from * to * around. Join. (32 sts)
Round 5: Ch 2. *Dc in the next 3 stitches, 2 dc in the next stitch.* Repeat from * to * around. Join. (40 sts)
Round 6: Ch 2. *Dc in the next 4 stitches, 2 dc in the next stitch.* Repeat from * to * around. Join. (48 sts)
Round 7: Ch 2. *Dc in the next 5 stitches, 2 dc in the next stitch.* Repeat from * to * around. Join. (56 sts)
Round 8: Ch 2. *Dc in the next 6 stitches, 2 dc in the next stitch.* Repeat from * to * around. Join. (64 sts)
Round 9: Ch 2. *Dc in the next 7 stitches, 2 dc in the next stitch.* Repeat from * to * around. Join. (72 sts)
Rounds 10-11: Ch 2. Dc in each stitch around. Join. (72 sts)
Your work should now measure approximately 4 inches in diameter, forming a flat circle.
Mastering the Leaf Stitch Pattern
Now we will begin the beautiful textured pattern. This stitch creates a crossed "leaf" effect. Pay close attention to the direction of the crosses as you alternate rounds.
Round 12 (Leaf Stitch - Right Cross): Ch 2. *Skip the next stitch. Dc in the following stitch. Go back and dc in the skipped stitch (this creates a right-leaning cross). Dc in the next stitch.* Repeat from * to * around. Join. (72 sts)
Round 13: Ch 2. Dc in each stitch around. Join. (72 sts)
Round 14 (Leaf Stitch - Left Cross): Ch 2. *Dc in the next stitch. Skip the next stitch. Dc in the following stitch. Go back and dc in the skipped stitch (this creates a left-leaning cross).* Repeat from * to * around. Join. (72 sts)
Round 15: Ch 2. Dc in each stitch around. Join. (72 sts)
Rounds 16-25: Repeat Rounds 12-15 consecutively (alternating the cross stitch direction each time) until the piece measures approximately 8 inches from the top of the crown. Tip: Try the hat on as you go to ensure it reaches your desired slouchy length before adding the trim.
Adding the Contrast Trim
It's time to switch to your cream yarn (CC) for a clean, finished edge.
Round 26: With CC, ch 1 (does not count as a stitch). Work 1 single crochet (sc) in each stitch around. Join with a slip stitch to the first sc. (72 sts)
Round 27: Ch 1. *Sc in the next 2 stitches, 2 sc in the next stitch.* Repeat from * to * around. Join. (96 sts) This increase round will give the brim a gentle flare, allowing it to sit comfortably over the ears.
Round 28: Ch 1. Sc in each stitch around. Join. Fasten off and weave in all loose ends securely with your yarn needle. (96 sts)
Final Touches
Your Whimsical Woodland Slouchy Beanie is almost complete! For an extra touch of whimsy, you can create a fluffy pom-pom using your cream (CC) yarn and attach it securely to the top of the hat. This adds a playful contrast and completes the woodland aesthetic.
Gently steam block your hat if desired to help the leaf stitch pattern lay flat and look its best. Simply hold a steam iron slightly above the surface without touching the yarn, or lightly mist with water and let it dry flat.
Congratulations! You've created a beautiful, textured slouchy beanie that's as cozy as it is stylish. This rustic, forest-inspired hat makes a wonderful gift for a loved one or a delightful treat for yourself. Wear it on crisp autumn walks or snowy winter days, and enjoy the handmade warmth!


