Whimsical Woodland Gnome Home Free Crochet Pattern – Enchanted Yarn Cottage
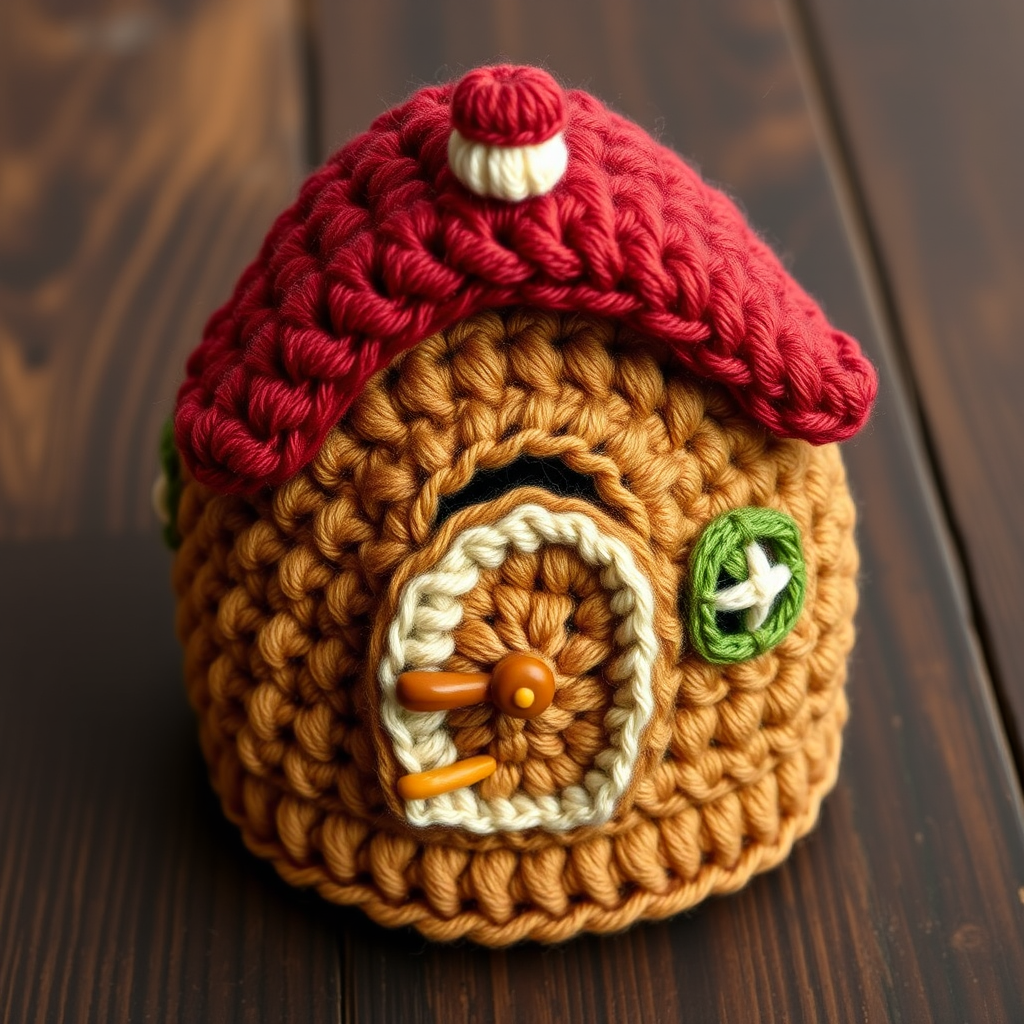
Whimsical Woodland Gnome Home Free Crochet Pattern – Enchanted Yarn Cottage
Bring a touch of forest magic to your shelf, garden, or nursery with this charming Whimsical Woodland Gnome Home crochet pattern. This storybook-inspired cottage features textured earthy yarn walls, a deep rust-red mushroom roof, and delightful hand-embroidered details that make it feel like it was plucked straight from a fairy tale. Perfect for beginners and experienced crocheters alike, this amigurumi-style project is worked in continuous rounds and comes together beautifully with just a few basic stitches. Let's get started on creating your very own enchanted yarn cottage!
Materials Needed
Before you begin, gather the following supplies to ensure a smooth and enjoyable crochet session:
- Yarn: Worsted weight yarn in earthy tones – warm brown (for walls), moss green (for windows), cream (for door and mushroom), rust red (for roof and doorknob), plus small amounts of yellow (for window glow) and white (for mushroom details).
- Hook: 5.0 mm crochet hook (US H-8)
- Notions: Tapestry needle for sewing and weaving ends, stitch markers to track rounds
- Fiberfill: For lightly stuffing the roof (optional but recommended for shape)
Gauge: 4 inches = 16 sc and 18 rows in single crochet. Gauge is not critical for this project, but maintaining consistent tension throughout will give your gnome home a polished, even look.
Step-by-Step Instructions
This pattern is worked in continuous rounds unless otherwise noted. Always use a stitch marker to track the beginning of each round.
Base and Walls (Worked in One Piece)
Start with warm brown yarn to create the foundation and walls of your gnome home.
- Round 1: Make a magic ring, work 6 sc into the ring. (6)
- Round 2: 2 sc in each stitch around. (12)
- Round 3: *Sc in next stitch, 2 sc in next* repeat around. (18)
- Round 4: *Sc in next 2 stitches, 2 sc in next* repeat around. (24)
- Round 5: *Sc in next 3 stitches, 2 sc in next* repeat around. (30)
- Round 6: *Sc in next 4 stitches, 2 sc in next* repeat around. (36)
- Round 7: *Sc in next 5 stitches, 2 sc in next* repeat around. (42)
- Round 8: *Sc in next 6 stitches, 2 sc in next* repeat around. (48)
- Round 9: *Sc in next 7 stitches, 2 sc in next* repeat around. (54)
- Round 10: *Sc in next 8 stitches, 2 sc in next* repeat around. (60)
- Rounds 11-20: Sc in each stitch around. (60) – This forms the base and lower walls. Fasten off and weave in ends.
Door (Worked Separately and Sewn On)
Create a cozy cream-colored arched door to welcome visitors to your gnome home.
- Row 1: With cream yarn, chain 10, sc in 2nd chain from hook and across. (9)
- Rows 2-8: Chain 1, turn, sc in each stitch across. (9)
- Fasten off, leaving a long tail for sewing. Position the door centered on the front of the walls, between rounds 12-18. Sew it securely in place.
- Using rust red yarn, embroider a small doorknob in the center of the door, about 2 rows from the edge.
Window (Embroidered)
Add charming cross-stitch windows to bring life to the cottage walls.
- Using moss green yarn, embroider a simple cross-stitch window on each side of the door. Each window should be about 4 stitches wide and 6 rows tall.
- Add a small yellow cross in the center of each window to create a glowing light effect, as if someone is home.
Roof (Worked in the Round, Then Shaped)
Create the whimsical rust-red mushroom roof that gives this gnome home its fairy-tale charm.
- Round 1: With rust red yarn, make a magic ring, work 6 sc into the ring. (6)
- Round 2: 2 sc in each stitch around. (12)
- Round 3: *Sc in next stitch, 2 sc in next* repeat around. (18)
- Round 4: *Sc in next 2 stitches, 2 sc in next* repeat around. (24)
- Round 5: *Sc in next 3 stitches, 2 sc in next* repeat around. (30)
- Round 6: *Sc in next 4 stitches, 2 sc in next* repeat around. (36)
- Round 7: *Sc in next 5 stitches, 2 sc in next* repeat around. (42)
- Round 8: *Sc in next 6 stitches, 2 sc in next* repeat around. (48)
- Round 9: *Sc in next 7 stitches, 2 sc in next* repeat around. (54)
- Round 10: *Sc in next 8 stitches, 2 sc in next* repeat around. (60)
- Rounds 11-15: Sc in each stitch around. (60)
- Round 16: *Sc in next 8 stitches, sc2tog* repeat around. (54)
- Round 17: *Sc in next 7 stitches, sc2tog* repeat around. (48)
- Round 18: *Sc in next 6 stitches, sc2tog* repeat around. (42)
- Round 19: *Sc in next 5 stitches, sc2tog* repeat around. (36)
- Round 20: *Sc in next 4 stitches, sc2tog* repeat around. (30)
- Round 21: *Sc in next 3 stitches, sc2tog* repeat around. (24)
- Round 22: *Sc in next 2 stitches, sc2tog* repeat around. (18)
- Round 23: *Sc in next stitch, sc2tog* repeat around. (12)
- Round 24: Sc2tog around. (6)
- Fasten off, leaving a long tail. Stuff the roof lightly with fiberfill before closing the final hole. Sew the roof onto the top of the walls, slightly overlapping the edge for a snug, whimsical fit.
Mushroom Decoration (Optional, for the Roof Peak)
Add a tiny mushroom topper for extra woodland charm.
- Cap: With cream yarn, make a magic ring, work 6 sc. Round 2: 2 sc in each stitch (12). Round 3: *Sc in next stitch, 2 sc in next* (18). Fasten off.
- Stem: With rust red yarn, chain 4, sc in 2nd chain and across (3), work 2 more rows. Fasten off.
- Sew the stem to the center of the cream cap, then sew the whole mushroom onto the roof peak.
Finishing Touches
Complete your enchanted cottage with these optional embellishments:
- Weave in all ends carefully to keep your work neat and secure.
- Add a small chimney made from a rolled rectangle of brown yarn, sewn onto one side of the roof.
- Create a tiny wreath on the door using green yarn and small red berries (made from French knots) for a festive, welcoming touch.
Your Whimsical Woodland Gnome Home is now complete! Display it on a shelf, in a fairy garden, or as a charming centerpiece. The soft, plush texture and storybook details make it a treasured handmade keepsake. Happy crocheting!


