Starlight Snowflake Crochet Ornament Cover Free Pattern
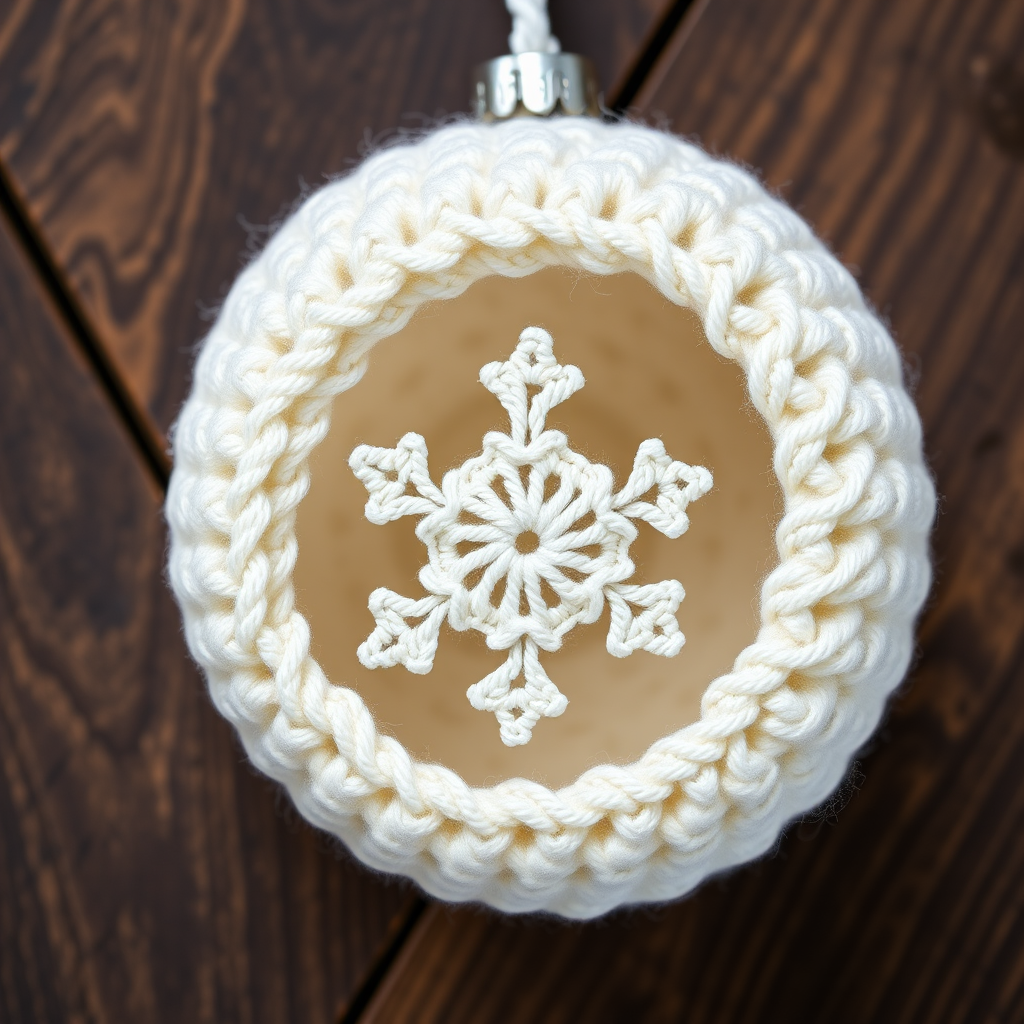
Starlight Snowflake Crochet Ornament Cover: A Free Pattern for Handmade Holiday Magic
There’s something truly special about pulling out handmade ornaments year after year. They carry memories, warmth, and a unique charm that mass-produced baubles simply can’t replicate. If you’re looking to add a personal, cozy touch to your Christmas tree this season, this Starlight Snowflake Crochet Ornament Cover is the perfect project. This quick and satisfying make transforms a plain glass or plastic ball into a delicate, textured work of art. Using fine yarn and a small hook, you’ll create a crisp, dimensional cover that looks intricate but is surprisingly beginner-friendly. Whether you’re crafting for your own home or planning heartfelt handmade gifts, these snowflake-covered ornaments are sure to become a treasured part of your holiday traditions.
This pattern is designed to fit a standard 2.5-inch (6.5 cm) ornament ball, creating a snug, stretchy cover that showcases your crochet skills beautifully. The combination of simple single and double crochet stitches builds a smooth, ribbed sphere, while the optional openwork snowflake motif adds that extra touch of winter magic. Let’s gather our supplies and get started on creating these stunning decorations!
Materials Needed for Your Crochet Ornament Cover
Before we dive into the stitches, let’s make sure you have everything you need. This project is wonderfully portable and uses minimal supplies, making it perfect for crafting on the go or while watching your favorite holiday movie.
- Yarn: Fingering weight cotton or acrylic yarn in white, silver, or icy blue. You’ll need approximately 20-30 yards per ornament. A soft white with a subtle shimmer creates a truly magical effect, but any color that speaks to your holiday style will work perfectly.
- Crochet Hook: A D/3 (3.25 mm) crochet hook. This smaller hook size is essential for creating a tight, dense fabric that will hold its shape and stretch nicely over the ornament ball.
- Ornament Ball: A standard 2.5-inch (6.5 cm) ornament ball. You can use glass, plastic, or even a DIY yarn ball in a pinch. The cover is designed to stretch, so slight variations in size are fine.
- Yarn Needle: A tapestry or yarn needle for weaving in ends and sewing on the optional snowflake motif.
- Scissors: A sharp pair for cutting your yarn.
- Stitch Marker (Optional): While this pattern is worked in joined rounds, a stitch marker can be helpful for keeping track of your place, especially in the early increase rounds.
Gauge: 6 double crochet (dc) x 3 rows = 1 inch. Gauge is not critical for this project, but aiming for a snug fit over your 2.5-inch ornament is key. If your tension is looser, you may need to adjust your hook size or the number of increase rounds to achieve the perfect fit.
Step-by-Step Instructions: Crafting Your Starlight Snowflake Cover
This pattern creates a stretchy cover that fits over a standard 2.5-inch (6.5 cm) ornament ball. We’ll be working in joined rounds, meaning each round is closed with a slip stitch and the next round begins with a chain. Let’s break it down step by step to ensure a flawless finish.
Starting the Base: The Magic Ring and Increases
Round 1: Begin by making a magic ring. This technique creates a tight, adjustable center that will become the bottom of your ornament cover. If you’re not familiar with the magic ring, you can alternatively chain 4 and join with a slip stitch to form a ring. Once your ring is ready, chain 3 (this counts as your first double crochet), then work 11 double crochet (dc) into the ring. Join with a slip stitch to the top of the beginning chain-3. You should now have a total of 12 double crochet stitches.
Round 2: Chain 3 (counts as your first dc), then work 1 dc into the same stitch at the base of the chain. This is your increase. Now, work 2 dc into each stitch around the circle. Join with a slip stitch to the top of the beginning chain-3. You’ll have 24 double crochet stitches in this round.
Round 3: Chain 3 (counts as dc), work 1 dc into the next stitch. *Work 2 dc into the next stitch (an increase), then 1 dc into each of the next 2 stitches.* Repeat from * to * around the entire round. Join with a slip stitch to the top of the beginning chain-3. Your stitch count is now 32 double crochet stitches.
Round 4: This round transitions to single crochet to begin shaping the body of the cover. Chain 1 (this does not count as a stitch), work 1 single crochet (sc) into the same stitch. Work 1 sc into each of the next 3 stitches. *Work 2 sc into the next stitch (an increase), then 1 sc into each of the next 4 stitches.* Repeat from * to * around. Join with a slip stitch to the first single crochet of the round. You should now have 38 single crochet stitches.
Shaping the Body: Even Rounds for a Smooth Sphere
Round 5: Chain 1, work 1 single crochet into each stitch around the entire round. Join with a slip stitch to the first single crochet. You’ll maintain 38 single crochet stitches.
Round 6: Chain 1, work 1 sc into the same stitch. Work 1 sc into each of the next 4 stitches. *Work 2 sc into the next stitch (an increase), then 1 sc into each of the next 5 stitches.* Repeat from * to * around. Join with a slip stitch. Your stitch count increases to 44 single crochet stitches.
Rounds 7-10: For these four rounds, we’ll work even to create the main body of the cover. Chain 1, then work 1 single crochet into each stitch around. Join with a slip stitch at the end of each round. You will have 44 single crochet stitches at the end of each of these rounds. Pro Tip: After completing Round 10, try the cover over your ornament ball. It should stretch slightly to fit snugly. If it feels too tight, you can add one more round of increases (working 2 sc in every 6th stitch) before continuing with the even rounds.
Closing the Top: Decrease Rounds for a Neat Finish
Now we’ll shape the top of the cover by decreasing the number of stitches. This creates a gathered, closed look that holds the ornament securely.
Round 11: Chain 1, work 1 sc into the same stitch. Work 1 sc into each of the next 2 stitches. *Work a single crochet 2 together (sc2tog) over the next 2 stitches, then work 1 sc into each of the next 3 stitches.* Repeat from * to * around. Join with a slip stitch. You’ll now have 35 single crochet stitches.
Round 12: Chain 1, work 1 sc into the same stitch. Work 1 sc into the next stitch. *Work a sc2tog over the next 2 stitches, then work 1 sc into each of the next 2 stitches.* Repeat from * to * around. Join with a slip stitch. Your stitch count is now 26 single crochet stitches.
Round 13: Chain 1, work 1 sc into the same stitch. *Work a sc2tog over the next 2 stitches, then work 1 sc into the next stitch.* Repeat from * to * around. Join with a slip stitch. You’ll have 17 single crochet stitches remaining.
Round 14: Chain 1, work 1 sc into the same stitch. *Work a sc2tog over the next 2 stitches.* Repeat from * to * around. Join with a slip stitch. You should now have 9 single crochet stitches.
Finishing the Top: Fasten off your yarn, leaving a long tail (about 8-10 inches). Thread this tail through a yarn needle. Weave the needle through the front loops of the remaining 9 stitches, going around the circle. Gently pull the tail tight to cinch the top closed, gathering the stitches neatly. Secure the yarn with a few small stitches and weave the tail inside the cover to hide it.
Adding the Snowflake Motif (Optional Decoration)
To give your ornament that signature “Starlight Snowflake” look, we’ll create a small, delicate snowflake to sew onto the front of the cover. This is a lovely way to add extra detail and dimension.
Creating the Snowflake: With a separate piece of your yarn, chain 6. Join with a slip stitch to form a small ring.
- Chain 5, then work 1 double crochet (dc) into the ring.
- Chain 3, work 1 dc into the ring.
- Chain 5, then work a slip stitch into the ring.
Repeat this sequence (ch 5, dc, ch 3, dc, ch 5, sl st) 5 more times to create a total of 6 points on your snowflake. After the 6th point, fasten off, leaving a tail for sewing. This simple pattern creates a beautiful, openwork star-like snowflake.
Attaching the Snowflake: Using a yarn needle and the tail from the snowflake, or a separate piece of matching thread, sew the snowflake securely onto the front of your ornament cover. Position it in the center of the body of the cover, between the bottom and top openings. Weave in all loose ends carefully.
Final Assembly and Hanging Loop
Your cover is now complete! To finish your ornament, gently insert your ornament ball through the bottom opening (the magic ring end). The stretchy crochet fabric should easily stretch over the ball. Adjust the cover so it sits smoothly and the snowflake motif is centered.
If you’d like to add a hanging loop, you have a couple of options. You can simply use the ornament’s own hanger if it protrudes from the top. Alternatively, before you cinch the top closed, you can create a loop by chaining 15 stitches and attaching it to the top edge. To do this, after Round 14, instead of fastening off, chain 15 and slip stitch back into the same stitch to form a loop. Then, fasten off and weave in the ends. This creates a beautiful, integrated loop for hanging.
Your Starlight Snowflake Crochet Ornament Cover is now ready to grace your tree, be gifted to a loved one, or add a handmade touch to your holiday gift wrapping. Enjoy the process, and happy holidays!


