Snowdrift Snuggle Snowman Free Crochet Pattern – Cozy Winter Amigurumi
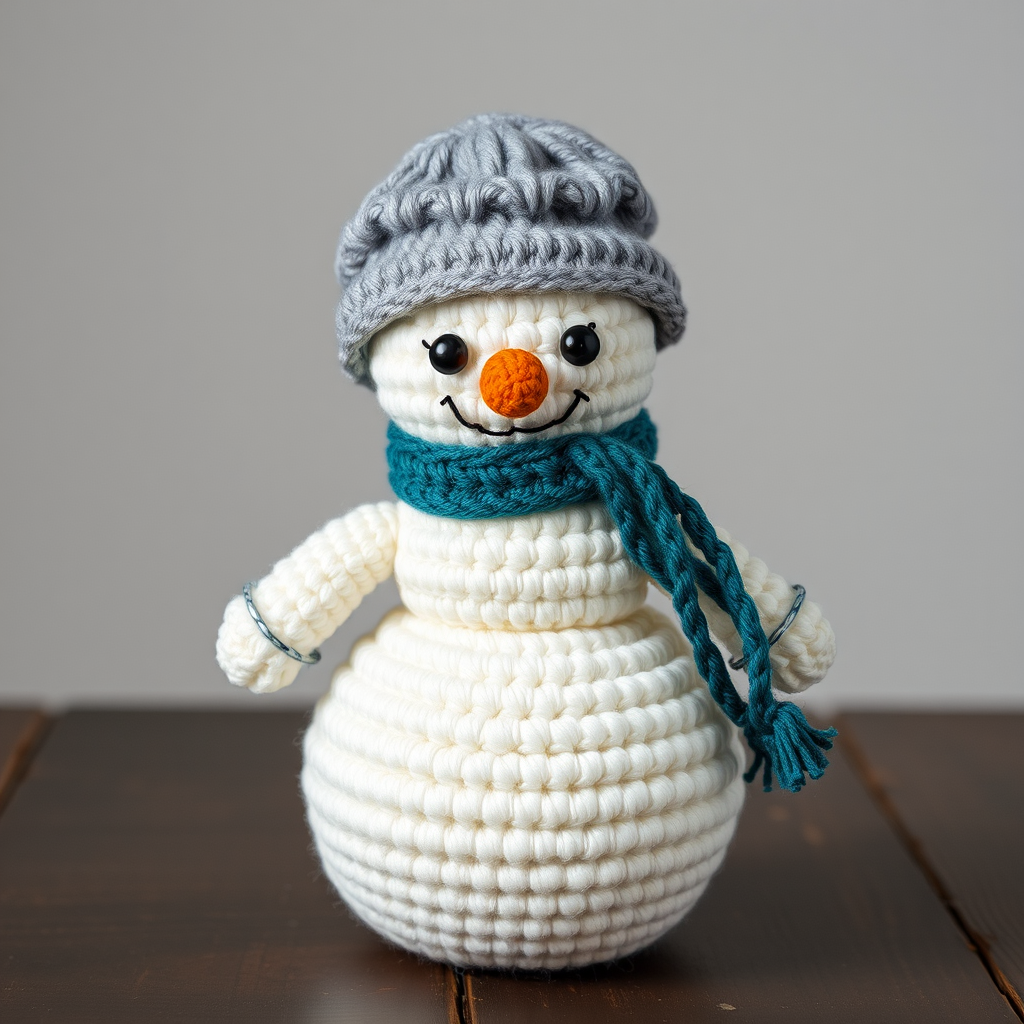
Snowdrift Snuggle Snowman Free Crochet Pattern – Cozy Winter Amigurumi
Meet the Snowdrift Snuggle Snowman, a charming crochet companion with a chunky cable-knit scarf and a hand-stitched carrot nose. This pattern uses soft, fluffy yarn to create a huggable winter friend that brings hygge to any shelf. Whether you're a seasoned crocheter or a curious beginner, this amigurumi project is the perfect way to celebrate the cozy magic of winter. With clear instructions and a bit of patience, you'll have your very own snowman buddy to display, gift, or snuggle with all season long.
Materials Needed
Before you begin, gather all your supplies. Having everything ready will make the process smooth and enjoyable. Here's what you'll need:
- Yarn: Worsted weight yarn in the following colors:
- White (main body)
- Soft grey (hat)
- Orange (nose)
- Deep teal (scarf)
- Black (eyes and mouth)
- Crochet Hook: US G/6 (4.0 mm) crochet hook
- Polyester fiberfill stuffing – for a plush, huggable body
- Yarn needle – for sewing pieces together and weaving in ends
- Stitch marker – to keep track of your rounds
- Scissors
Gauge: 4 sc x 4 rows = 1 inch. Gauge is not critical for this project, but maintaining consistent tension will ensure your snowman looks neat and even.
Abbreviations
Familiarize yourself with these standard crochet abbreviations before starting:
- MR: Magic ring
- sc: Single crochet
- inc: Increase (2 sc in same stitch)
- dec: Decrease (sc 2 together)
- st(s): Stitch(es)
- rnd: Round
- ch: Chain
- sl st: Slip stitch
Step-by-Step Instructions
Body (Make 2 Pieces – Bottom and Top)
The snowman's body is made from two spheres: a larger bottom and a slightly smaller top. This creates the classic snowman silhouette.
Bottom Body
Rnd 1: MR, 6 sc in ring. (6)
Rnd 2: inc in each st around. (12)
Rnd 3: (sc in next st, inc) around. (18)
Rnd 4: (sc in next 2 sts, inc) around. (24)
Rnd 5: (sc in next 3 sts, inc) around. (30)
Rnd 6: (sc in next 4 sts, inc) around. (36)
Rnd 7-12: sc in each st around. (36)
Rnd 13: (sc in next 4 sts, dec) around. (30)
Rnd 14: (sc in next 3 sts, dec) around. (24)
Rnd 15: (sc in next 2 sts, dec) around. (18)
Stuff firmly with polyester fiberfill. Make sure the stuffing is evenly distributed for a smooth, round shape.
Rnd 16: (sc in next st, dec) around. (12)
Rnd 17: dec around. (6)
Fasten off, leaving a long tail for sewing. Weave the end through the remaining stitches and pull tight to close the hole. Weave in the end securely.
Top Body
Rnd 1: MR, 6 sc in ring. (6)
Rnd 2: inc in each st around. (12)
Rnd 3: (sc in next st, inc) around. (18)
Rnd 4: (sc in next 2 sts, inc) around. (24)
Rnd 5: (sc in next 3 sts, inc) around. (30)
Rnd 6: (sc in next 4 sts, inc) around. (36)
Rnd 7-10: sc in each st around. (36)
Rnd 11: (sc in next 4 sts, dec) around. (30)
Rnd 12: (sc in next 3 sts, dec) around. (24)
Rnd 13: (sc in next 2 sts, dec) around. (18)
Stuff firmly.
Rnd 14: (sc in next st, dec) around. (12)
Rnd 15: dec around. (6)
Fasten off, weave in end as described above.
Assembly of the Body
Using the yarn needle and the long tail from the top body, sew the top body onto the bottom body. Position the top sphere slightly offset (toward the back) to create a natural snowman silhouette. Use a whip stitch, working through the stitches of both pieces to secure them together. Hide the seam by pulling the yarn snugly and weaving the end through the body.
Arms (Make 2)
The arms are simple tubes that give your snowman a friendly, reachable look.
Rnd 1: MR, 6 sc in ring. (6)
Rnd 2-8: sc in each st around. (6)
Fasten off, leaving a long tail for sewing. Attach the arms to the sides of the top body, positioning them about halfway down. Sew securely, weaving the yarn through the body and the arm several times for stability.
Carrot Nose
Using orange yarn, create the iconic carrot nose.
Rnd 1: MR, 4 sc in ring. (4)
Rnd 2: (sc in next st, inc) around. (6)
Rnd 3: (sc in next 2 sts, inc) around. (8)
Rnd 4-5: sc in each st around. (8)
Fasten off, leaving a tail. Sew the nose onto the face, positioning it slightly above the center of the top body. Angle it slightly upward for a cheerful expression.
Face Details
Using black yarn and a yarn needle, embroider the eyes and mouth.
- Eyes: Create two French knots or small satin stitches, placing them symmetrically above the nose.
- Mouth: Use a backstitch to create a gentle smiling curve below the nose. Keep the stitches small and even for a neat finish.
Hat
Using grey yarn, crochet a cozy beanie-style hat.
Rnd 1: MR, 6 sc in ring. (6)
Rnd 2: inc in each st around. (12)
Rnd 3: (sc in next st, inc) around. (18)
Rnd 4: (sc in next 2 sts, inc) around. (24)
Rnd 5-7: sc in each st around. (24)
Rnd 8: sc in back loops only around. (24) – This creates a crisp fold line for the brim.
Rnd 9-11: sc in each st around. (24)
Rnd 12: (sc in next 2 sts, dec) around. (18)
Rnd 13: (sc in next st, dec) around. (12)
Rnd 14: dec around. (6)
Fasten off and weave in the end. Fold up the brim along the back-loop-only row and place the hat on the snowman's head. You can sew it in place or leave it removable.
Scarf
Using teal yarn, create a simple rectangular scarf.
Row 1: ch 40. sc in 2nd ch from hook and across. (39)
Row 2: ch 1, turn, sc in each st across. (39)
Repeat Row 2 until the scarf is 3 rows wide. Fasten off and weave in the ends.
Wrap the scarf around the snowman's neck, crossing the ends in front. Tie a knot or sew it in place for a secure fit.
Finishing Touches
Weave in all remaining ends using the yarn needle. For extra charm, you can embroider a small snowflake or sew a button onto the belly. This adds a personal touch and makes your snowman truly one-of-a-kind.
Your Snowdrift Snuggle Snowman is now complete! Standing about 8 inches tall, this cozy companion is perfect for shelf display, gift-giving, or as a cuddly winter friend. The soft, fluffy texture and handcrafted details make it a treasured piece that captures the warmth of the season. Happy crocheting!


