Savanna Sunset Tiger Applique Free Pattern – Crocheted Roaring Cub Wall Art
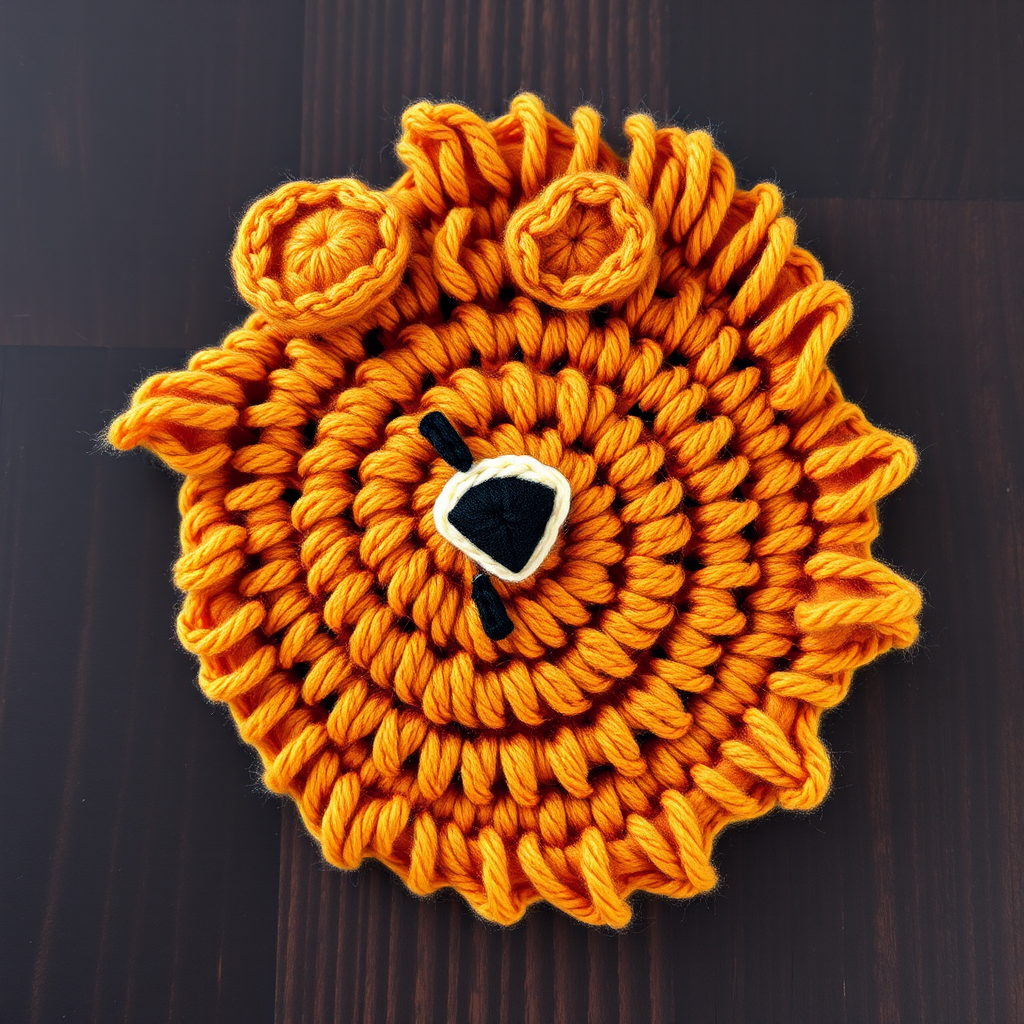
Savanna Sunset Tiger Applique Free Pattern – Crocheted Roaring Cub Wall Art
Bring the wild beauty of the savanna into your home with this textured crochet tiger applique, featuring a dimensional roaring cub face and lush striped mane. Perfect for nursery decor, throw pillows, or tote bag embellishments, this pattern is a modern twist on classic animal appliques. The warm, earthy color palette of burnt orange, charcoal black, cream, and golden yellow creates a cozy, boho aesthetic that works beautifully in any space. Whether you're a seasoned crocheter or just starting your amigurumi journey, this pattern is designed to be accessible, rewarding, and utterly adorable.
Materials Needed
Before you begin, gather the following supplies. Having everything ready will make your crochet session smooth and enjoyable.
- Yarn: Worsted weight cotton or acrylic yarn in four colors:
- Burnt orange (main face color)
- Charcoal black (stripes, nose, details)
- Cream (muzzle and whiskers)
- Warm gold (mane)
- Hook: 3.5mm (E) crochet hook
- Notions: Tapestry needle for weaving ends and embroidery, stitch markers (optional but helpful), scissors
- Optional: Safety eyes (for decorative use only, not for children's toys), foam board and pins for blocking
Gauge: 4 sc x 4 rows = 1 inch. Gauge is not critical for this project, but consistent tension is recommended for a neat, even finish.
Step-by-Step Instructions
This applique is worked in two main parts: the tiger face (worked in the round) and the mane (worked in a spiral around the face). The ears, nose, and stripes are added separately. Follow along carefully, and you'll have a stunning tiger applique in no time.
Part 1: Tiger Face (Worked in Continuous Rounds)
The face is a flat circle, worked in continuous spiral rounds. Do not join at the end of each round unless specified.
- Round 1: With burnt orange, make a magic ring. Ch 1, work 6 sc into the ring. Pull the tail to tighten the ring. (6 sts)
- Round 2: Work 2 sc in each stitch around. (12 sts)
- Round 3: *Sc in next st, 2 sc in next st*; repeat from * to * around. (18 sts)
- Round 4: *Sc in next 2 sts, 2 sc in next st*; repeat from * to * around. (24 sts)
- Round 5: *Sc in next 3 sts, 2 sc in next st*; repeat from * to * around. (30 sts)
- Round 6: *Sc in next 4 sts, 2 sc in next st*; repeat from * to * around. (36 sts)
- Round 7: *Sc in next 5 sts, 2 sc in next st*; repeat from * to * around. (42 sts)
- Round 8: *Sc in next 6 sts, 2 sc in next st*; repeat from * to * around. (48 sts)
- Round 9: *Sc in next 7 sts, 2 sc in next st*; repeat from * to * around. (54 sts)
- Round 10: *Sc in next 8 sts, 2 sc in next st*; repeat from * to * around. (60 sts)
- Rounds 11-12: Sc in each stitch around. (60 sts)
- Fasten off and weave in the yarn tail securely.
Part 2: Mane (Worked in a Spiral Around the Face)
The mane is created in two rounds: a ruffled base and a spiky fringe. This gives the tiger its wild, dimensional look.
- Attach warm gold yarn to any stitch on the outer edge of the face using a slip stitch.
- Round 1 (Ruffled Base): Ch 2 (counts as first hdc), hdc in the same stitch. Work 2 hdc in each stitch around the entire face. (120 sts). This will create a ruffled, wavy base for the mane.
- Round 2 (Spiky Fringe): Working in back loops only, *ch 3, skip 1 st, sl st in next st*; repeat from * to * around the entire round. This creates a beautiful, spiky fringe effect.
- Fasten off and weave in all ends.
Part 3: Ears (Make 2)
These small, folded ears add a cute, dimensional touch to the top of the face.
- Round 1: With burnt orange, make a magic ring. Ch 1, work 6 sc into the ring. Pull tight. (6 sts)
- Round 2: Work 2 sc in each stitch around. (12 sts)
- Round 3: *Sc in next st, 2 sc in next st*; repeat from * to * around. (18 sts)
- Fasten off, leaving a long tail (about 12 inches) for sewing.
- Fold each ear in half (the right sides together) and sew the bottom edge closed. Position the ears on the top corners of the face (around rounds 3-4 from the center) and sew them securely in place.
Part 4: Nose and Muzzle
These small pieces create the tiger's adorable face.
- Nose: With charcoal black, ch 4. Sc in the 2nd ch from hook, sc in the next 2 chs. (3 sts). This forms a small triangle. Fasten off, leaving a tail. Sew this to the center of the face, about 2 rounds above the bottom edge.
- Muzzle: With cream, make a magic ring. Ch 1, work 6 sc into the ring. (6 sts). Fasten off, leaving a tail. Sew this just below the nose, overlapping slightly to create a cute, puffy muzzle.
Part 5: Stripes and Details
This is where the tiger really comes to life! Take your time with the embroidery for a polished look.
- Stripes: Using charcoal black yarn and a tapestry needle, embroider 3-4 vertical stripes on each side of the face. Start from the outer edge and taper the stripes inward toward the center. This mimics a tiger's natural markings.
- Eyes: Using black yarn, embroider two small curved lines (like a smile) for closed, peaceful eyes. Alternatively, you can use safety eyes for a more playful look (only for decorative use, not for children's toys).
- Whiskers: Using cream yarn, embroider 3 long, straight stitches on each side of the muzzle. These add a delicate, realistic touch.
Finishing
Follow these final steps to ensure your applique looks its best.
- Weave in all ends: Use your tapestry needle to hide any remaining yarn tails on the back of the work.
- Block the applique: Pin the applique flat to a foam board. If using acrylic yarn, steam gently with an iron (without touching the yarn directly). If using cotton, spray lightly with water. Allow it to dry completely. This will help the piece lay flat and look professional.
- Attach: Sew or glue the applique onto a pillow, tote bag, or frame it as wall art. It also makes a wonderful addition to a nursery mobile or a handmade gift.
Your Savanna Sunset Tiger Applique is complete! This project is a fantastic way to practice working in the round, creating texture, and adding fine details through embroidery. The result is a stunning, handmade piece that brings a touch of the wild into your home. Happy crocheting!


