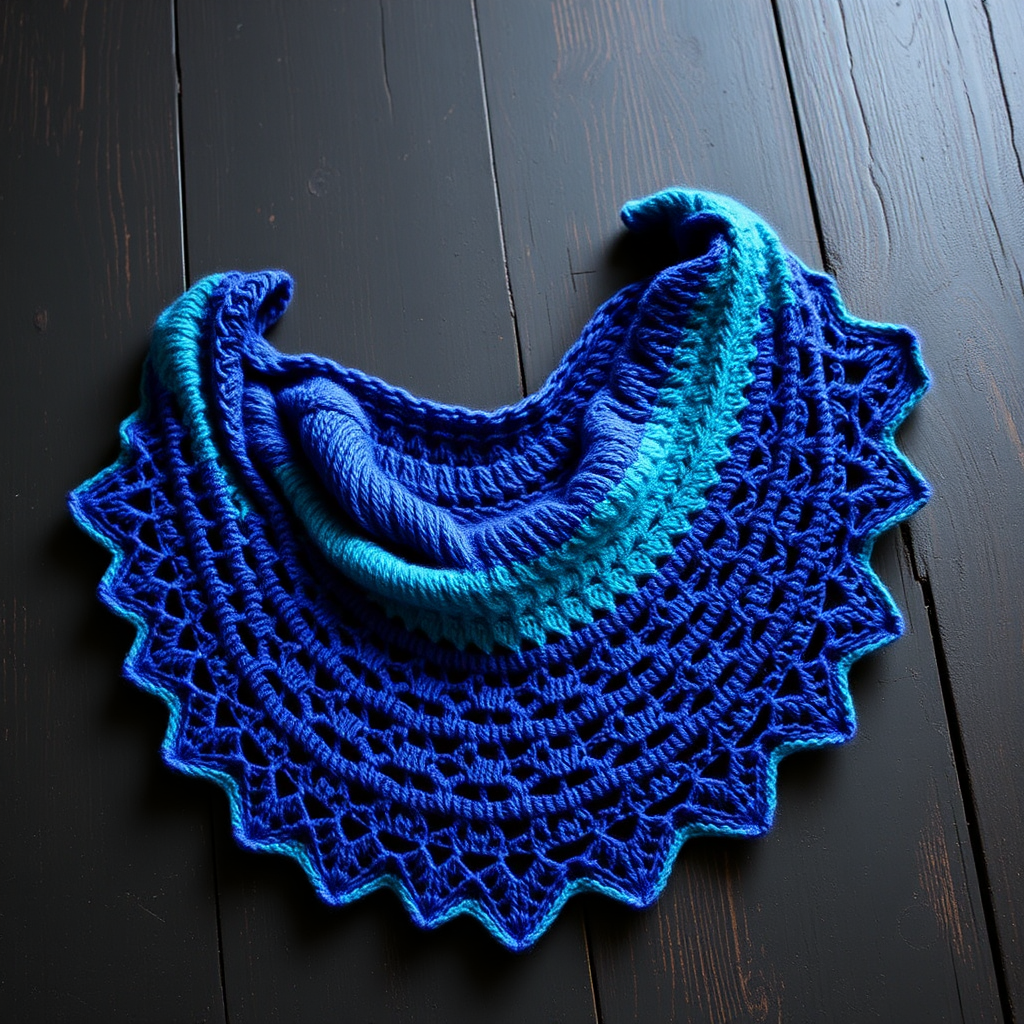
Meadow Mist Mosaic Shawl Free Knitting Pattern – Lacy Wildflower Wrap

Meadow Mist Mosaic Shawl Free Knitting Pattern – Lacy Wildflower Wrap
Wrap yourself in the soft hues of a spring meadow with this delicate mosaic knit shawl, featuring a unique blend of lace and textured stitches. Perfect for cool evenings, this pattern offers a meditative knit with a stunning floral-inspired motif. The mosaic technique creates a woven tapestry effect without the hassle of carrying multiple yarns across rows—you simply slip stitches while alternating colors every two rows. The result is a breathtaking triangular shawl that drapes elegantly, with a delicate lace border that catches the light beautifully.
Whether you're a seasoned knitter looking for a new challenge or a confident beginner ready to expand your skills, this pattern is designed to guide you through every step. The rhythmic repetition of the mosaic sections makes it a perfect project for relaxing evenings, while the stunning payoff—a wearable piece of art—will keep you motivated to the very last bind-off stitch.
Materials Needed
Before you begin, gather the following materials to ensure a smooth knitting experience:
- Yarn: Fingering weight yarn in 3 colors:
- Color A (Meadow Green) – 400 yards
- Color B (Buttercup Yellow) – 300 yards
- Color C (Dewy White) – 300 yards
- Needle: US Size 6 (4.0 mm) circular knitting needle, 32-inch or longer (to accommodate the growing number of stitches)
- Gauge: 20 stitches and 28 rows = 4 inches in stockinette stitch (blocked). Gauge is important for achieving the correct drape and size, so take a moment to knit a swatch.
- Other Tools: Stitch markers (optional but helpful), tapestry needle for weaving in ends, blocking pins and mat for finishing.
Step-by-Step Instructions
This shawl is worked from the top center down, increasing at the edges and center to form a triangular shape. The mosaic pattern is created by slipping stitches while changing colors every two rows, producing a woven effect without carrying yarn across. Follow along carefully, and you'll be amazed at how the pattern emerges.
Abbreviations
- k = knit
- p = purl
- yo = yarn over
- k2tog = knit two together
- skpo = slip, knit, pass slipped stitch over (decrease)
- sl = slip stitch purlwise
- RS = right side
- WS = wrong side
Setup Section
With Color A, cast on 3 stitches.
- Row 1 (RS): k1, yo, k1, yo, k1 (5 stitches)
- Row 2 (WS): k2, p1, k2
- Row 3 (RS): k2, yo, k1, yo, k2 (7 stitches)
- Row 4 (WS): k2, p3, k2
- Row 5 (RS): k2, yo, k3, yo, k2 (9 stitches)
- Row 6 (WS): k2, p5, k2
- Row 7 (RS): k2, yo, k5, yo, k2 (11 stitches)
- Row 8 (WS): k2, p7, k2
Note: The edge stitches (first 2 and last 2) are always knit on RS rows and purled on WS rows, except for the setup where they are knit. This creates a neat garter stitch border.
Mosaic Pattern – Important Notes
Always slip stitches purlwise with yarn on the wrong side (wyif) on RS rows, and yarn in front (wyif) on WS rows. This means you hold the yarn to the front of the work as you slip the stitch. This is crucial for the mosaic effect—the slipped stitches will create horizontal bars of color.
Section 1 (Color A and B)
Row 1 (RS, Color A): k2, yo, *k1, sl1, k1, sl1, k1*, repeat from * to * until last 2 stitches, yo, k2 (increase 2 stitches)
Row 2 (WS, Color A): k2, p to last 2 stitches, k2. Important: When you encounter a slipped stitch from Row 1, slip it again purlwise with yarn in front (wyif). Do not knit it. Only knit the stitches that were knit on the RS row.
Row 3 (RS, Color B): k2, yo, *sl1, k1, sl1, k1, sl1*, repeat from * to * until last 2 stitches, yo, k2
Row 4 (WS, Color B): k2, p to last 2, k2, slipping the same stitches as on RS with yarn in front (wyif).
Repeat Rows 1-4 until you have 51 stitches on the needle, ending with a WS row.
Pro Tip: The pattern repeat in Section 1 is a 5-stitch repeat. As you increase, you'll add more repeats. The slipped stitches on Row 1 are the knit stitches from Row 3, and vice versa. This creates the woven effect.
Section 2 (Color C and A)
Row 1 (RS, Color C): k2, yo, *k2, sl1, k2, sl1*, repeat from * to * until last 2 stitches, yo, k2
Row 2 (WS, Color C): k2, p to last 2, k2, slipping the same stitches as on RS with yarn in front (wyif).
Row 3 (RS, Color A): k2, yo, *sl1, k2, sl1, k2*, repeat from * to * until last 2 stitches, yo, k2
Row 4 (WS, Color A): k2, p to last 2, k2, slipping the same stitches as on RS with yarn in front (wyif).
Repeat Rows 1-4 until you have 91 stitches on the needle, ending with a WS row.
Note: The pattern repeat in Section 2 is a 6-stitch repeat. The slipped stitches are now offset by one stitch compared to Section 1, creating a different geometric motif.
Section 3 (Color B and C)
Row 1 (RS, Color B): k2, yo, *k3, sl1, k3, sl1*, repeat from * to * until last 2 stitches, yo, k2
Row 2 (WS, Color B): k2, p to last 2, k2, slipping the same stitches as on RS with yarn in front (wyif).
Row 3 (RS, Color C): k2, yo, *sl1, k3, sl1, k3*, repeat from * to * until last 2 stitches, yo, k2
Row 4 (WS, Color C): k2, p to last 2, k2, slipping the same stitches as on RS with yarn in front (wyif).
Repeat Rows 1-4 until you have 131 stitches on the needle, ending with a WS row.
Note: The pattern repeat in Section 3 is a 7-stitch repeat. You'll notice the slipped stitches are now spaced further apart, creating a larger, bolder motif.
Lace Edge
Switch to Color C. This delicate lace border adds a beautiful finishing touch with eyelets and scalloped points.
Row 1 (RS): k2, yo, *k2tog, yo, k1, yo, skpo*, repeat from * to * until last 2 stitches, yo, k2
Row 2 (WS): k2, p to last 2, k2
Row 3 (RS): k2, yo, *k1, yo, skpo, k2tog, yo*, repeat from * to * until last 2 stitches, yo, k2
Row 4 (WS): k2, p to last 2, k2
Row 5 (RS): k2, yo, *k2tog, yo, k3, yo, skpo*, repeat from * to * until last 2 stitches, yo, k2
Row 6 (WS): k2, p to last 2, k2
Row 7 (RS): k2, yo, *k1, yo, skpo, k1, k2tog, yo*, repeat from * to * until last 2 stitches, yo, k2
Row 8 (WS): k2, p to last 2, k2
Row 9 (RS): k2, yo, *k2tog, yo, k5, yo, skpo*, repeat from * to * until last 2 stitches, yo, k2
Row 10 (WS): k2, p to last 2, k2
Row 11 (RS): k2, yo, *k1, yo, skpo, k3, k2tog, yo*, repeat from * to * until last 2 stitches, yo, k2
Row 12 (WS): k2, p to last 2, k2
Bind Off (Loosely)
With RS facing, k2, *k2tog, return stitch to left needle*, repeat from * to * until all stitches are bound off. This stretchy bind-off is essential for the lace edge to maintain its scalloped shape. Cut yarn and weave in all ends with a tapestry needle.
Blocking
Blocking is crucial for this shawl to open up the lace pattern and define the points. Soak the shawl in lukewarm water with a mild soap for 20-30 minutes. Gently squeeze out excess water (do not wring). Lay the shawl flat on a blocking mat, and pin out the points of the lace edge to create the scalloped shape. Also pin the top edge to create a straight line. Allow to dry completely before unpinning.
Once blocked, your Meadow Mist Mosaic Shawl will reveal its full beauty—a stunning tapestry of spring colors with a delicate, airy lace edge. This shawl is perfect for cool evenings, special occasions, or as a thoughtful handmade gift. Enjoy the meditative rhythm of the mosaic pattern and the joy of creating something truly special.
Happy knitting!