Meadow Breeze V-Neck Crochet Sweater for Kids – Free Pattern
Meadow Breeze V-Neck Crochet Sweater for Kids – Free Pattern
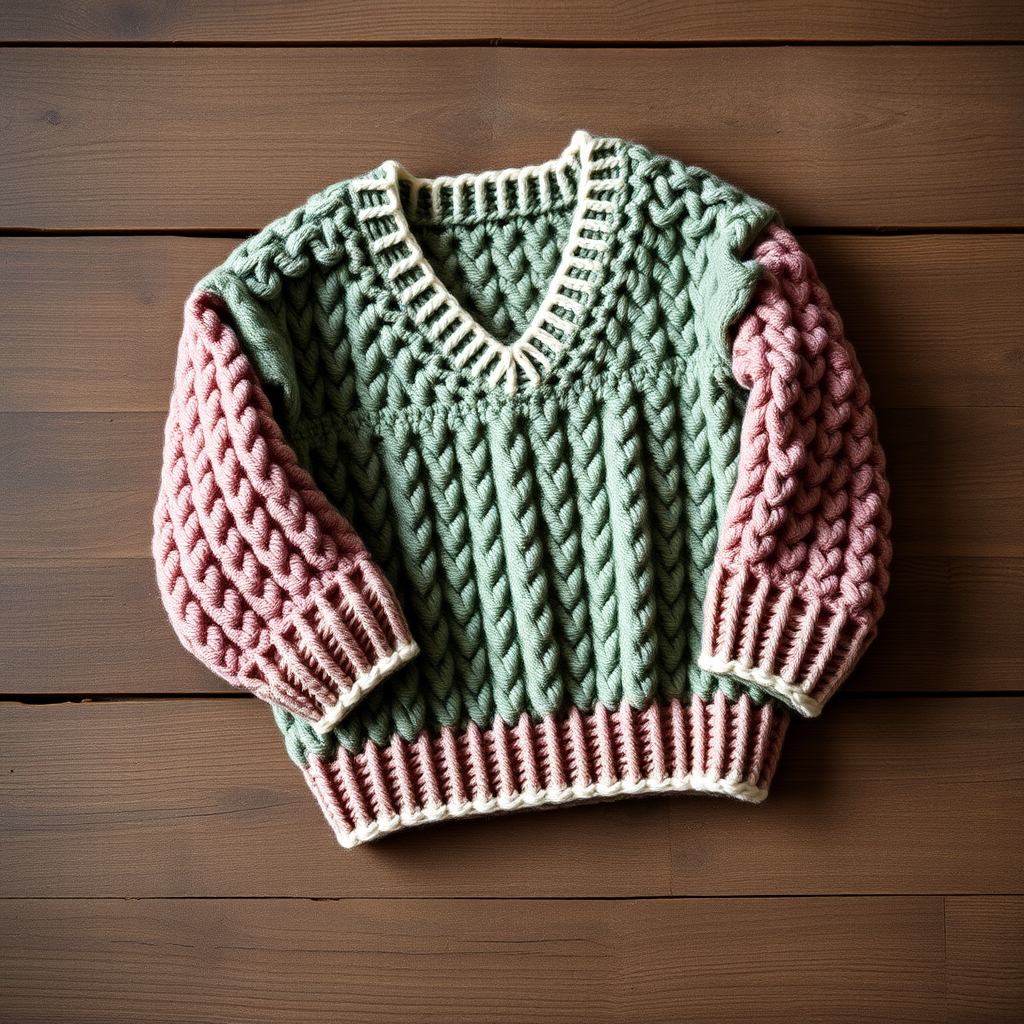
There's something truly special about crocheting a garment for a little one—especially when it's as beautiful and functional as the Meadow Breeze V-Neck Sweater. This airy, textured sweater is worked from the top down, meaning you can try it on your child as you go and easily adjust the length. The earthy color palette of sage green, cream, and dusty rose creates a soft, nature-inspired look that pairs perfectly with jeans, leggings, or skirts. Whether you're a seasoned crocheter or a confident beginner ready for your first garment, this pattern is designed to be approachable, rewarding, and utterly wearable.
The relaxed, boxy fit and dropped shoulders give this sweater a modern, cozy silhouette that kids love to move in. The dense-but-drapey Trinity Stitch provides beautiful texture without adding bulk, making it ideal for those crisp spring mornings and cool fall afternoons. Let's dive in and create a handmade heirloom your little one will treasure!
Materials Needed
Before you begin, gather the following supplies. Having everything ready will make your crochet session smooth and enjoyable.
Yarn
- Weight: Worsted weight (Category 4) cotton blend yarn
- Colors & Approximate Yardage (total for all sizes):
- Sage Green (yoke & body): 300–400 yds
- Dusty Rose (sleeves): 200–250 yds
- Cream (V-neck edging & cuffs): 100–150 yds
Hooks
- 9 mm (M/13) crochet hook – for the main body and sleeves
- 6.5 mm (K/10.5) crochet hook – for the V-neck edging and sleeve cuffs
Other Supplies
- Yarn needle for weaving in ends
- Scissors
- Stitch markers (optional but helpful for counting)
- Measuring tape
Gauge
With 9 mm hook: 11 stitches x 10 rows = 4 inches in Trinity Stitch. Always check your gauge to ensure the correct fit—if your swatch is too big, try a smaller hook; if too small, go up a hook size.
Step-by-Step Instructions
This pattern is written for the smallest size (2/3T) with larger sizes (4/5, 6/7, 8/10, 12/14) in parentheses. Follow the numbers that correspond to your desired size consistently throughout.
Stitch Abbreviations
- ch = chain
- sc = single crochet
- dc = double crochet
- sl st = slip stitch
- st(s) = stitch(es)
- sk = skip
- RS = right side
- WS = wrong side
Special Stitch – Trinity Stitch (Worked in Rows)
This is the signature stitch of the sweater, creating a beautiful, bumpy texture that's surprisingly simple to master.
- Row 1 (RS): sc in 2nd ch from hook, *dc in next ch, sc in next ch*; repeat from * to * across the row.
- Row 2: ch 1, turn, sc in first st, *dc in next st, sc in next st*; repeat from * to * across.
- Repeat Row 2 for the remainder of the pattern. The alternating sc and dc create the textured "bumps."
Note: The sweater is worked top-down in one piece to the underarms, then the sleeves are worked separately in the round.
Yoke (Neck to Underarms)
With 9 mm hook and sage green yarn, ch 44 (48, 52, 56, 60).
- Row 1 (RS): Work Trinity Stitch across the foundation chain. You should have 43 (47, 51, 55, 59) stitches.
- Row 2: ch 1, turn, work Trinity Stitch across all stitches.
- Row 3 (Increase Row): ch 1, turn, work 2 sts in the first st (increase), work Trinity Stitch across until the last st, work 2 sts in the last st (increase). You now have 45 (49, 53, 57, 61) stitches.
- Repeat Row 3 every other row (i.e., on Rows 5, 7, 9, etc.) until the yoke measures 5 (5.5, 6, 6.5, 7) inches from the starting chain, ending with a WS row. You should have approximately 61 (67, 73, 79, 85) stitches at this point. The increases create the gentle shaping for the shoulders and chest.
Divide for Body and Sleeves
Now you'll separate the yoke into the front panels, back, and sleeves. This is the magical moment where the sweater starts to take shape!
- Next row (RS): Work Trinity Stitch across the first 8 (9, 10, 11, 12) sts (this is the front panel).
- ch 2 (this creates the underarm gap), then sk next 12 (13, 14, 15, 16) sts (these are the sleeve stitches).
- Work Trinity Stitch across the next 21 (23, 25, 27, 29) sts (this is the back panel).
- ch 2, then sk next 12 (13, 14, 15, 16) sts (the second sleeve).
- Work Trinity Stitch across the last 8 (9, 10, 11, 12) sts (the second front panel).
- You now have a total of 41 (45, 49, 53, 57) body stitches (front + back + the 2 ch from each underarm).
Body
- Continue working even in Trinity Stitch across all body stitches. The ch-2 spaces from the underarm division will be worked into as part of the stitch pattern on the next row.
- Work until the body measures 6 (7, 8, 9, 10) inches from the underarm, or your desired length. For a tunic-style fit, add 1–2 inches.
- Fasten off and weave in the yarn end.
V-Neck Edging
This clean, cream-colored edging frames the V-neck beautifully and prevents stretching.
- With 6.5 mm hook and cream yarn, join the yarn at the bottom left front edge (where the V begins).
- Work single crochet evenly up the left V-neck slope, around the back neck, and down the right V-neck slope. The number of stitches will depend on your tension; aim for a smooth, even edge without puckering.
- Turn, ch 1, and work sc in each sc across for a second row. This gives a sturdy, finished look.
- Fasten off and weave in ends.
Sleeves
Now for the dusty rose sleeves—the perfect pop of color!
- With 9 mm hook and dusty rose yarn, join the yarn at the underarm ch-2 space.
- Work Trinity Stitch around the sleeve opening. You'll work into the 12 (13, 14, 15, 16) sleeve stitches plus the 2 ch stitches from the underarm, giving you a total of 14 (15, 16, 17, 18) stitches.
- Work even in Trinity Stitch for 4 (5, 6, 7, 8) inches, or until the sleeve reaches the desired length (just past the elbow is a classic look).
- Switch to the 6.5 mm hook and work 2 rows of single crochet for a snug, neat cuff. This prevents the sleeve from flaring out.
- Fasten off and weave in ends. Repeat for the second sleeve.
Finishing
- Weave in all loose ends with a yarn needle. Take your time—this makes a huge difference in the final look and durability.
- Block lightly to shape. Since this is a cotton blend, a gentle steam block or a light mist with water and a flat dry will help even out the stitches and set the V-neck shape. Avoid heavy stretching to maintain the relaxed fit.
And there you have it—a stunning, handmade Meadow Breeze V-Neck Sweater that your little one will adore. The combination of the textured Trinity Stitch, the earthy sage green, and the sweet dusty rose sleeves makes this a truly special piece. Whether it's a gift or a treat for your own child, this sweater is sure to be worn, loved, and passed down. Happy crocheting!


