Luminous Lagoon Jellyfish Free Pattern – Crocheted Bioluminescent Sea Drifter
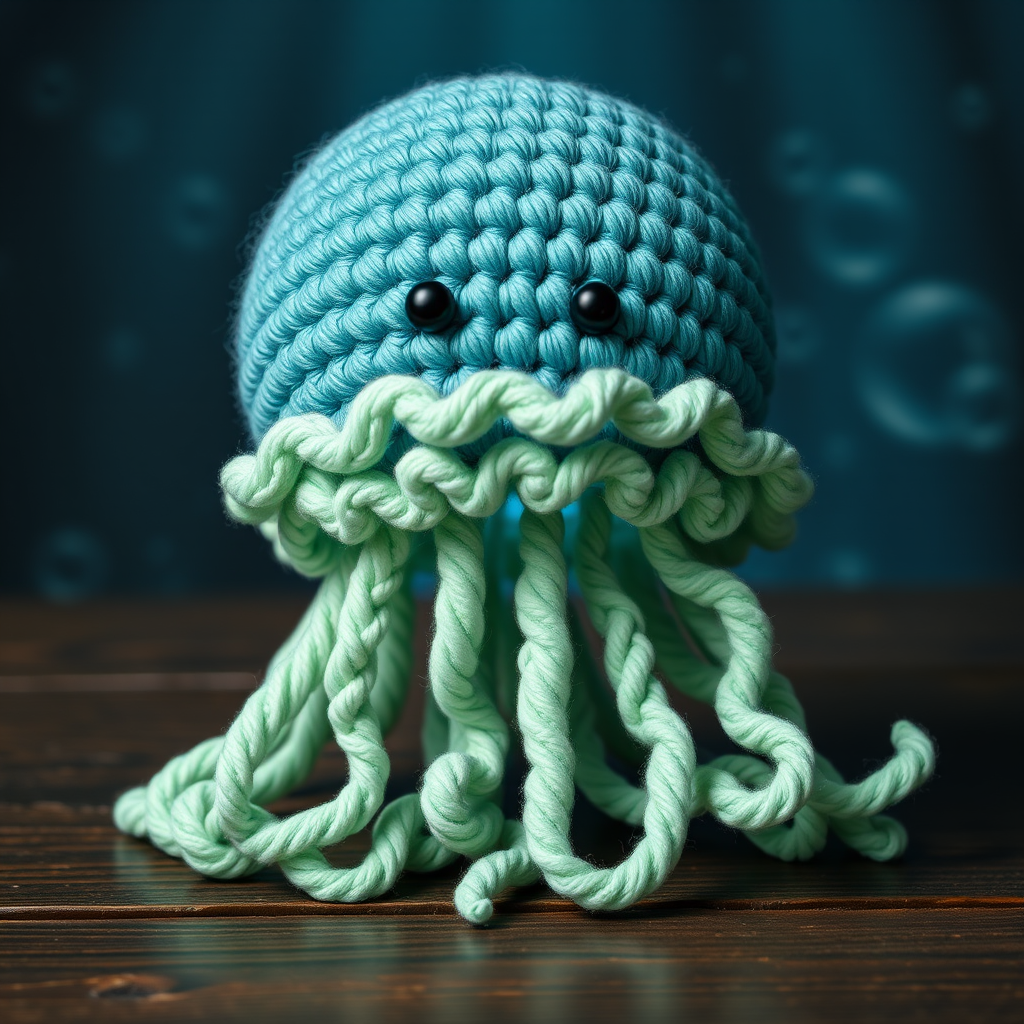
Luminous Lagoon Jellyfish Free Pattern – Crocheted Bioluminescent Sea Drifter
Dive into a dreamy underwater world with this ethereal jellyfish amigurumi, featuring a softly glowing bell and cascading, curly tentacles. This beginner-friendly crochet project is the perfect stash-busting adventure, transforming simple worsted-weight yarn into a magical sea creature that brings a touch of ocean wonder to any shelf, nursery, or gift box. Whether you're a seasoned maker or picking up a hook for the first time, this pattern is designed to be your calming, creative escape.
With its gentle dome, fluted ruffle, and spiraling tentacles, this jellyfish is more than just a toy—it's a handmade piece of art. The optional glow-in-the-dark yarn adds a subtle bioluminescent rim, making it a captivating nightlight for little ones or a whimsical desk companion for dreamers. Let's get started on crafting your very own glowing sea drifter!
Materials Needed
Before we begin, gather these simple supplies. This project is wonderfully portable and requires minimal tools, making it ideal for travel or cozy evenings at home.
- Yarn: Worsted weight (#4) cotton or acrylic yarn in the following colors:
- Teal (main bell color)
- Seafoam green (ruffle and tentacles)
- A small amount of glow-in-the-dark or white yarn (for the optional bioluminescent effect)
- A tiny amount of black yarn (for the eyes)
- Hook: 3.5mm (E) crochet hook
- Other: Yarn needle, stitch marker, fiberfill stuffing, scissors
Gauge: Gauge is not critical for this project, but aim for a tight tension to prevent stuffing from showing. Approximately 4 sc = 1 inch. If your stitches are loose, consider using a smaller hook to keep the stuffing hidden.
Step-by-Step Instructions
This jellyfish is worked in continuous spiral rounds unless otherwise noted. Use a stitch marker to keep track of your rounds—this is crucial for maintaining the correct shape. Let's begin!
Part 1: The Bell (Top Dome)
Start with your teal yarn. This section creates the smooth, rounded dome of the jellyfish.
- R1: Magic ring, 6 sc in ring. (6)
- R2: 2 sc in each st around. (12)
- R3: (Sc in next st, 2 sc in next st) around. (18)
- R4: (Sc in next 2 sts, 2 sc in next st) around. (24)
- R5: (Sc in next 3 sts, 2 sc in next st) around. (30)
- R6: (Sc in next 4 sts, 2 sc in next st) around. (36)
- R7: (Sc in next 5 sts, 2 sc in next st) around. (42)
- R8: (Sc in next 6 sts, 2 sc in next st) around. (48)
- R9-14: Sc in each st around. (48) – This creates the dome height. Work these 6 rounds evenly without increases.
- R15: (Sc in next 6 sts, sc2tog) around. (42) – Begin decreasing to shape the bottom of the bell.
- R16: (Sc in next 5 sts, sc2tog) around. (36)
- R17: (Sc in next 4 sts, sc2tog) around. (30)
- R18: (Sc in next 3 sts, sc2tog) around. (24)
- R19: (Sc in next 2 sts, sc2tog) around. (18)
Stuff the bell firmly with fiberfill. Make sure it's plump but not overstuffed, as you want it to be huggable.
- R20: (Sc in next st, sc2tog) around. (12)
- R21: Sc2tog around. (6)
Fasten off, leaving a long tail. Thread the tail through a yarn needle and weave it through the front loops of the remaining 6 stitches. Pull tight to close the hole, secure with a knot, and weave in the end.
Part 2: The Underside Ruffle (Mouth/Manubrium)
Now, we'll create the delicate, fluted ruffle that hangs beneath the bell. Attach your seafoam green yarn to the bottom edge of the bell (the opening). Important: You will be working in the back loops only of the last round of the bell (R18) to create a ruffle that hangs down naturally.
- R1: Ch 1, (sc in next st, 2 sc in next st) around. (27) – Work these stitches into the back loops only.
- R2: (Sc in next 2 sts, 2 sc in next st) around. (36)
- R3: (Sc in next 3 sts, 2 sc in next st) around. (45)
- R4: Sc in each st around. (45) – This round is worked normally (through both loops) to create a slight bend.
- R5: (Sc in next 4 sts, 2 sc in next st) around. (54)
- R6: Sc in each st around. (54)
Fasten off and weave in the end. This creates a lovely, fluted ruffle that mimics the jellyfish's oral arms.
Part 3: The Tentacles (Make 8-10)
These curly tentacles are the signature of your jellyfish! Using seafoam green yarn, make a chain of 30-40 stitches. Vary the lengths (some 30, some 35, some 40) for a natural, organic look.
- Row 1: Starting in the 2nd ch from hook, work 3 sc in each ch across. This will naturally curl the tentacle into a tight corkscrew.
Fasten off, leaving a long tail for sewing. Repeat to make 8-10 tentacles total. Sew the tentacles evenly around the inside of the ruffle, spacing them out. They should hang down below the ruffle, creating a sense of gentle movement.
Part 4: The Eyes (Make 2)
Give your jellyfish a cute, friendly expression with two simple eyes.
- Using black yarn, make a magic ring, 6 sc in ring. Sl st to join.
Fasten off, leaving a tail for sewing. Sew the eyes onto the bell, positioned about 2 inches down from the top and 1 inch apart. Make sure they're symmetrical for a balanced, adorable face.
Part 5: Optional Glow Effect
To truly capture the "bioluminescent" magic, here are two ways to add a glow:
- Glow Rim: If using glow-in-the-dark yarn, work the last 3 rounds of the bell (R16-18) with the glow yarn instead of teal. This creates a subtle, luminous rim at the base of the dome.
- Starry Effect: Alternatively, embroider small French knots or seed stitches with glow yarn randomly over the bell for a starry ocean effect. This adds texture and a magical, scattered glow.
And there you have it—your very own Luminous Lagoon Jellyfish! This project is a joy to make and even more delightful to gift. The combination of the smooth dome, fluted ruffle, and curly tentacles creates a tactile, sensory-friendly toy that's perfect for babies and adults alike. Display it on a shelf, hang it in a nursery, or let it drift on your desk as a reminder of the ocean's quiet magic.
Happy crocheting, and may your stitches always be tight and your tentacles always curly! 🌊✨


