Harvest Moon Turkey Napkin Ring Free Pattern – Knitted Festive Flatware Holder
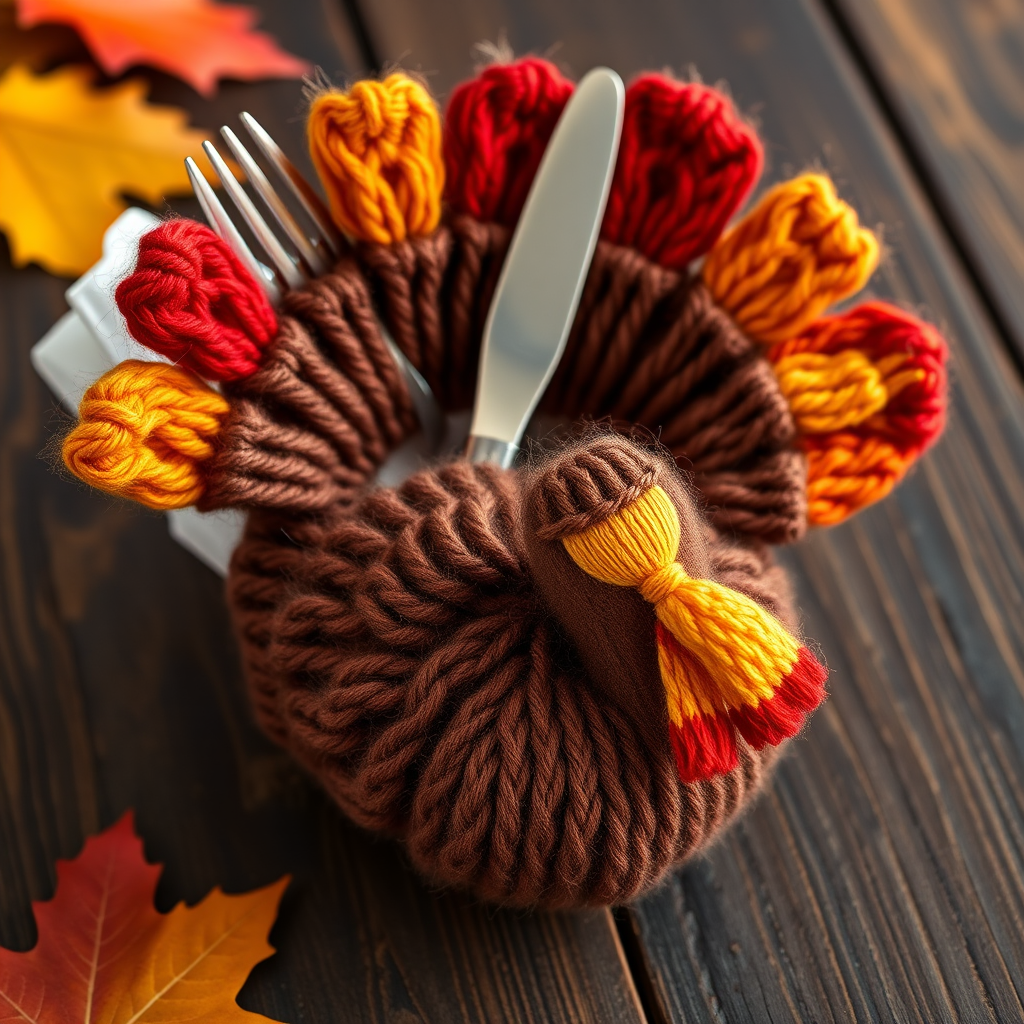
Harvest Moon Turkey Napkin Ring – Free Knitted Festive Flatware Holder Pattern
Bring rustic charm to your Thanksgiving table with this adorable knitted turkey napkin ring that doubles as a flatware holder. This delightful project features a textured feather fan in warm autumnal hues—burnt orange, rust red, golden yellow, and cream—paired with a rich chocolate brown ring and a charming little turkey head. Whether you're hosting a festive gathering or looking for a handmade gift, this pattern is perfect for beginners and experienced knitters alike. The visible knit stitches and soft yarn texture create a cozy, handmade centerpiece that will impress your guests and add a personal touch to your holiday decor.
Materials Needed
Before you begin, gather the following supplies to ensure a smooth knitting experience:
- Yarn: Worsted weight cotton or acrylic yarn in the following colors:
- Burnt orange
- Rust red
- Golden yellow
- Cream
- Chocolate brown
- Knitting Needles: US 6 (4.0 mm) knitting needles
- Tapestry Needle: For seaming and weaving in ends
- Scissors
Gauge: 20 stitches and 28 rows = 4 inches in stockinette stitch (knit one row, purl one row). While gauge is not critical for this project, matching it ensures your napkin ring fits standard flatware comfortably.
Step-by-Step Instructions
This pattern creates a knitted tube that forms the ring, with a separately knitted feather fan and a small turkey head. All pieces are seamed together at the end. Follow each section carefully, and you'll have a beautiful turkey napkin ring in no time.
Feather Fan (Make 1)
Using rust red yarn, cast on 30 stitches.
- Row 1 (Right Side): Knit all stitches.
- Row 2: Purl all stitches.
- Row 3: K2tog across the row (this means knit 2 stitches together repeatedly until you have 15 stitches left).
- Row 4: Purl all stitches.
- Row 5: K2tog across the row (you will now have 8 stitches; the last stitch is a K1, so knit the final stitch normally).
- Row 6: Purl all stitches.
Cut the yarn, leaving a long tail (about 12 inches). Thread the tail through a tapestry needle, then pass it through the remaining 8 stitches on your knitting needle. Slide the stitches off the needle, pull the yarn tight to gather the stitches into a fan shape, and secure with a knot. This creates the beautiful fan shape of the turkey's tail feathers.
Feather Stripes (Make 3)
These small rectangles will be folded and attached to the fan to mimic feather layers. Make one in each of the following colors: golden yellow, burnt orange, and cream.
- Using your chosen color, cast on 5 stitches.
- Work in stockinette stitch (knit one row, purl one row) for 10 rows total.
- Bind off all stitches loosely.
- Leave a tail for sewing. Repeat for the other two colors.
Turkey Body/Ring (Make 1)
Using chocolate brown yarn, cast on 24 stitches. Join in the round, being careful not to twist your stitches. Place a stitch marker to mark the beginning of the round.
- Rounds 1-10: Knit all stitches (this creates stockinette in the round).
- Round 11: K2tog around (you will have 12 stitches).
- Round 12: K2tog around (you will have 6 stitches).
Cut the yarn, leaving a long tail. Thread the tail through the remaining 6 stitches, pull tight, and secure. This forms a tube that will be the ring. The tube should be about 2 inches in diameter, perfect for sliding a napkin and flatware through.
Turkey Head (Make 1)
Using chocolate brown yarn, cast on 10 stitches.
- Row 1: Knit all stitches.
- Row 2: Purl all stitches.
- Row 3: K2tog across the row (you will have 5 stitches).
- Row 4: Purl all stitches.
Cut the yarn, leaving a long tail. Thread the tail through the remaining 5 stitches, pull tight, and secure. This forms a small dome shape. Sew the head to the front of the ring, just above where the feather fan will be attached.
Beak and Wattle
These small details give your turkey character.
- Beak: Using golden yellow yarn, cast on 3 stitches. Knit 2 rows, then bind off. Fold the small rectangle in half and sew it to the front of the turkey head, centered, to create a beak.
- Wattle: Using rust red yarn, cast on 3 stitches. Knit 4 rows, then bind off. Sew this below the beak, slightly overlapping the head, to create the wattle (the red fleshy part under the beak).
Assembly
Now it's time to bring all the pieces together. Follow these steps carefully for a polished finish:
- Attach the Feather Fan: Sew the feather fan to the back of the ring, opposite the head, so it fans upward. Use the long tail from the fan to secure it firmly with a whip stitch along the base of the fan.
- Layer the Feather Stripes: Attach the three feather stripes to the fan, layering them from bottom to top. Start with the golden yellow stripe at the bottom, then the burnt orange in the middle, and the cream on top. Use a whip stitch to secure each stripe, folding them slightly to mimic feather layers.
- Weave in All Ends: Use your tapestry needle to weave in any loose yarn ends on the inside of the ring and behind the fan to keep the front clean and neat.
- Final Assembly: Slide a napkin and flatware through the ring, positioning the head and fan to face outward. Adjust as needed for a balanced look.
Tips for Success
- Keep Tension Even: Consistent tension ensures your ring is uniform and fits comfortably around flatware.
- Block Your Pieces: Before assembly, lightly block the feather fan and ring to smooth out stitches and set the shape. Simply dampen with water and lay flat to dry.
- Customize Colors: Feel free to swap colors to match your holiday theme—deep greens, burgundy, or even metallics work beautifully.
This Harvest Moon Turkey Napkin Ring is a delightful addition to any Thanksgiving table. The combination of textured feathers, a cozy knitted ring, and a charming turkey face makes it a conversation starter and a cherished handmade keepsake. Whether you're crafting for yourself or gifting to a loved one, this pattern is sure to bring warmth and joy to the holiday season. Happy knitting!


