Emberfall Woven Cowl Free Pattern – Knitted Cable & Lattice Neck Warmer

Wrap Yourself in Warmth: The Emberfall Woven Cowl
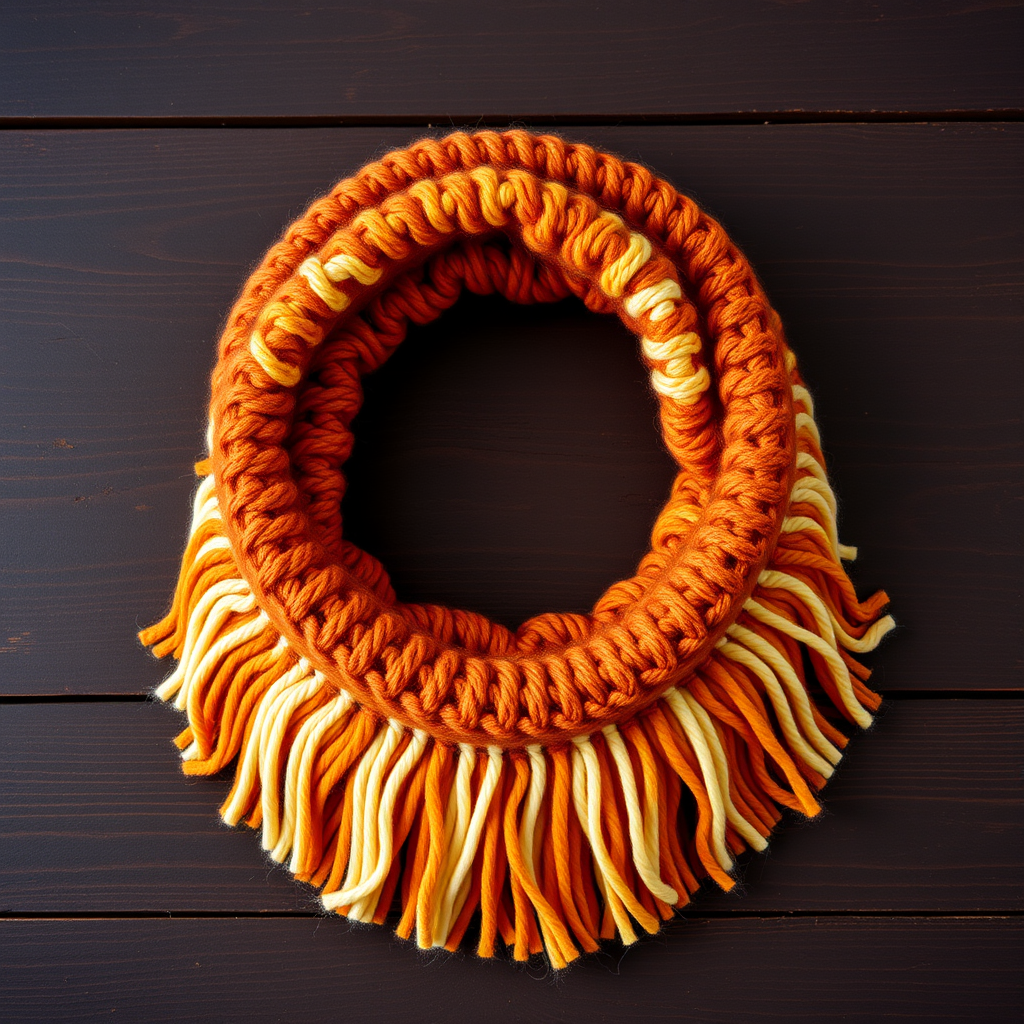
There's something magical about wrapping a hand-knit cowl around your neck on a crisp autumn day. The Emberfall Woven Cowl captures that feeling perfectly—a richly textured neck warmer that blends classic cables with a modern lattice stitch. This pattern creates a stunning, reversible piece that adds a touch of handmade luxury to any winter outfit. Whether you're a seasoned knitter looking for a satisfying project or a confident beginner ready to expand your skills, this cowl delivers both beauty and function. The deep, autumnal colorway evokes the warm glow of embers, making every stitch feel like a cozy embrace.
In this comprehensive guide, I'll walk you through everything you need to know—from gathering materials to mastering the special stitches—so you can create your very own Emberfall Woven Cowl. Let's dive in!
Materials Needed
Before you begin, gather the following supplies. Having everything ready will make your knitting session smooth and enjoyable.
Yarn
- Weight: Worsted weight yarn (approx. 250-300 yards)
- Colorway: A deep autumnal shade such as burnt orange, rust, or burgundy—choose a color that makes your heart sing!
Needles & Tools
- US Size 8 (5.0 mm) 16-inch circular knitting needle—the circular needle is essential for working in the round
- Cable needle—for creating those beautiful cable twists
- Stitch marker—to mark the beginning of your round
- Tapestry needle—for weaving in ends
- Scissors
Gauge
18 stitches and 24 rows = 4 inches in stockinette stitch. Be sure to check your gauge before starting to ensure your cowl comes out the perfect size. If you're getting more stitches per inch, try a larger needle; if fewer, go down a size.
Step-by-Step Instructions
Now, let's get to the fun part! Follow these detailed instructions carefully, and you'll have a gorgeous cowl in no time.
Finished Measurements
Your finished cowl will be approximately 24 inches in circumference and 10 inches tall—the perfect size to wrap around your neck once or twice.
Special Stitches
Before you start, familiarize yourself with these four special stitches. Practice them on a swatch first if you're new to cabling—it'll make the pattern much easier!
- C4B (Cable 4 Back): Slip 2 stitches to cable needle, hold to back of work, knit 2 from left needle, then knit 2 from cable needle.
- C4F (Cable 4 Front): Slip 2 stitches to cable needle, hold to front of work, knit 2 from left needle, then knit 2 from cable needle.
- LT (Left Twist): Knit 2 together through the back loop, but do not slip them off the left needle. Then knit the first stitch again, and slip both stitches off together.
- RT (Right Twist): Knit 2 together (through the front loop), but do not slip them off the left needle. Then knit the first stitch again, and slip both stitches off together.
Getting Started: Cast On & Ribbing
Step 1: Cast On
Cast on 108 stitches using your preferred method (long-tail cast on works beautifully here). Place a stitch marker on your right needle to mark the beginning of the round, then join in the round—being very careful not to twist your stitches. This is crucial for a seamless tube!
Step 2: Ribbed Edge (Rounds 1-4)
Work the following 4 rounds to create a stretchy, polished edge:
Round 1: *K2, P2* repeat to end of round.
Round 2: *K2, P2* repeat to end.
Round 3: *K2, P2* repeat to end.
Round 4: *K2, P2* repeat to end.
This ribbing will form the bottom edge of your cowl, keeping it snug and comfortable.
Setting Up the Pattern (Round 5)
Step 3: Setup Round
Round 5: *K6, P2, K2, P2, K6, P2, K2, P2* repeat to end of round.
This setup round establishes the rhythm of your pattern. You'll notice it creates a repeating sequence of 6 knit stitches (for the cables) and 2 knit/2 purl sections (for the lattice twists). Take a moment to admire your work—the pattern is beginning to emerge!
Working the Main Pattern (Rounds 6-14)
Now comes the heart of the pattern. You'll repeat Rounds 6-14 until your cowl measures approximately 9 inches from the cast-on edge. Let's break down each round:
Round 6: *C4B, K2, P2, RT, P2, C4F, K2, P2, LT, P2* repeat to end.
Tip: The C4B and C4F create the cable twists, while RT and LT form the lattice. Take your time with the cable needle—it gets easier with practice!
Round 7: *K6, P2, K2, P2, K6, P2, K2, P2* repeat to end.
Tip: This is a "rest" round—no special stitches, just knit and purl. Enjoy the rhythm!
Round 8: *K6, P2, LT, P2, K6, P2, RT, P2* repeat to end.
Tip: Notice how the twists alternate between LT and RT. This creates the woven lattice effect.
Round 9: *K6, P2, K2, P2, K6, P2, K2, P2* repeat to end.
Round 10: *C4F, K2, P2, RT, P2, C4B, K2, P2, LT, P2* repeat to end.
Tip: The cables now twist in the opposite direction (C4F instead of C4B), creating that beautiful braided effect.
Round 11: *K6, P2, K2, P2, K6, P2, K2, P2* repeat to end.
Round 12: *K6, P2, LT, P2, K6, P2, RT, P2* repeat to end.
Rounds 13-14: *K6, P2, K2, P2, K6, P2, K2, P2* repeat to end.
Step 4: Repeat the Pattern
Continue repeating Rounds 6-14 until your work measures approximately 9 inches from the cast-on edge. Important: End with either Round 9 or Round 13 (a plain round) so your pattern is at a natural stopping point before the finishing ribbing.
Finishing Touches
Step 5: Top Ribbing
Work the following 4 rounds to mirror the bottom edge:
Round 1: *K2, P2* repeat to end.
Round 2: *K2, P2* repeat to end.
Round 3: *K2, P2* repeat to end.
Round 4: *K2, P2* repeat to end.
Step 6: Bind Off
Bind off loosely in pattern (knit the knits and purl the purls). A loose bind-off is essential here—if it's too tight, the top edge won't stretch over your head comfortably. If you tend to bind off tightly, consider going up a needle size just for the bind-off row.
Step 7: Weave in Ends
Using your tapestry needle, weave in all loose ends carefully. Take your time—neat ends make for a professional-looking finish.
Step 8: Block Your Cowl
This step is crucial for showcasing your beautiful stitches! Gently wet-block your cowl by soaking it in lukewarm water with a drop of wool wash, then pressing out excess water (never wring!). Lay it flat on a towel, shape it into a circle, and let it dry completely. Blocking will open up the cables and lattice stitches, giving your cowl that polished, dimensional look.
Wear Your Creation with Pride
Once your Emberfall Woven Cowl is dry, it's ready to wear! The thick, plush fabric will keep you cozy through the coldest days, while the intricate cable and lattice pattern adds a touch of artisanal elegance to any outfit. Because the pattern is reversible, you can wear it either way—each side offers a slightly different texture.
This pattern is perfect for gifting, too. Imagine the joy on a loved one's face when they unwrap a handcrafted cowl in their favorite autumn shade. And because it works up relatively quickly in worsted weight yarn, you might find yourself making several for the whole family!
I'd love to see your finished Emberfall Woven Cowls! Share your photos on social media with the hashtag #EmberfallCowl, and don't hesitate to reach out if you have any questions along the way. Happy knitting, and may your winter be filled with warmth and beautiful stitches!