Blueberry Crumble Cowl Free Pattern – Knitted Textured Berry Stitch Neck Warmer
Blueberry Crumble Cowl: A Cozy Knitted Neck Warmer with Berry Stitch Texture
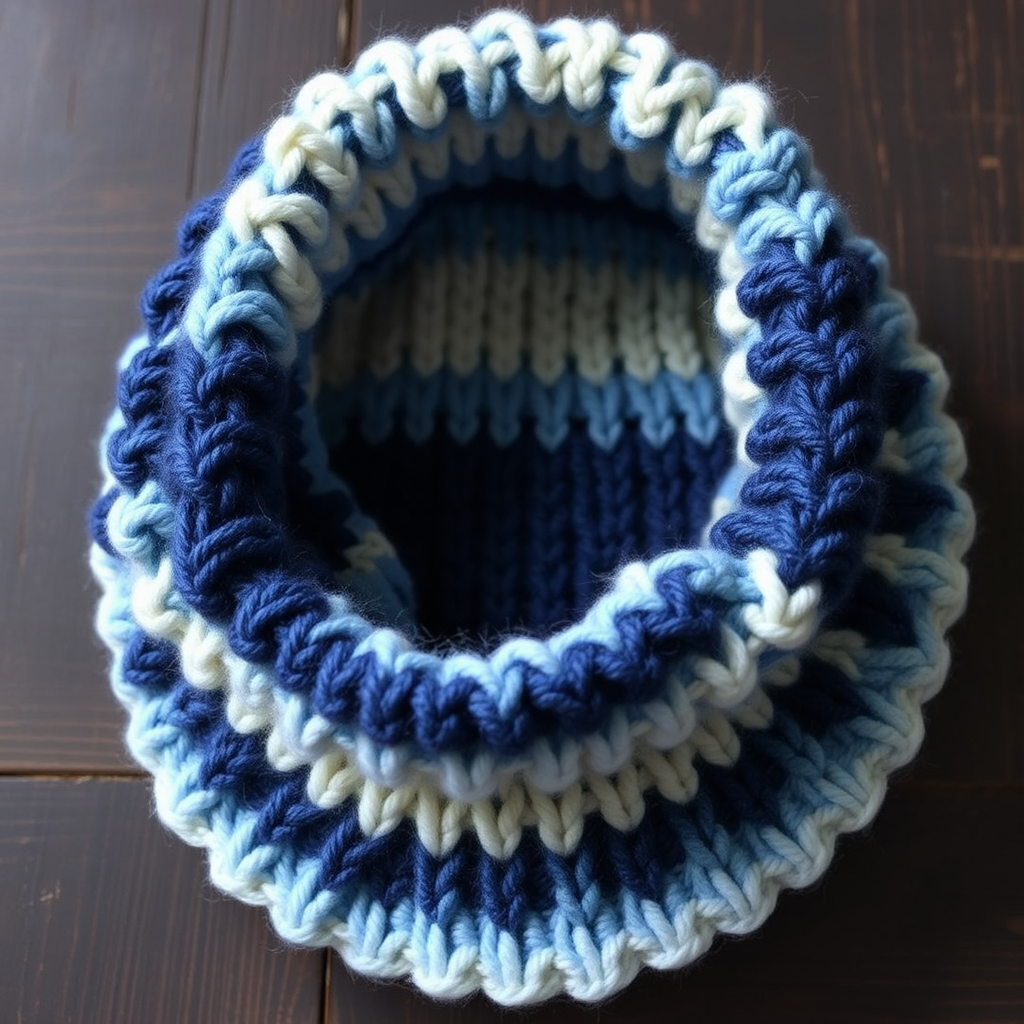
Wrap yourself in the warmth of a hand-knitted cowl that captures the sweet-tart essence of a blueberry crumble. This stunning accessory features a unique berry stitch texture that creates bumpy, tactile clusters reminiscent of fresh blueberries, while a soft gradient of deep indigo, sky blue, and creamy off-white transitions beautifully from dark to light. Perfect for chilly days, this seamless tube cowl is both stylish and functional—thick, plush, and designed to keep your neck cozy all winter long.
Whether you're a seasoned knitter looking for a satisfying textured project or a beginner ready to expand your skills, this pattern offers clear instructions and a rewarding result. The berry stitch is surprisingly simple once you get the rhythm, and the color changes add visual interest without complicated techniques. Let's dive into creating your very own Blueberry Crumble Cowl!
Materials Needed
Before you begin, gather the following supplies:
- Yarn: Worsted weight yarn in 3 colors:
- Color A: Deep Blue (approximately 70g)
- Color B: Light Blue (approximately 70g)
- Color C: Cream (approximately 60g)
- Needle: US 8 (5mm) circular knitting needle, 16-inch length
- Gauge: 18 stitches and 24 rows = 4 inches in stockinette stitch
- Notions: Stitch marker, tapestry needle for weaving in ends
Finished Measurements & Abbreviations
Finished Measurements: Approximately 9 inches wide (height) and 24 inches circumference (unstretched). The cowl will stretch slightly when worn, providing a comfortable fit around the neck.
Abbreviations:
- CO: Cast on
- K: Knit
- P: Purl
- K2tog: Knit two stitches together
- YO: Yarn over
- Sl: Slip stitch
- Rep: Repeat
- St(s): Stitch(es)
- P3tog: Purl three stitches together
Pattern Notes:
- This cowl is worked in the round on a circular needle, creating a seamless tube.
- The berry stitch pattern creates a bumpy, textured surface that resembles clusters of blueberries.
- Color changes are worked as indicated to create a beautiful gradient effect from dark to light.
- When instructed to "K1, P1, K1 into next st," you are working into the same stitch three times—this increases your stitch count by 2 stitches, which will be balanced by the P3tog decrease.
Step-by-Step Instructions
Ribbing: The Foundation
Step 1: With Color A (Deep Blue), CO 120 stitches onto your circular needle.
Step 2: Place a stitch marker to mark the beginning of the round. Join in the round, being extremely careful not to twist your stitches. The cast-on edge should form a clean circle without any twists.
Step 3: Work the ribbing pattern:
- Rounds 1-6: *K2, P2*; repeat from * to * around. This creates a classic 2x2 ribbing that will form a snug, stretchy edge at the bottom of your cowl.
Berry Stitch Pattern: Creating the Texture
Step 4: Switch to Color B (Light Blue) by simply starting to knit with the new color. Do not cut Color A yet—you'll need it later for the final ribbing.
Step 5: Begin the berry stitch pattern:
- Round 7: *K1, P1, K1 into next st (this increases 2 stitches, creating the base of your berry bump), then P3tog (purl three stitches together, decreasing 2 stitches)*; repeat from * to * around. This round creates the first set of berry bumps.
- Round 8: Knit all stitches around. This plain knit round allows the bumps to settle and creates a smooth background between the textured rows.
- Round 9: *P3tog (purl three stitches together), then K1, P1, K1 into next st*; repeat from * to * around. Notice how this is offset from Round 7—the bumps are staggered for a more organic, berry-like appearance.
- Round 10: Knit all stitches around.
- Rounds 11-12: Repeat Rounds 7-8. This completes the first section of berry stitches in Color B.
Step 6: Switch to Color C (Cream) for the middle section:
- Rounds 13-14: Repeat Rounds 7-8 (K1, P1, K1 into next st, P3tog, then knit all stitches).
- Rounds 15-16: Repeat Rounds 9-10 (P3tog, K1, P1, K1 into next st, then knit all stitches).
Step 7: Switch back to Color B (Light Blue) for the next section:
- Rounds 17-18: Repeat Rounds 7-8.
- Rounds 19-20: Repeat Rounds 9-10.
Step 8: Switch back to Color A (Deep Blue) for the final textured section:
- Rounds 21-22: Repeat Rounds 7-8.
- Rounds 23-24: Repeat Rounds 9-10.
Final Ribbing: The Finishing Touch
Step 9: Work the top ribbing to match the bottom:
- Rounds 25-30: *K2, P2*; repeat from * to * around. This creates a matching ribbed edge at the top of your cowl, providing a polished, symmetrical finish.
Step 10: Bind off loosely in pattern. This means you'll knit the knit stitches and purl the purl stitches as you bind off, maintaining the ribbing pattern. Be sure to bind off loosely so the edge remains stretchy and comfortable when worn.
Finishing: The Final Touches
Step 11: Cut your yarn, leaving a 6-inch tail. Thread the tail through the tapestry needle and pull it through the last stitch to secure.
Step 12: Weave in all loose ends carefully using your tapestry needle. Take your time to weave each end through the wrong side of the fabric, going back and forth through several stitches to ensure they're secure and won't unravel with wear.
Step 13: Block your cowl gently. To block, soak the cowl in lukewarm water with a small amount of gentle wool wash for about 15-20 minutes. Gently squeeze out excess water (never wring or twist), then lay flat on a towel and roll up to remove additional moisture. Shape the cowl to its intended dimensions and allow it to dry completely. Blocking will even out the berry stitches and give your cowl a professional, polished appearance.
Tips for Success
- Keep your tension consistent when working the berry stitch. The K1, P1, K1 into the same stitch can feel tight at first—try to keep these stitches loose enough to work into easily on the next round.
- Use a stitch marker to track the beginning of each round. This is especially helpful when working the offset berry pattern.
- Don't worry if the first few rounds look uneven—the blocking process will smooth everything out beautifully.
- Carry your yarn colors up when switching between sections rather than cutting each time. This reduces the number of ends to weave in and keeps your work tidy.
Your Blueberry Crumble Cowl is now complete! This cozy, textured accessory will keep you warm and stylish all season long. The gradient from deep indigo through sky blue to creamy white creates a beautiful ombré effect that pairs beautifully with both casual and dressy outfits. Wear it wrapped snugly around your neck, or let it drape loosely for a more relaxed look.
This pattern is perfect for gift-giving, too—imagine the delight of someone receiving a hand-knitted cowl with such a unique, tactile texture. The berry stitch is a conversation starter, and the thoughtful color gradient shows real craftsmanship.
Happy knitting, and enjoy your beautiful new Blueberry Crumble Cowl!