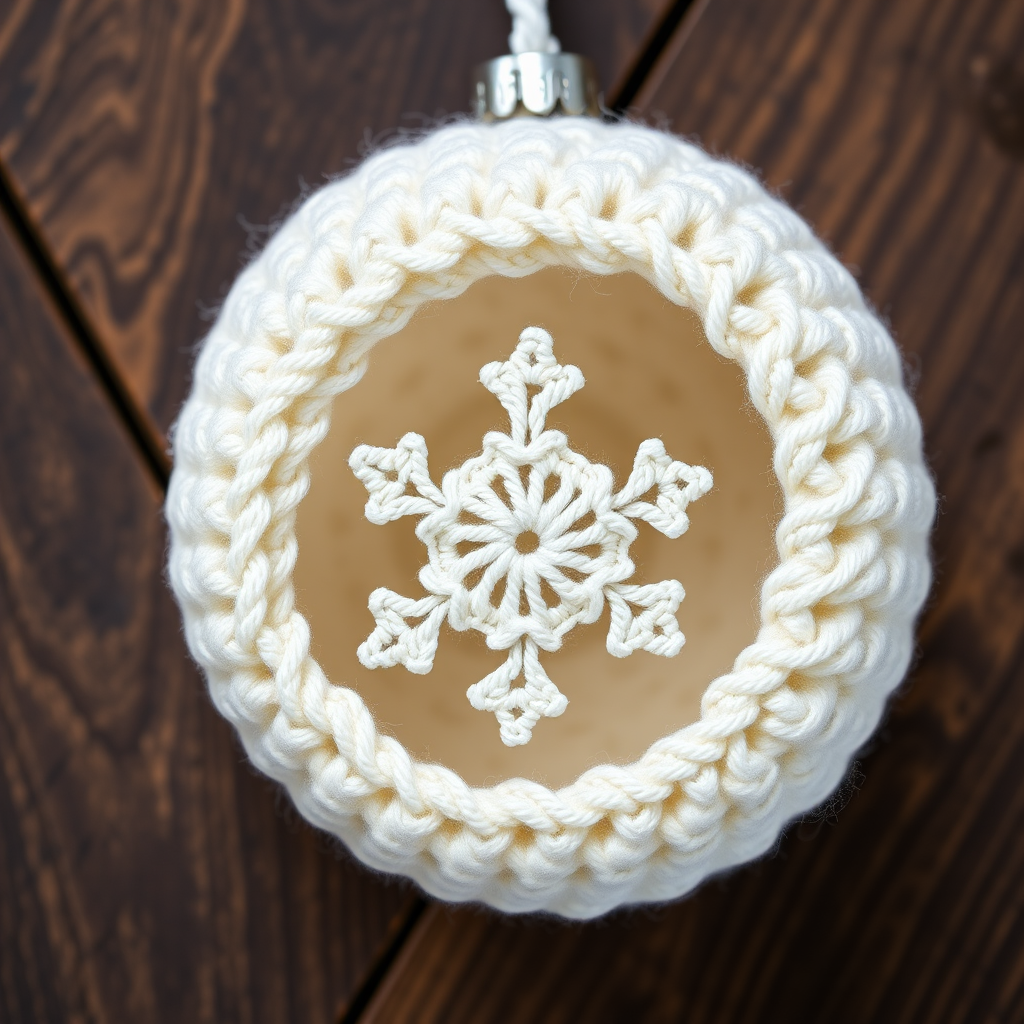
Celestial Snowflake Medallion Free Pattern

Celestial Snowflake Medallion: A Free Crochet Ornament Pattern
Elevate your holiday decor this year with a touch of handmade celestial charm. This elegant crocheted snowflake medallion features intricate openwork and a beautifully defined center, creating a stunning ornament that looks far more complex than its quick two-round construction suggests. Whether you're adorning your Christmas tree, adding a special touch to gift wrap, or creating a handmade gift for a loved one, this pattern is the perfect way to add a personal, artistic flair to the season. With just a small amount of yarn and a single afternoon, you can create a delicate, star-like decoration that captures the quiet magic of a winter night.
This pattern is designed with beginners in mind, focusing on basic stitches and clear construction. The result is a professional-looking, stiffened medallion that holds its shape perfectly, ready to be hung and admired year after year. Let's get started on crafting your own celestial snowflake.
Materials Needed
Before you begin, gather the following supplies. This project is wonderfully portable and requires minimal materials, making it a perfect on-the-go craft.
- Yarn: Worsted weight cotton yarn in ivory, silver, or icy blue. You will need approximately 10 yards per ornament. Cotton is recommended as it holds stiffening well and provides excellent stitch definition.
- Crochet Hook: Size G/6 (4.0 mm) crochet hook. This size creates a tight, firm fabric that is essential for the snowflake to hold its shape.
- Stitch Marker: To help you keep track of your rounds.
- Yarn Needle: For weaving in the ends securely.
- Stiffening Solution: White craft glue and water (1:1 ratio) or a commercial fabric stiffener.
- Pins and Flat Surface: For shaping and drying the snowflake.
- Optional: Small jump ring or thread loop for hanging.
Gauge: Gauge is not critical for this project. The most important thing is to maintain a tight, consistent tension to create a firm fabric that will hold its shape after stiffening.
Step-by-Step Instructions
This pattern is worked in two main rounds, followed by a final round to create the points. Follow along carefully, and you'll have a beautiful snowflake in no time.
Round 1: The Center Core
We begin by creating the solid, tight center of the snowflake.
- Make a Magic Ring: Create a magic ring (also known as a magic circle). This technique allows you to pull the center closed tightly, leaving no hole.
- Chain 3: This chain-3 counts as your first double crochet (dc) stitch for this round.
- Work 11 Double Crochets: Work 11 more double crochet (dc) stitches into the center of the magic ring. You should now have a total of 12 double crochet stitches, including the initial chain-3.
- Close the Ring: Pull the tail of the magic ring tightly to close the center hole completely.
- Join the Round: Join with a slip stitch (sl st) to the top of the beginning chain-3. This secures the round. (You should have 12 dc stitches).
Round 2: Creating the Loops
This round forms the base structure for the snowflake's points.
- Begin the Round: Chain 1 (ch 1). This does not count as a stitch.
- Single Crochet: Work a single crochet (sc) into the same stitch where you joined. This is your first stitch of the round.
- Create the First Loop: Chain 5 (ch 5).
- Skip and Single Crochet: Skip the next double crochet from the previous round, and work a single crochet (sc) into the following double crochet.
- Repeat: Repeat the pattern of *ch 5, skip next dc, sc in next dc* around the entire circle. You will do this a total of 6 times.
- Finish the Round: After your 6th chain-5 loop, skip the last double crochet and join with a slip stitch (sl st) to the very first single crochet of this round. You should now have 6 chain-5 loops around the center.
Round 3: Forming the Points
Now we will work the intricate points of the snowflake into each of the chain-5 loops created in Round 2.
- Position Your Hook: Slip stitch (sl st) into the next chain-5 loop to move your yarn into position.
- Start Point A: In this same chain-5 loop, you will create the first point. Chain 1 (ch 1), then work a single crochet (sc) into the same loop.
- Build the Point: In the *same* chain-5 loop, work the following sequence:
- Chain 3 (ch 3).
- Double crochet (dc) into the same loop.
- Chain 3 (ch 3).
- Treble crochet (tr) into the same loop. This is the tallest point of the snowflake.
- Chain 3 (ch 3).
- Double crochet (dc) into the same loop.
- Chain 3 (ch 3).
- Single crochet (sc) into the same loop. This completes one full point.
- Repeat for All Points: Repeat this entire sequence (Point A) in each of the remaining 5 chain-5 loops. You will have a total of 6 completed points.
- Join and Finish: After completing the last point, join with a slip stitch (sl st) to the very first single crochet of this round. Fasten off your yarn and weave in all loose ends securely with your yarn needle.
Stiffening and Finishing
To ensure your snowflake holds its beautiful, crisp shape, stiffening is essential.
- Prepare the Stiffening Solution: In a disposable container, mix a solution of 1 part white craft glue to 1 part water. Alternatively, you can use a commercial fabric stiffener according to the manufacturer's instructions.
- Soak the Snowflake: Gently submerge your crocheted snowflake in the solution, ensuring it is completely saturated. Allow it to soak for a few minutes.
- Remove Excess: Carefully lift the snowflake out of the solution and gently squeeze out any excess liquid. Do not wring or twist, as this can distort the shape.
- Shape and Pin: Place the snowflake on a flat, protected surface (like a piece of wax paper or a foam board). Gently shape it into a perfect star, pulling the points outward. Use rust-proof pins to secure each point and the center, ensuring the shape is symmetrical and the loops are open.
- Dry Completely: Allow the snowflake to dry completely, which may take several hours or overnight. Once dry, it will be stiff and hold its shape.
- Add a Hanger: Attach a small jump ring to one of the points, or thread a piece of ribbon or thread through a loop for hanging.
Your celestial snowflake medallion is now complete! These beautiful ornaments make wonderful handmade gifts, thoughtful gift toppers, or a stunning addition to your own holiday tree. Enjoy the process and the beautiful result of your crafting.