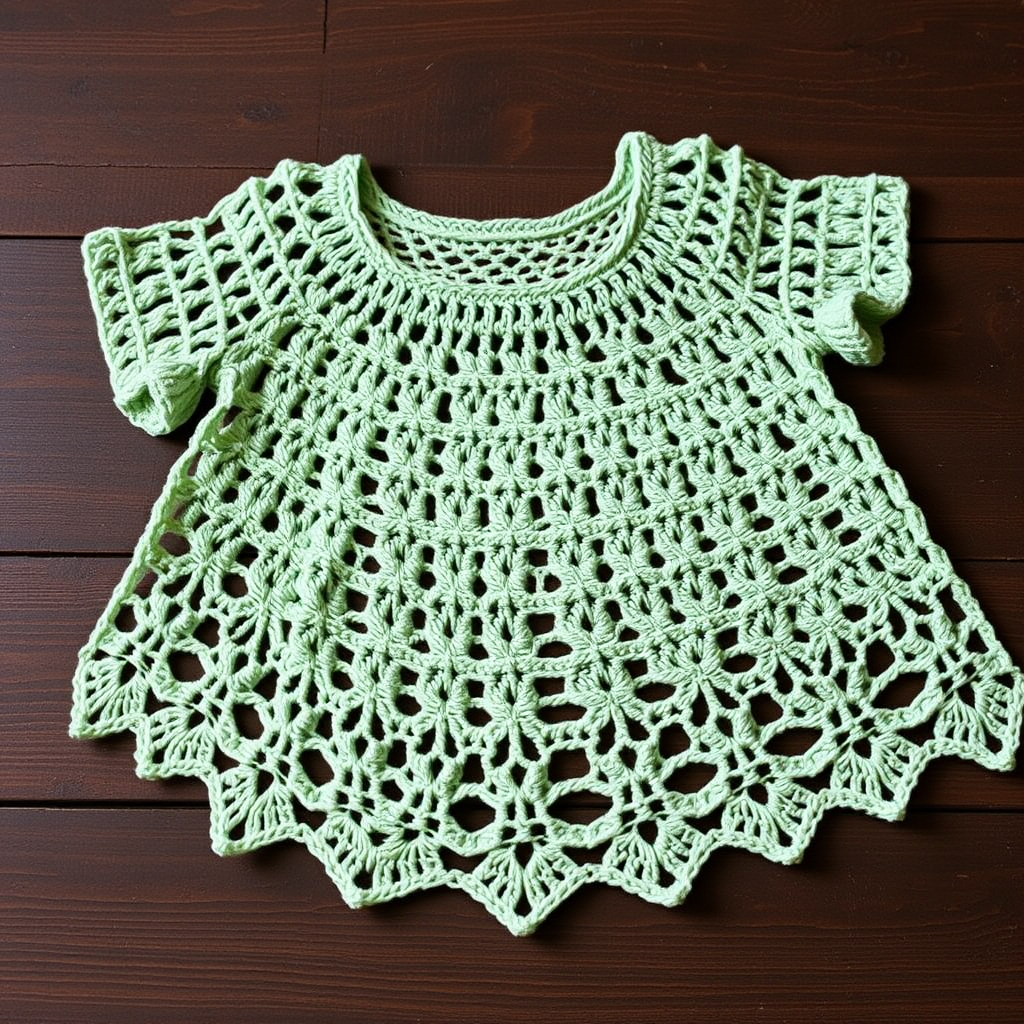
Boho Breeze Crochet Crop Top Free Pattern
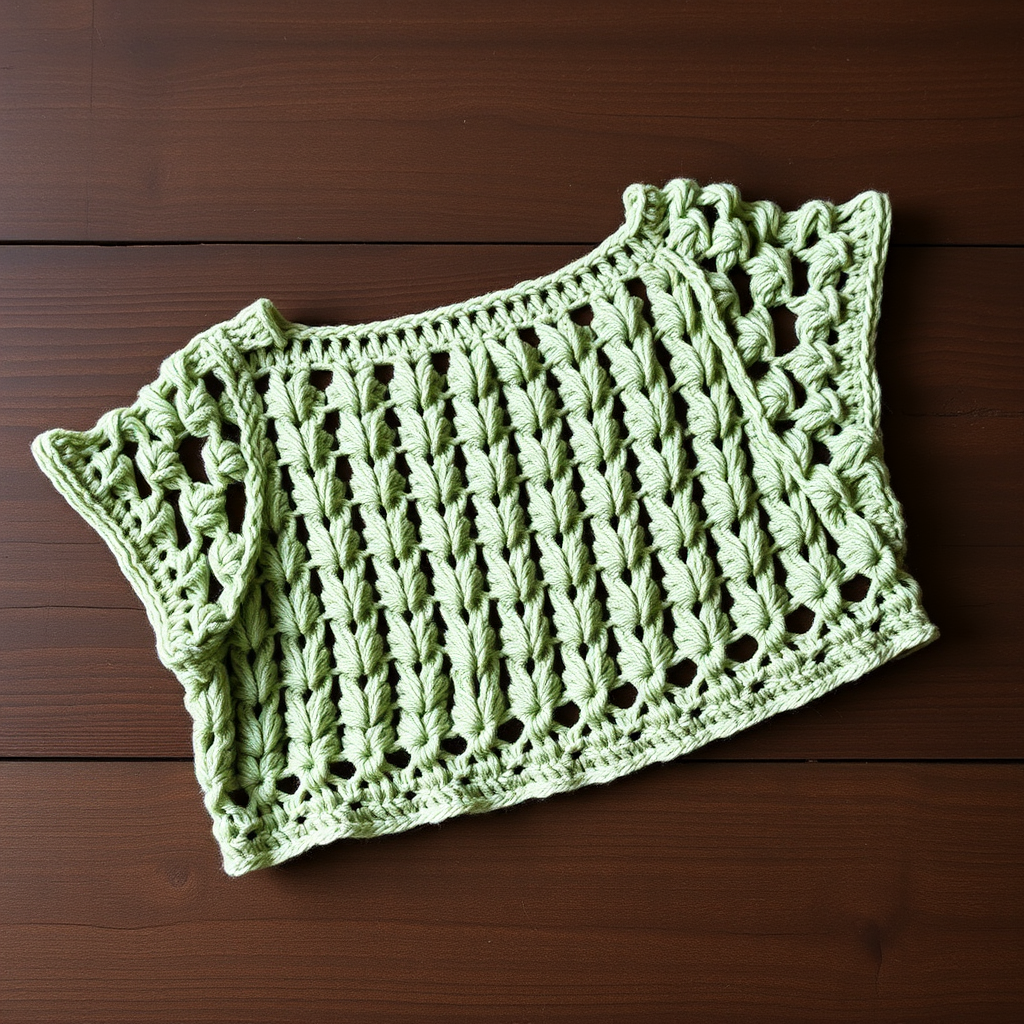
Boho Breeze Crochet Crop Top: A Free Beginner-Friendly Pattern
Are you ready to create a stunning, wearable piece of art that screams summer? Look no further than the Boho Breeze Crochet Crop Top. This airy, textured top is the perfect addition to your warm-weather wardrobe, featuring a unique and beautiful shell stitch pattern that drapes elegantly over the body. Crafted in soft, breathable cotton, it’s a stylish staple you’ll reach for all season long. Whether you're heading to the beach, a festival, or just enjoying a sunny day, this top adds a touch of bohemian charm to any outfit.
This pattern is designed with the beginner in mind, using basic stitches to create a professional-looking result. The step-by-step instructions below are detailed and comprehensive, ensuring you can recreate this exact item at home without any confusion. Let's pick up your hook and get started on your new favorite summer top!
Materials Needed
Before you begin, gather the following materials to ensure a smooth crocheting experience. The quality of your materials will greatly affect the final look and feel of your top.
- Yarn: Worsted weight cotton yarn (e.g., Lion Brand 24/7 Cotton) in your color of choice. The sample uses a beautiful Sage Green. You will need approximately 400-600 yards depending on the size you are making.
- Crochet Hook: A 5.5 mm (I/9) crochet hook is required to achieve the correct gauge.
- Other Tools: A yarn needle for weaving in ends, a pair of scissors, and a tape measure.
Gauge: 16 double crochet (dc) x 8 rows = 4 inches (blocked). It is crucial to check your gauge to ensure your top fits correctly. If your swatch is too small, try a larger hook; if it's too large, try a smaller hook.
Sizes and Abbreviations
This pattern is written for multiple sizes to help you achieve the perfect fit.
- Sizes: XS (S, M, L, XL, XXL)
- Finished Bust: 32 (36, 40, 44, 48, 52) inches.
Familiarize yourself with these standard crochet abbreviations before you start:
- ch: chain
- sc: single crochet
- dc: double crochet
- sl st: slip stitch
- sk: skip
- st(s): stitch(es)
- shell: (2 dc, ch 1, 2 dc) all worked into the same stitch.
Step-by-Step Instructions
Follow these instructions carefully. The top is worked in two main pieces (front and back) from the bottom up, then seamed together. Remember to block your pieces before seaming for the best drape and finish.
Getting Started: The Front Panel
Row 1: Chain 82 (90, 98, 106, 114, 122). Double crochet (dc) in the 4th chain from your hook and in each chain across. Turn your work. You should now have 80 (88, 96, 104, 112, 120) dc stitches.
Row 2: Chain 3 (counts as your first dc), dc in the next 2 dc. *Skip 2 dc, work a shell (2 dc, ch 1, 2 dc) in the next dc, skip 2 dc, dc in the next 3 dc.* Repeat from * to * across the row, ending with a dc in the very last dc. Turn.
Row 3: Chain 3, dc in the next 2 dc. *Chain 1, work a shell in the ch-1 space of the shell from the row below, chain 1, dc in the next 3 dc.* Repeat from * to * across the row, ending with a dc in the last dc. Turn.
Repeat Row 3 until your piece measures 8 (8.5, 9, 9.5, 10, 10.5) inches from the beginning, ending with a wrong-side row. This forms the main body of the front panel.
Shaping the Armholes (Front)
Now we will create the openings for your arms.
Next Row (Right Side): Slip stitch (sl st) over the first 4 (5, 6, 7, 8, 9) stitches. Chain 3, and continue working in your established pattern across the row until you have 4 (5, 6, 7, 8, 9) stitches remaining. Turn your work, leaving these last stitches unworked. You will now have 72 (78, 84, 90, 96, 102) active stitches.
Continue working in the pattern (without any further decreases at the edges) until the armhole measures 6 (6.5, 7, 7.5, 8, 8.5) inches from the underarm. Ensure you end with a wrong-side row.
Shaping the Neckline (Front)
This step creates the front neckline dip.
Next Row (Right Side): Work across the first 24 (26, 28, 30, 32, 34) stitches in your pattern, then turn, leaving the center stitches unworked for the neck opening.
Now, decrease 1 stitch at the neck edge on every row, 3 times total. This means you will skip the first stitch of the row at the neck edge. After these decreases, work even (without decreasing) until the armhole measures 7 (7.5, 8, 8.5, 9, 9.5) inches. Fasten off your yarn.
Return to the center of the front panel and attach your yarn to the other side of the neckline. Repeat the same process to shape the other side of the neckline, working in the pattern.
Creating the Back Panel
Work the back panel exactly the same as the front panel, but with a key difference in the neckline shaping. The back neckline is higher than the front.
Work the main body and armhole shaping exactly as you did for the front panel. When the armhole measures 5 (5.5, 6, 6.5, 7, 7.5) inches, begin shaping the neckline. Work across the first 24 (26, 28, 30, 32, 34) stitches, turn, and decrease 1 stitch at the neck edge every row 3 times. Work even until the armhole matches the length of the front panel. Fasten off and repeat for the other side of the back neckline.
Finishing and Assembly
This is where your top comes together.
- Blocking: This is a crucial step for a professional finish. Wet or steam block both the front and back panels to the specified measurements. This will even out your stitches and give the cotton yarn a beautiful drape.
- Seaming: Once dry, sew the shoulder seams together, carefully matching the decreases. Then, sew the side seams, leaving 6 (6.5, 7, 7.5, 8, 8.5) inches open at the top of each side for the armholes.
- Edging: To give your top a clean, polished look, we will add a simple border. Join your yarn at the underarm. Work a round of single crochet (sc) evenly around the entire armhole opening. Join with a slip stitch to the first sc. Repeat for the other armhole.
- Neckline and Bottom Edging: In the same manner, work a round of single crochet evenly around the neckline and then around the bottom edge of the top. Join with a slip stitch and fasten off.
- Weave in Ends: Use your yarn needle to carefully weave in all loose ends to secure your work.
Congratulations! You have just completed your very own Boho Breeze Crochet Crop Top. This beautiful, handmade piece is perfect for layering over a swimsuit or pairing with your favorite high-waisted jeans. The airy shell stitch and soft cotton make it an absolute joy to wear. Enjoy your new favorite summer staple, and be proud of the beautiful work you've created!