Aurora Ridge Fingerless Mitts Free Pattern
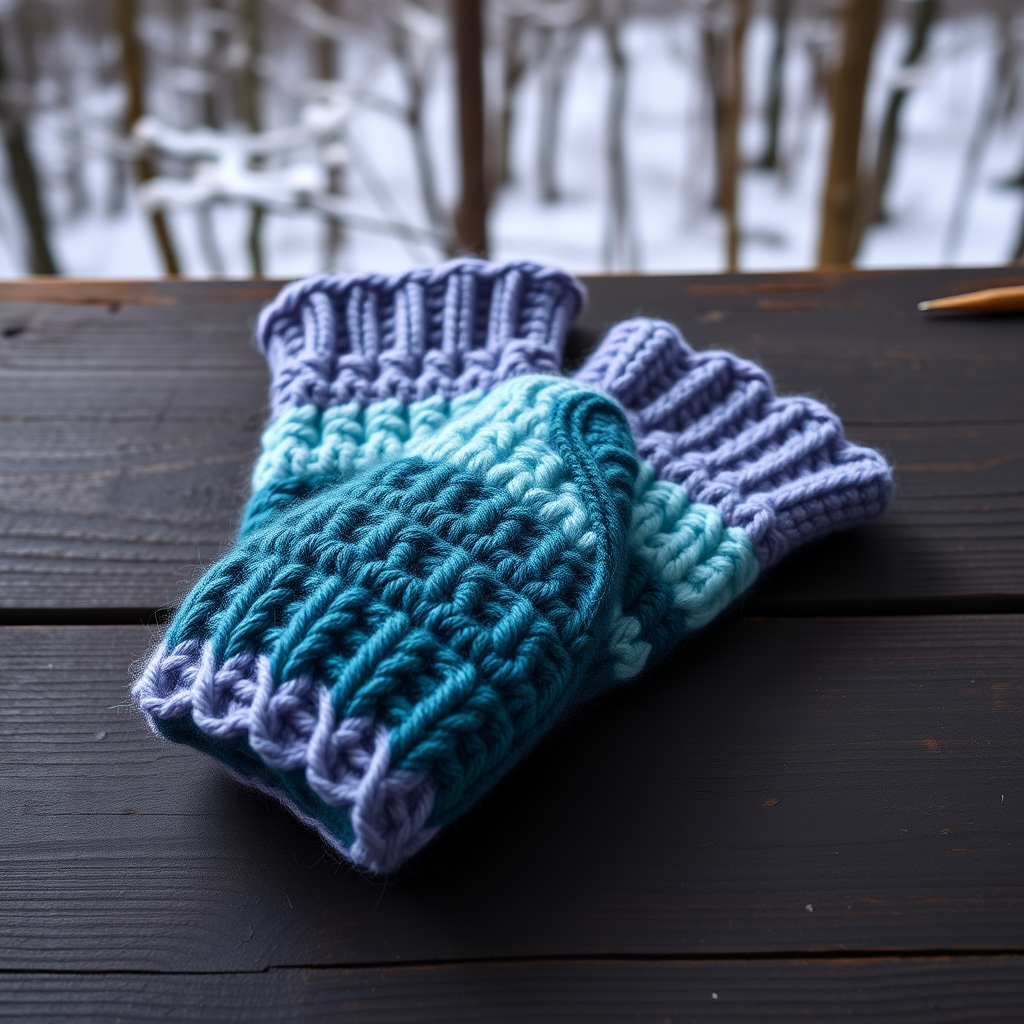
Wrap Your Hands in the Northern Lights: The Aurora Ridge Fingerless Mitts
There’s something magical about slipping your hands into a pair of handcrafted mittens—especially when they’re designed to mimic the ethereal glow of the aurora borealis. The Aurora Ridge Fingerless Mitts are a top-down crochet project that combines a mesmerizing ridge stitch with the practicality of fingerless wear. Whether you’re typing at a chilly desk, sipping coffee on a frosty porch, or looking for a heartfelt handmade gift, this worsted-weight pattern works up quickly and feels incredibly cozy.
This pattern is perfect for confident beginners and intermediate crocheters alike. The construction is straightforward: you’ll start with a ribbed cuff, work the hand in the round, create a thumb opening, and finish with a neat crab stitch border. The result is a pair of mitts that look intricate but are surprisingly simple to make. Let’s dive into everything you need to create your own Aurora Ridge Fingerless Mitts.
Materials Needed
Before you begin, gather the following supplies. This project is wonderfully portable—you only need one skein of yarn and a single hook.
- Yarn: Worsted weight yarn (Category 4), approximately 120–150 yards. A great choice is Lion Brand Wool-Ease in “Aurora” or “Arctic Blue” for a gradient effect, but any soft worsted yarn will work beautifully.
- Crochet Hook: US J/10 (6.0 mm) hook. This size creates a dense, warm fabric that’s perfect for mitts.
- Other Tools: Yarn needle for weaving in ends, scissors, and a tape measure (optional but helpful for checking gauge).
Gauge: 14 stitches and 16 rows = 4 inches (10 cm) in extended single crochet (esc). Gauge is important for fit, so take a moment to make a small swatch before starting. If your gauge is off, adjust your hook size accordingly.
Step-by-Step Instructions
This pattern is worked from the top (cuff) down to the fingers. The key stitch is the extended single crochet (esc), and the ridge texture comes from working in the back loop only (BLO) on alternating rows. Don’t worry if you’ve never tried esc before—it’s simple: yarn over, insert hook, yarn over and pull through, yarn over and pull through two loops, yarn over and pull through the last two loops. It’s like a single crochet with an extra step, giving you a taller, more flexible stitch.
Part 1: The Cuff (Worked Flat, Then Joined)
The cuff is a flat rectangle that you’ll fold and seam to form a tube. This creates the ribbed, stretchy band that hugs your wrist.
Row 1: Chain 10. Work 1 esc into the 2nd chain from your hook, then 1 esc into each chain across. You should have 9 stitches total.
Row 2: Chain 1, turn your work. Work 1 esc into the back loop only (BLO) of each stitch across. (9 stitches)
Repeat Row 2 until the cuff measures approximately 7 inches (17.5 cm) when slightly stretched. This length will wrap comfortably around your wrist. Do not fasten off.
Now, fold the cuff in half so the short ends meet. Use a slip stitch to seam the two short edges together, forming a tube. Turn the tube right side out so the seam is on the inside. You now have a ribbed cuff ready for the hand section.
Part 2: The Hand (Worked in the Round)
Now you’ll work around the top edge of the cuff to create the body of the mitten. This section is worked in continuous rounds, joining each round with a slip stitch.
Round 1: Chain 1. Work 24 esc evenly around the top edge of the cuff. Join with a slip stitch to the first stitch. (24 stitches)
Round 2: Chain 1. Work 1 esc in the BLO of each stitch around. Join with a slip stitch. (24 stitches)
Round 3: Chain 1. Work 1 esc in each stitch around (through both loops this time). Join. (24 stitches)
Rounds 4–5: Repeat Round 2 (BLO) and Round 3 (both loops) alternately. This creates the beautiful ridge texture that mimics the flowing aurora.
Round 6: Chain 1. Work 1 esc in the BLO of each stitch around. Join. (24 stitches)
Rounds 7–10: Repeat Rounds 3–6 once more. This gives you a nice, textured hand section that’s both warm and flexible.
Part 3: Thumb Opening
This is where you’ll create the gap for your thumb. Don’t worry—it’s easier than it sounds.
Round 11: Chain 1. Work 1 esc in the next 18 stitches. Then chain 4, skip the next 4 stitches, and work 1 esc in the last 2 stitches. Join with a slip stitch. (You’ll have 20 esc stitches + a 4-chain space = 24 total stitches)
Round 12: Chain 1. Work 1 esc in each stitch and in each chain around the opening. Join. (24 stitches)
Rounds 13–14: Repeat Round 2 (BLO) and Round 3 (both loops). This closes up the thumb hole and continues the pattern seamlessly.
Part 4: Top Edge and Finishing
The top edge gets a clean, professional finish with a crab stitch border.
Round 15: Chain 1. Work 1 esc in the BLO of each stitch around. Join. (24 stitches)
Round 16: Chain 1. Work 1 reverse single crochet (also called crab stitch) in each stitch around. To do this, insert your hook from front to back in the next stitch to the right, yarn over, pull through, yarn over, and pull through both loops on the hook. This creates a twisted, rope-like edge. Fasten off and weave in your ends.
Part 5: The Thumb (Worked in the Round)
Now you’ll add the thumb tube. Attach your yarn to the corner of the thumb opening with a slip stitch.
Setup Round: Chain 1. Work 10 esc evenly around the opening, making sure to include the chain-4 space. Join with a slip stitch. (10 stitches)
Rounds 1–3: Chain 1. Work 1 esc in each stitch around. Join. (10 stitches)
Round 4: Chain 1. Work 1 reverse single crochet in each stitch around. Fasten off and weave in your ends.
Repeat for the Second Mitten
Simply follow all the same steps to create the second mitten. Since you’re working from the top down, both mittens will be identical—no need to mirror anything.
Final Thoughts and Tips
Your Aurora Ridge Fingerless Mitts are now complete! Here are a few quick tips to ensure success:
- Check your gauge: If your mitts feel too tight or too loose, adjust your hook size. A smaller hook gives a denser fabric; a larger hook gives more drape.
- Blocking: If your edges curl, gently steam block the mitts to relax the yarn.
- Yarn choice: A wool-blend yarn will give you the best stitch definition and warmth. Acrylic works too, but wool has that lovely aurora-like sheen.
These mitts are a joy to make and even more joyful to wear. The ridge stitch catches the light beautifully, and the fingerless design keeps your hands dexterous while staying warm. Whether you keep them for yourself or gift them to someone special, the Aurora Ridge Fingerless Mitts are sure to become a winter favorite.
Happy crocheting, and may your hands always be wrapped in cozy, handmade light!


