Aurora Lace Pullover Free Knitting Pattern – Picot & Eyelet Yoke Sweater
The Aurora Lace Pullover: A Dreamy Knit for Spring & Summer Evenings
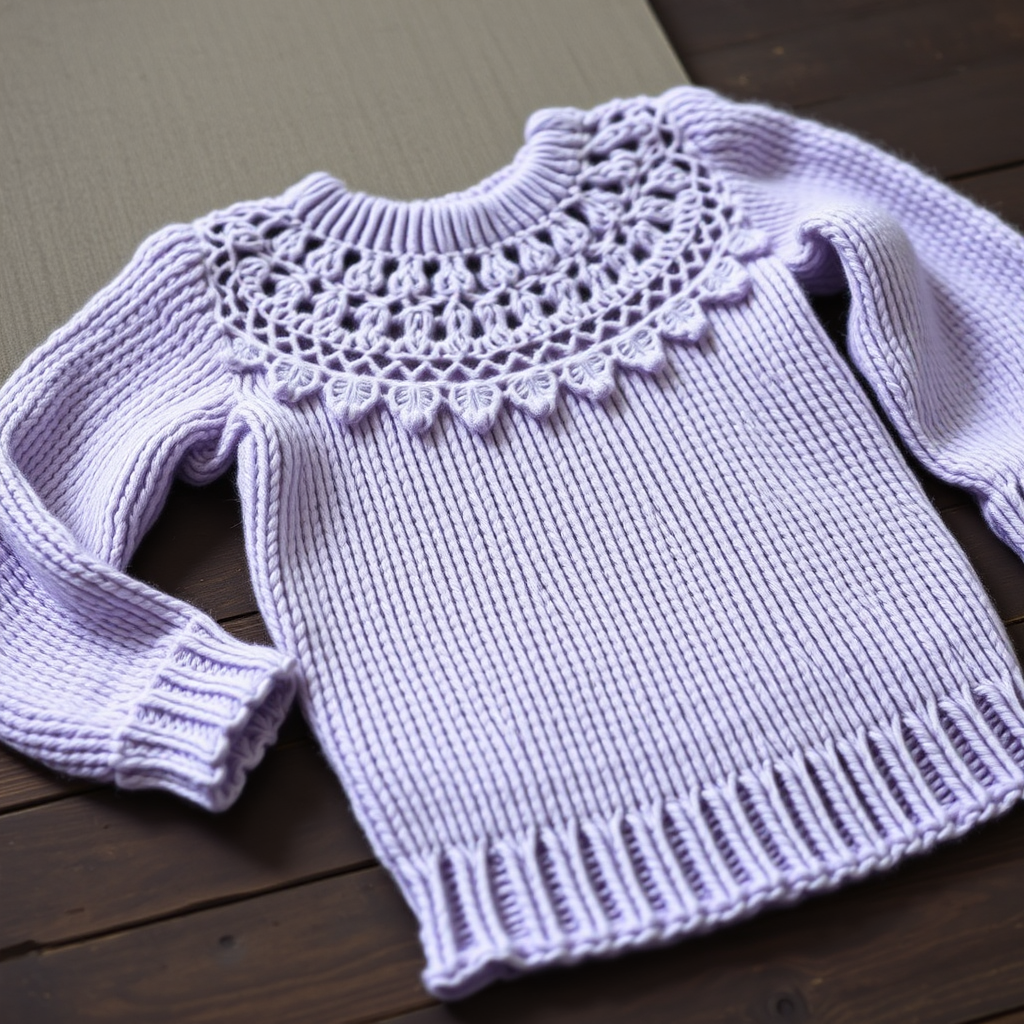
Imagine a sweater that feels like a gentle breeze—light, airy, and adorned with delicate eyelets that catch the light. That's the magic of the Aurora Lace Pullover. This free knitting pattern combines a romantic lace yoke with a smooth, stockinette body, creating a silhouette that's both modern and timeless. Knit in a soft, worsted-weight cotton blend, this pullover is the perfect layering piece for cool spring mornings or balmy summer nights. Whether you're a seasoned knitter looking for a relaxing project or a confident beginner ready for a beautiful challenge, the Aurora Pullover is a joy to create and an even greater joy to wear.
This pattern is designed to be accessible, with clear instructions and a rhythmic lace repeat that becomes meditative once you get into the flow. The result is a relaxed, feminine sweater with a round neckline, slightly tapered sleeves, and a gorgeous picot edging that adds a touch of handmade elegance. Let's dive into everything you need to bring this stunning piece to life.
Materials Needed
Before you begin, gather your supplies. Here's what you'll need to knit the Aurora Lace Pullover:
- Yarn: Worsted weight cotton blend yarn (e.g., Lion Brand Comfy Cotton Blend) – 900 (1000, 1100, 1200, 1300) yards. The sample uses a soft pastel lavender, but any color that speaks to you will work beautifully.
- Needles:
- US 7 (4.5 mm) circular needles in two lengths: 24" (for the body) and 16" (for the yoke and sleeves).
- US 6 (4.0 mm) circular needles (in the same lengths) for the ribbing.
- Notions: Stitch markers (including one unique marker for the beginning of the round), stitch holders or waste yarn for the sleeves, a tapestry needle for weaving in ends, and blocking pins.
Gauge: 20 stitches and 28 rows = 4 inches in stockinette stitch on US 7 needles (blocked). Getting the correct gauge is crucial for the perfect fit, so take the time to knit a swatch!
Step-by-Step Instructions
This pattern is worked top-down, starting with the yoke and finishing with the body and sleeves. Follow these detailed instructions carefully, and you'll have a beautiful sweater in no time.
Sizes & Measurements
This pattern is written for sizes XS (S, M, L, XL). The finished bust measurements are: 32 (36, 40, 44, 48) inches. Choose the size that best matches your desired ease. All instructions are written with the smallest size first, with larger sizes in parentheses.
Abbreviations
k = knit, p = purl, yo = yarn over, k2tog = knit two together, ssk = slip slip knit, pm = place marker, sm = slip marker, rnd = round, RS = right side, WS = wrong side.
Special Stitches
Before you start, familiarize yourself with these two special techniques:
Picot Bind-Off: K2, *return these 2 stitches to the left needle, k2tog through the back loop, k1, repeat from * until 1 stitch remains. Cut yarn and pull through the last loop.
Lace Pattern (multiple of 8 + 1): This is worked in the round for the yoke.
- Rnd 1: *K1, yo, ssk, k3, k2tog, yo, repeat from * to last st, k1.
- Rnd 2 and all even rounds: Knit all stitches.
- Rnd 3: *K2, yo, ssk, k1, k2tog, yo, k1, repeat from * to last st, k1.
- Rnd 5: *K3, yo, ssk, k2tog, yo, k2, repeat from * to last st, k1.
- Rnd 7: *K1, k2tog, yo, k1, yo, ssk, k2, repeat from * to last st, k1.
- Rnd 9: *K2, k2tog, yo, k1, yo, ssk, k1, repeat from * to last st, k1.
- Rnd 11: *K3, k2tog, yo, k1, yo, ssk, repeat from * to last st, k1.
- Rnd 12: Knit. Repeat rounds 1-12 for the pattern.
Knitting the Yoke
Using your smaller (US 6) circular needles, cast on 100 (110, 120, 130, 140) stitches. Place a marker and join in the round, being extremely careful not to twist your stitches.
Work in K1, P1 ribbing for 1 inch. This creates a neat, stretchy neckline.
Switch to your larger (US 7) needles. Knit one round, increasing 20 (22, 24, 26, 28) stitches evenly spaced around. You should now have 120 (132, 144, 156, 168) stitches on your needles.
Begin the lace pattern. Work rounds 1-12 of the lace pattern once. Then, continue repeating rounds 1-12, but on every 4th repeat, increase 12 stitches evenly spaced on the last knit round (round 12). This will gradually shape the yoke.
Continue in this manner until the yoke measures 8 (8.5, 9, 9.5, 10) inches from the cast-on edge, ending with a purl round (or a round 12). At this point, you should have approximately 180 (198, 216, 234, 252) stitches.
Dividing for Body and Sleeves
This is the exciting part where your sweater starts to take shape! On the next round, you will separate the sleeves from the body.
Next Round: Knit 26 (29, 32, 35, 38) stitches (this is half the back). Place the next 38 (41, 44, 47, 50) stitches onto a stitch holder or waste yarn (this is the first sleeve). Cast on 6 (8, 10, 12, 14) new stitches for the underarm. Knit 52 (58, 64, 70, 76) stitches (this is the front). Place the next 38 (41, 44, 47, 50) stitches onto a holder (this is the second sleeve). Cast on 6 (8, 10, 12, 14) new stitches for the underarm. Knit the remaining 26 (29, 32, 35, 38) stitches (this is the other half of the back).
Knitting the Body
You will now work only on the body stitches. Continue in stockinette stitch (knit every round) until the body measures 12 (13, 14, 15, 16) inches from the underarm, or 2 inches less than your desired total length.
Switch to your smaller (US 6) needles. Work in K1, P1 ribbing for 1.5 inches. Bind off all stitches using the picot bind-off for a delicate, decorative edge.
Knitting the Sleeves
Place the stitches from one sleeve holder onto your larger (US 7) needles. To close the gap at the underarm, pick up and knit 6 (8, 10, 12, 14) stitches from the cast-on underarm stitches. Place a marker for the beginning of the round and join in the round.
Work in stockinette stitch (knit every round). To shape the sleeve, decrease 2 stitches every 6 rounds by knitting 2 together (k2tog) at the beginning and end of the round. Continue this decrease pattern until the sleeve measures 14 (15, 16, 17, 18) inches from the underarm, or 2 inches less than your desired sleeve length.
Switch to your smaller (US 6) needles. Work in K1, P1 ribbing for 1.5 inches. Bind off using the picot bind-off.
Repeat the entire process for the second sleeve.
Finishing Touches
Weave in all loose ends with your tapestry needle, being sure to secure them well.
The final and most magical step is blocking. This is essential for lace patterns. Soak your sweater in lukewarm water with a gentle wool wash for about 20 minutes. Gently squeeze out the excess water (never wring!). Lay the sweater flat on a clean towel and roll it up to remove more water. Then, lay it out on a blocking mat and pin it to the specified measurements. Pay special attention to the lace yoke, gently stretching and pinning out the eyelets to open them up and showcase the beautiful pattern. Allow it to dry completely.
Once dry, your Aurora Lace Pullover is ready to wear! Enjoy the fruits of your labor—a delicate, airy, and utterly charming sweater that's perfect for your spring and summer wardrobe.