Aurora Borealis Ombre Cowl Free Pattern – Dreamy Gradient Knit Neck Warmer
Wrap Yourself in the Northern Lights: The Aurora Borealis Ombre Cowl
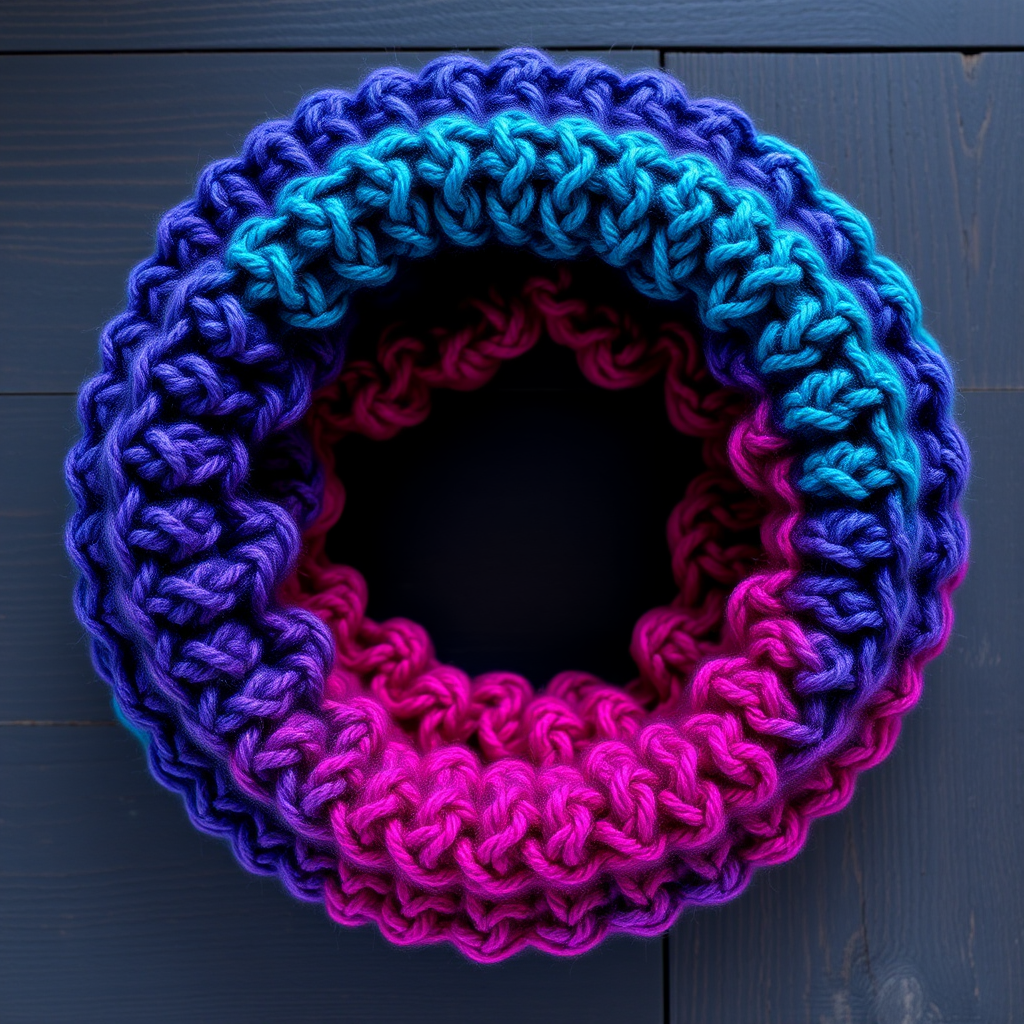
Imagine wrapping yourself in the breathtaking, shifting colors of the night sky. The Aurora Borealis Ombre Cowl brings that magic to life, transitioning from a deep, mysterious teal through a rich midnight purple and finally into a vibrant magenta. This isn't just a winter accessory; it's a statement piece, a wearable work of art that adds a pop of jewel-toned color to any outfit.
Knitted in the round with super bulky yarn, this cowl works up quickly, making it a perfect weekend project. The simple, rhythmic seed stitch creates a dense, pebbled fabric that is as cozy as it is beautiful. Best of all, it's completely reversible, so you can style it any way you like. Whether you're a seasoned knitter looking for a satisfying, quick knit or a confident beginner ready for a first circular project, this pattern is designed for you. Let's get started on creating your own piece of the aurora.
Materials Needed: Gathering Your Stardust
Before we begin our knitting journey, let's gather the essentials. This project uses a chunky yarn and a large needle, ensuring your cowl comes together in no time.
Yarn
- Super Bulky Weight Yarn (Size 6): You will need three colors, approximately 80 yards of each.
- Color A: Deep Teal (for the top edge)
- Color B: Midnight Purple (for the middle)
- Color C: Magenta (for the bottom edge)
Needles & Notions
- US 13 (9 mm) 24-inch Circular Knitting Needle: The circular needle is essential for knitting in the round seamlessly.
- Stitch Marker: To mark the beginning of your rounds.
- Tapestry Needle: For weaving in the yarn tails when you're finished.
- Scissors: For cutting yarn.
Gauge
10 stitches and 14 rows = 4 inches in seed stitch (blocked). While gauge isn't critical for a cowl, matching it will ensure you achieve the same cozy, snug fit. Always take a moment to knit a small swatch to check your tension.
Step-by-Step Instructions: Knitting Your Aurora
This cowl is knitted in the round, creating a seamless, infinity-style loop. The ombre effect is achieved by a simple color-changing sequence. Don't be intimidated—just follow along, and you'll be amazed at what you create.
Abbreviations
- CO: Cast on
- K: Knit
- P: Purl
- St(s): Stitch(es)
- Rnd(s): Round(s)
- Rep: Repeat
Getting Started: The Cast On
1. Cast On: With Color A (Deep Teal), CO 80 sts. Place a stitch marker on your right-hand needle to mark the beginning of the round. Join in the round by knitting the first stitch from your left needle with the working yarn from your right. Be very careful not to twist the stitches on your needle—this is the most common mistake for beginners. The cast-on edge should lie flat around the needle without any twists.
Knitting the Seed Stitch Body
The seed stitch is a simple two-row repeat that creates a beautiful, bumpy texture. We'll alternate the pattern every 4 rounds to keep the fabric balanced and even.
2. Rnds 1-4: Work in seed stitch: *K1, P1; rep from * around. This creates a stretchy, textured edge.
3. Rnds 5-8: Continue in seed stitch, but now work the pattern as: *P1, K1; rep from * around. This alternates the seed stitch pattern to keep it balanced.
First Color Transition: Teal to Purple
4. Color Transition 1: At the beginning of Rnd 9, drop Color A and pick up Color B (Midnight Purple). Do not cut Color A yet – you will carry it up the inside of the work. Simply start knitting with the new color, leaving a 6-inch tail to weave in later.
5. Rnds 9-16: With Color B, continue in seed stitch, alternating the pattern (K1, P1 for 4 rnds, then P1, K1 for 4 rnds) as you did before. This will create 8 rounds of beautiful purple.
Second Color Transition: Purple to Magenta
6. Color Transition 2: At the beginning of Rnd 17, drop Color B and pick up Color C (Magenta). Now you can cut Color A and Color B, leaving a 6-inch tail for each to weave in later.
7. Rnds 17-24: With Color C, continue in seed stitch, alternating the pattern every 4 rnds. You will complete 8 rounds of vibrant magenta.
8. Rnds 25-28: Work the final 4 rnds in seed stitch with Color C. This completes the main body of your cowl.
Binding Off and Finishing Touches
9. Bind Off: Bind off loosely in pattern (K1, P1) to maintain stretchiness. To do this, knit the first stitch, purl the second, then pass the first stitch over the second. Continue this pattern across the round. Cut yarn, leaving a 10-inch tail.
10. Finishing: Weave in all loose ends using a tapestry needle. Thread the needle with a yarn tail and weave it in and out of the stitches on the wrong side of the work, going in one direction for about 2 inches, then reversing direction to secure it. Trim any excess yarn.
11. Blocking: Block the cowl gently by soaking it in cool water for about 15 minutes. Squeeze out the excess water (do not wring), then lay it flat on a towel to dry. This helps even out the stitches and enhance the drape, giving your cowl a professional, polished finish.
Optional Customization
For a more dramatic ombre, you can use 4 or 5 colors and work fewer rounds per color. Adjust the number of rounds accordingly to maintain the total length. You could also experiment with different stitch patterns, like a simple rib or moss stitch, to change the texture.
Size: Finished circumference: 24 inches (stretches to 30 inches), Height: 10 inches.
And there you have it—your very own Aurora Borealis Ombre Cowl! A stunning, handcrafted piece that's as unique as the night sky itself. Wear it with pride, knowing you created something beautiful and warm with your own two hands. Happy knitting!