Aran Isle Enchanted Cable Clutch Free Knitting Pattern
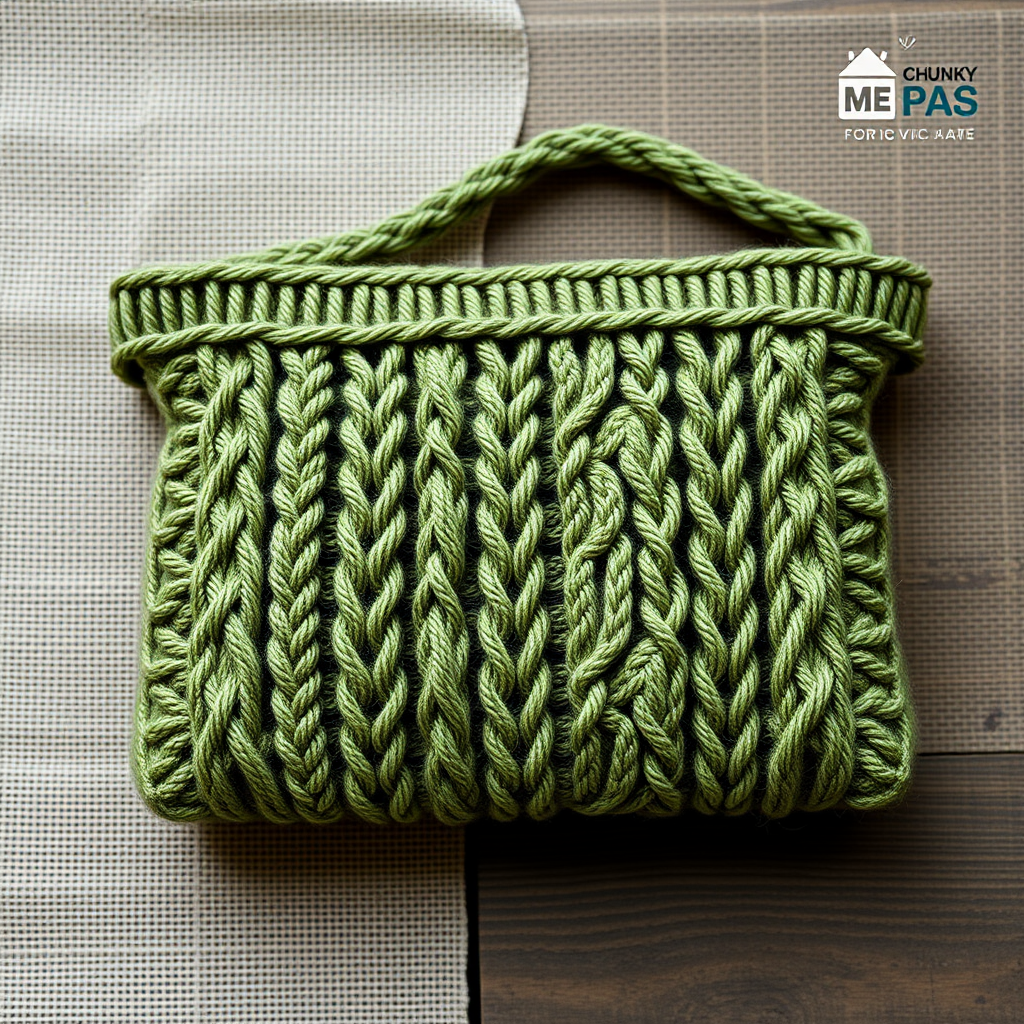
Carry a Piece of Irish Heritage: The Aran Isle Enchanted Cable Clutch
There is something deeply magical about Celtic cable knitting. The twisted ropes, the diamond lattices, and the rich, embossed textures seem to carry the stories of windswept cliffs and cozy cottages. Today, I am thrilled to share a pattern that captures that exact spirit: the Aran Isle Enchanted Cable Clutch. This isn't just a bag; it is a wearable piece of heritage, knit in a soft, heathered moss green that feels both rustic and refined. Whether you are heading to a farmer's market or a cozy dinner, this clutch adds a touch of handcrafted elegance to any outfit. Best of all, it is a free pattern that is surprisingly achievable for knitters ready to take their skills to the next level with cables.
This project is a joy to knit. The repetitive nature of the cable rows is meditative, and watching the intricate braided panels emerge from your needles is deeply satisfying. The finished piece is a generously sized clutch (about 9 inches wide by 6 inches tall) with a sturdy, knitted I-cord handle. Let's dive into the details so you can create this timeless accessory for yourself.
Materials Needed
Before you cast on, gather your supplies. This project uses simple, readily available materials, making it a perfect weekend project.
- Yarn: Worsted weight yarn in heathered moss green (approx. 200g / 400 yards). A soft wool or wool-blend is ideal for achieving that cozy, textured look.
- Needles: US 7 (4.5mm) straight knitting needles.
- Cable Needle: A standard cable needle (or a double-pointed needle) for working the C4F, C4B, C6F, and C6B maneuvers.
- Tapestry Needle: For seaming the sides and weaving in ends.
- Gauge: 20 stitches and 26 rows = 4 inches in stockinette stitch. Always check your gauge to ensure the correct finished size.
Step-by-Step Instructions
This pattern is knit as a single, long rectangle, which is then folded and seamed to create the clutch. Follow these detailed instructions carefully, and you will have a beautiful bag in no time.
Abbreviations
- CO: Cast on
- K: Knit
- P: Purl
- C4F: Slip 2 stitches to cable needle, hold to front, knit 2, knit 2 from cable needle.
- C4B: Slip 2 stitches to cable needle, hold to back, knit 2, knit 2 from cable needle.
- C6F: Slip 3 stitches to cable needle, hold to front, knit 3, knit 3 from cable needle.
- C6B: Slip 3 stitches to cable needle, hold to back, knit 3, knit 3 from cable needle.
- K2tog: Knit 2 stitches together.
- P2tog: Purl 2 stitches together.
- BO: Bind off.
Main Panel (Knit One Piece, Then Fold)
We begin by casting on 44 stitches. This will form the entire body of the clutch.
Row 1 (Right Side): K2, P2, K6, P2, K2, P2, K6, P2, K2, P2, K6, P2, K2, P2, K6, P2, K2.
Row 2 (Wrong Side): P2, K2, P6, K2, P2, K2, P6, K2, P2, K2, P6, K2, P2, K2, P6, K2, P2.
Row 3: K2, P2, C6F, P2, K2, P2, C6F, P2, K2, P2, C6F, P2, K2, P2, C6F, P2, K2.
Row 4: Repeat Row 2.
Row 5: K2, P2, K6, P2, K2, P2, K6, P2, K2, P2, K6, P2, K2, P2, K6, P2, K2.
Row 6: Repeat Row 2.
Row 7: K2, P2, C6B, P2, K2, P2, C6B, P2, K2, P2, C6B, P2, K2, P2, C6B, P2, K2.
Row 8: Repeat Row 2.
Repeat Rows 1-8 until the piece measures 18 inches from the cast-on edge, ending with a Row 8. This creates a long rectangle with four vertical cable panels. The C6F and C6B twists create the braided rope effect, while the K2/P2 sections form the lattice-like texture between them.
Fold and Seam
Now we transform the flat rectangle into a bag.
- Fold the rectangle in half with the right sides together, bringing the cast-on edge to the bind-off edge. The fold will be the bottom of the purse.
- Using a tapestry needle and a length of your yarn, sew the side seams using a mattress stitch or whip stitch. Leave the top edge open.
- Turn the purse right side out. You should now have a neat, textured pouch.
Top Edging
To give the clutch a clean, finished opening, we add a ribbed border.
- With the right side facing you, pick up and knit 44 stitches evenly around the top opening.
- Work in K1, P1 ribbing for 6 rows. This creates a stretchy, neat edge.
- Bind off in pattern (knit the knits and purl the purls as you bind off).
Handle
The I-cord handle is simple to make and incredibly sturdy.
- Cast on 8 stitches onto a double-pointed needle (or use the straight needle if you prefer).
- Work in I-cord for 18 inches. I-cord technique: Knit across the 8 stitches, then slide the stitches to the other end of the needle without turning your work. Pull the yarn tightly across the back and knit across again. Repeat until you reach the desired length.
- Bind off all stitches.
- Sew each end of the I-cord securely to the inside of the purse at the side seams, creating a handle that arches over the top.
Finishing
Your clutch is almost complete!
- Weave in all loose ends with your tapestry needle to ensure a clean, professional finish.
- Optional Closure: For a secure closure, sew a decorative button on the front of the bag. Create a loop on the inside of the flap (the back edge of the top opening) using a simple chain stitch with your yarn, so it can loop over the button.
And there you have it—a stunning, handcrafted Aran Isle Enchanted Cable Clutch. This project is a wonderful way to practice your cabling skills while creating a functional piece of art. The rich texture and heritage-inspired design make it a gift that is sure to be treasured. Happy knitting!


