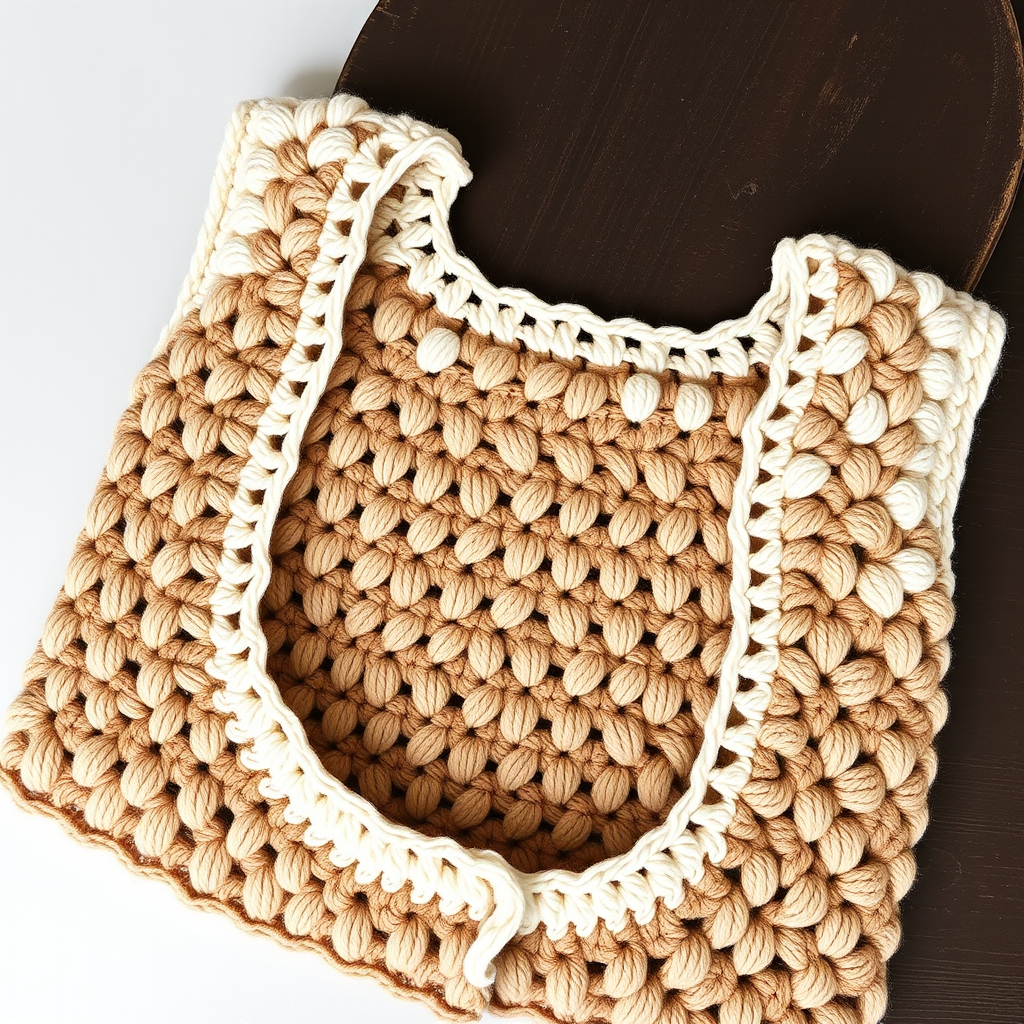
Woodland Wanderer Crochet Vest Free Pattern

Woodland Wanderer Crochet Vest: A Free Pattern for Little Explorers
Wrap your little explorer in the cozy, textured embrace of the Woodland Wanderer Vest. This modern take on a classic boy's garment features a rich, earthy palette and a stunning basketweave stitch that adds depth and warmth to every adventure. Whether it's a crisp autumn hike or a chilly spring morning, this handmade vest is the perfect layering piece. Best of all, this free crochet pattern is designed with clear, step-by-step instructions that make it achievable even for confident beginners ready to tackle a new stitch.
With its forest green base, contrasting rust orange and cream accents, and a classic V-neck button-front silhouette, this vest is as stylish as it is functional. The deeply textured basketweave pattern creates a woven, dimensional effect that looks far more complex than it actually is. Let's gather your materials and get started on creating a cherished heirloom piece.
Materials Needed
Before you begin your crafting journey, ensure you have all the necessary supplies on hand. This project uses simple, readily available materials.
- Yarn: Worsted weight (4) yarn in three colors:
- Main Color (MC): Forest Green – approximately 300 yards
- Contrast A: Rust Orange – approximately 50 yards (for accents)
- Contrast B: Cream – approximately 50 yards (for accents)
- Crochet Hook: D/3 (3.25 mm) crochet hook. Using the recommended hook size is crucial for achieving the correct gauge.
- Other Supplies: Yarn needle for weaving in ends and seaming, scissors, and 3 wooden buttons (approximately ½ inch in diameter) for the front closure.
Gauge: 18 stitches and 12 rows = 4 inches in basketweave stitch pattern (after blocking). Always take the time to make a gauge swatch before starting your project. This ensures your finished vest will match the intended measurements.
Understanding the Basketweave Stitch
The magic of this vest lies in its textured basketweave pattern. It's created by alternating groups of front post and back post double crochet stitches. If you're new to post stitches, don't worry—they're easier than they look! Here’s a quick breakdown of the special stitches you'll need.
Special Stitches
- Front Post Double Crochet (fpdc): Yarn over, insert hook from front to back around the post (the vertical part) of the next stitch, yarn over, pull up a loop, yarn over, pull through two loops, yarn over, pull through remaining two loops.
- Back Post Double Crochet (bpdc): Yarn over, insert hook from back to front around the post of the next stitch, yarn over, pull up a loop, yarn over, pull through two loops, yarn over, pull through remaining two loops.
The Basketweave Pattern
This pattern is worked over a multiple of 8 + 2 stitches. For this vest, you'll be working with 64 stitches (which is 8 repeats of the 8-stitch pattern). Here's how it works:
- Row 1 (RS): *fpdc on next 4 sts, bpdc on next 4 sts* repeat across.
- Row 2: *bpdc on next 4 sts, fpdc on next 4 sts* repeat across.
- Rows 3-4: Repeat rows 1-2.
- Rows 5-6: Reverse the pattern (bpdc where fpdc was, and fpdc where bpdc was).
Repeat these 6 rows for the entire pattern. This creates the beautiful woven "basket" effect.
Step-by-Step Instructions
This pattern is for size 4-5 years (chest 23-24 inches, length 14 inches). Follow these instructions carefully, and you'll have a beautiful vest in no time.
Back Panel
- With your Main Color (MC) yarn, chain 66.
- Row 1 (RS): Double crochet (dc) in the 4th chain from the hook and in each chain across. You should have 64 dc stitches. (The initial chain 3 counts as your first dc.)
- Row 2: Chain 2 (counts as a dc), turn your work. Work the basketweave pattern across all 64 stitches. This will give you 8 full repeats of the 8-stitch pattern.
- Continue working in the basketweave pattern, repeating rows 1-6 of the pattern, until the piece measures 14 inches from the beginning. Fasten off and set aside.
Front Panels (Make Two)
You will make two identical front panels. These will form the V-neck and button bands.
- With MC yarn, chain 34.
- Row 1: Dc in the 4th chain from the hook and in each chain across. You should have 32 dc stitches.
- Row 2: Chain 2, turn, work the basketweave pattern across all 32 stitches (4 full repeats).
- Continue in the pattern until the piece measures 12 inches from the beginning, ending with a wrong-side (WS) row.
- Shape Armhole: On the next row (RS), slip stitch across the first 4 stitches to bind them off. Then, continue in the basketweave pattern across the remaining 28 stitches.
- Continue straight in the pattern until the piece measures 14 inches from the beginning. Fasten off. Repeat this entire process for the second front panel.
Assembly
Now it's time to bring your panels together.
- Sew Shoulder Seams: With your yarn needle and MC yarn, sew the shoulder seams, matching the front and back panels. Sew for 2 inches on each side, leaving the center open for the neckline.
- Sew Side Seams: Sew the side seams, leaving 6 inches open at the top of each side for the armholes.
Edging and Finishing
These neat, single crochet borders give the vest a polished, professional look.
- Armhole Edging: With MC, join your yarn at the underarm. Work 1 round of single crochet (sc) evenly around the entire armhole opening (approximately 40 sc). Join with a slip stitch to the first sc. Fasten off. Repeat for the other armhole.
- Bottom Edging: With MC, join your yarn at the bottom edge. Work 1 row of sc evenly across the bottom of the vest (approximately 64 sc). Fasten off.
- Front Edging (Button Bands): With MC, join your yarn at the bottom right front edge. Work sc evenly up the front edge (approximately 30 sc). Fasten off. Repeat for the left front edge.
Buttonholes
We'll add buttonholes to the left front band (as worn).
- With MC, join your yarn at the bottom of the left front band.
- Work sc up the edge. At 2 inches, 5 inches, and 8 inches from the bottom, make a buttonhole: chain 2, skip 2 sc, and continue with sc.
- Continue to the top of the band and fasten off.
Final Touches
- Sew Buttons: Sew 3 buttons on the right front band, opposite the buttonholes you created.
- Weave in Ends: Carefully weave in all loose ends with your yarn needle to ensure a clean finish.
- Blocking: Block the vest lightly to shape. This helps even out the stitches and gives the basketweave pattern a beautiful, crisp definition. Lay it flat to dry.
Your Woodland Wanderer Vest is now complete! This textured, cozy garment is sure to become a favorite for your little one. The earthy colors and classic design make it a versatile piece that pairs beautifully with jeans, corduroys, or even a little button-down shirt. Enjoy watching your little explorer wander in style and comfort!