Whispering Willow Leaf Crochet Pattern – Free Pattern
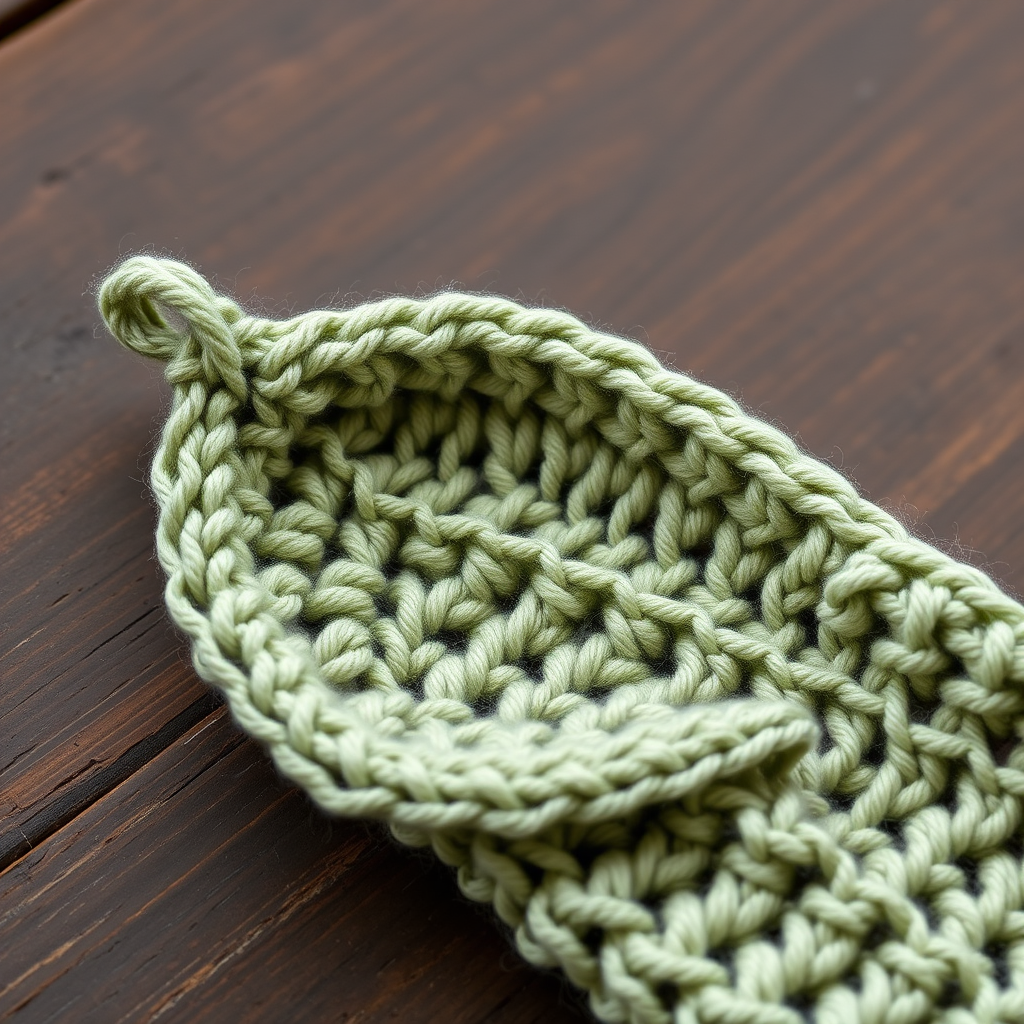
Whispering Willow Leaf Crochet Pattern – Free Pattern
Add a touch of woodland charm to your crochet flowers with this elegantly curved willow leaf pattern. Its delicate vein detail and soft drape make it perfect for bouquets, wreaths, or gift toppers. Whether you're crafting a botanical masterpiece or simply adding a natural accent to a handmade gift, this leaf pattern is a quick, satisfying project that brings a sense of calm and creativity to your crochet time.
This free crochet leaf pattern is designed with the beginner in mind, yet it offers enough structure to create a beautifully defined leaf that looks professionally made. The combination of single, half-double, double, and treble crochet stitches creates a subtle central ridge and a gentle curve that mimics the graceful shape of a real willow leaf. With just a few yards of yarn and a single crochet hook, you can produce a leaf that measures about 3 inches long—perfect for embellishing flowers, wreaths, or even as a standalone decorative piece.
Whether you are new to crochet or a seasoned maker looking for a quick botanical project, this pattern will guide you through every step with clarity and precision. Let’s get started on creating your very own whispering willow leaf!
Materials Needed
Before you begin, gather the following materials. This project is wonderfully portable and requires only minimal supplies, making it an excellent choice for on-the-go crafting.
- Yarn: Worsted weight cotton or acrylic yarn in sage green, forest green, or variegated green (approx. 10 yards per leaf). Cotton yarn will give a crisper stitch definition, while acrylic offers a softer drape—choose based on your project's needs.
- Crochet Hook: G/6 (4.0 mm) crochet hook. This hook size pairs perfectly with worsted weight yarn to create a firm yet flexible fabric.
- Yarn Needle: For weaving in ends and attaching the leaf to your project.
- Scissors: To cut the yarn tail.
Gauge: Not critical for this project. The leaf will measure about 3 inches long when finished, but slight variations in tension will not affect the overall look. Feel free to adjust your hook size if you prefer a larger or smaller leaf.
Step-by-Step Instructions
Follow these detailed instructions carefully to create your whispering willow leaf. The pattern is worked in two stages: first, you will create the foundation and one side of the leaf, then you will work around the chain to form the other side, and finally, you will add a second round to shape and finish the leaf. Take your time and read through each step before proceeding.
Foundation Chain
Step 1: Begin with a slip knot on your G/6 (4.0 mm) crochet hook. To make a slip knot, create a loop with your yarn, insert the hook, and pull the working yarn through the loop, tightening gently around the hook. Leave a tail of about 6 inches for weaving in later.
Step 2: Chain 10 stitches. To chain, yarn over (wrap the yarn over the hook from back to front) and pull through the loop on your hook. Repeat this process 10 times. You should now have a foundation chain of 10 chain stitches, with the hook in the last chain made.
Row 1 – First Side of the Leaf
Step 3: Starting in the 2nd chain from your hook (skip the first chain closest to the hook), work the following stitches:
- Single crochet (sc) in the next 3 chains. To single crochet, insert your hook into the chain, yarn over, pull up a loop (you now have 2 loops on your hook), yarn over again, and pull through both loops on your hook.
- Half double crochet (hdc) in the next 2 chains. To half double crochet, yarn over, insert your hook into the chain, yarn over, pull up a loop (3 loops on hook), yarn over, and pull through all 3 loops.
- Double crochet (dc) in the next 2 chains. To double crochet, yarn over, insert your hook into the chain, yarn over, pull up a loop (3 loops on hook), yarn over, pull through 2 loops, yarn over, pull through remaining 2 loops.
- Treble crochet (tr) in the last chain. To treble crochet, yarn over twice, insert your hook into the chain, yarn over, pull up a loop (4 loops on hook), yarn over, pull through 2 loops, yarn over, pull through 2 loops, yarn over, pull through remaining 2 loops.
After completing these stitches, you will have worked 8 stitches along the first side of the foundation chain. Do not turn your work. You will now work along the opposite side of the foundation chain, using the back loops of the same chain stitches.
Row 1 – Second Side of the Leaf
Step 4: Rotate your work so you are looking at the back side of the foundation chain. You will see a series of "bumps" or back loops along the edge. Working into these back loops, proceed as follows:
- Treble crochet (tr) in the same first chain (the one you just worked your last treble into). This is the chain at the tip of the leaf. Insert your hook into the back loop of this chain and complete a treble crochet.
- Double crochet (dc) in the next 2 chains (working into the back loops).
- Half double crochet (hdc) in the next 2 chains.
- Single crochet (sc) in the next 3 chains.
You have now completed 8 more stitches along the second side of the foundation chain. In total, you have 16 stitches around the chain, forming an oval shape that will become the body of your leaf.
Round 2 – Shaping and Finishing the Leaf
Step 5: Continuing in the round (do not turn), chain 1. This chain 1 does not count as a stitch; it simply gives you height to begin the next round.
Step 6: Now work the following stitches along the first side of the leaf (the side you worked first):
- Single crochet (sc) in the next 3 stitches.
- Half double crochet (hdc) in the next 2 stitches.
- Double crochet (dc) in the next 2 stitches.
- Treble crochet (tr) in the next stitch (this is the stitch at the tip of the leaf on this side).
Step 7: Now you will create the pointed tip of the leaf. In the last stitch of this side (the tip stitch), work the following sequence:
- Treble crochet (tr) in the same stitch.
- Chain 2.
- Slip stitch (sl st) in the 2nd chain from your hook. To slip stitch, insert your hook into the chain, yarn over, and pull through both the chain and the loop on your hook in one motion. This creates a small picot point.
- Treble crochet (tr) in the same stitch again.
This sequence forms a delicate point at the tip of your leaf, giving it that characteristic willow shape.
Step 8: Now work down the other side of the leaf (the second side you created). Work the following stitches:
- Treble crochet (tr) in the next stitch.
- Double crochet (dc) in the next 2 stitches.
- Half double crochet (hdc) in the next 2 stitches.
- Single crochet (sc) in the next 3 stitches.
Step 9: To close the round, slip stitch (sl st) into the first single crochet of this round. This joins your work neatly and completes the leaf shape.
Finishing Touches
Step 10: Fasten off your yarn by cutting the working yarn, leaving a tail of about 6-8 inches. Pull the tail through the loop on your hook to secure the stitch.
Step 11: Weave in the starting tail (from your slip knot) using your yarn needle. Thread the tail through the needle and weave it in and out of the stitches on the back of the leaf, being careful not to pull too tightly. Trim any excess yarn.
Step 12: Use the remaining tail to attach the leaf to your flower stem, wreath, or gift topper. Simply thread the tail through your yarn needle, position the leaf where you want it, and sew it securely in place with a few small stitches. Weave in the end and trim.
Your whispering willow leaf is now complete! Repeat this pattern to create as many leaves as you need for your project. Each leaf takes only a few minutes to make, so you can quickly build a beautiful collection of botanical embellishments.
Tips for Perfect Leaves
- Consistent Tension: Try to keep your tension even throughout the project. This will ensure that your leaf has a uniform shape and the stitches lie flat.
- Blocking (Optional): If your leaf curls slightly, you can gently block it by pinning it to a flat surface and lightly steaming it with an iron (keeping the iron a few inches away from the yarn). This will help it lay flat and enhance the stitch definition.
- Color Variations: Experiment with different shades of green or even variegated yarn to create a more natural, organic look. You can also use this pattern with other colors to create autumn leaves or whimsical fantasy leaves.
- Stitch Markers: If you find it helpful, place a stitch marker at the tip of the leaf (the first treble crochet of the second side) to help you keep track of where you are in the pattern.
This whispering willow leaf pattern is a versatile and rewarding project that you'll return to again and again. Whether you're adding a finishing touch to a crochet flower bouquet, creating a nature-inspired wreath, or simply enjoying a few minutes of mindful crafting, this leaf is sure to bring a touch of elegance to your work. Happy crocheting!


