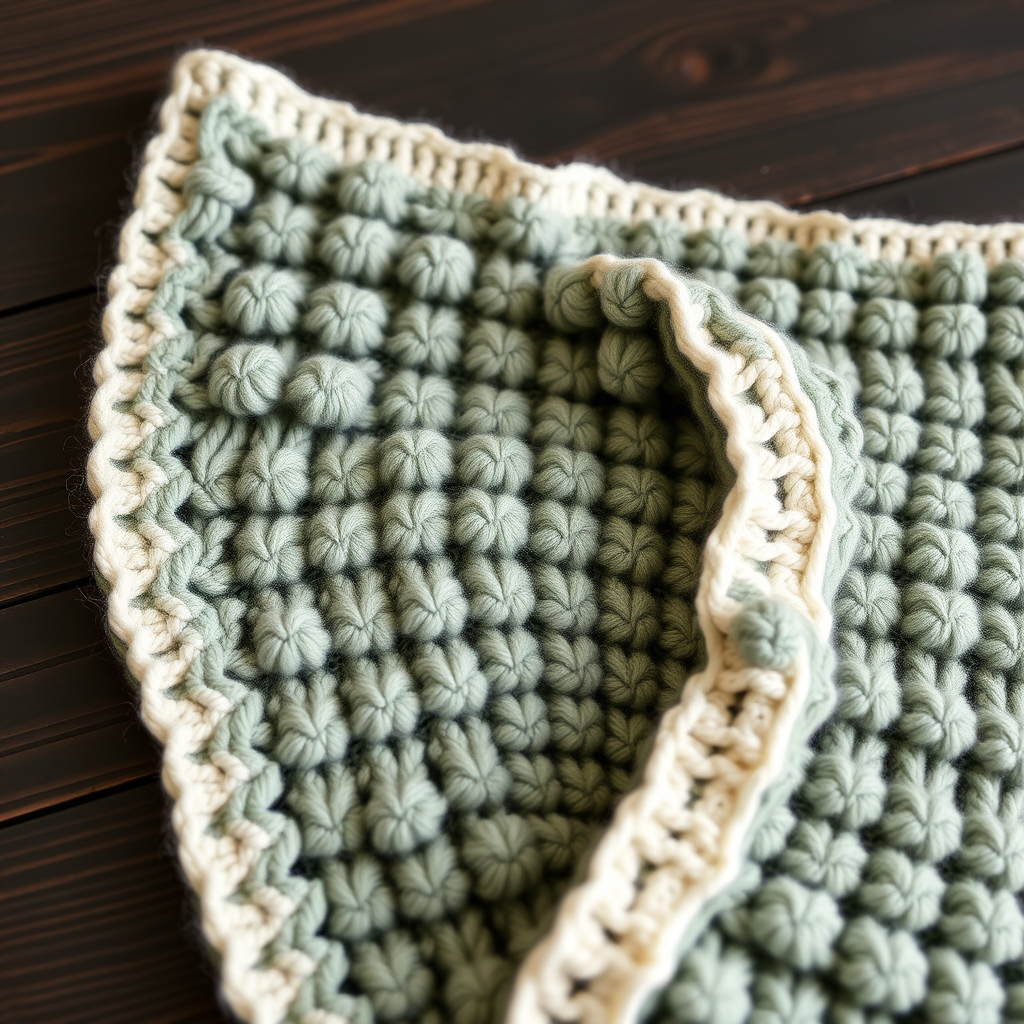
Whispering Willow Baby Blanket Free Knitting Pattern – Textured Leaf Stitch Throw

Whispering Willow Baby Blanket: A Free Knitting Pattern for a Textured Leaf Stitch Throw
There is something truly magical about creating a handmade heirloom for a little one. The Whispering Willow Baby Blanket is designed to wrap your baby in the gentle embrace of nature, featuring an intricate leaf stitch pattern that creates a soft, dimensional texture. This blanket is not just a practical accessory—it's a piece of art that will be treasured for generations.
Whether you're a seasoned knitter looking for a meditative project or a confident beginner ready for a beautiful challenge, this pattern offers a rewarding experience. The serene sage green color and the embossed leaf motifs evoke a sense of calm and organic beauty, making it the perfect addition to any nursery or a thoughtful, handmade gift for a baby shower.
In this comprehensive guide, I'll walk you through every step, from gathering your materials to weaving in those final ends. Let's pick up our needles and create something truly special.
Materials Needed
Before you begin, it's essential to gather all your supplies. Using the recommended materials will ensure your gauge is correct and your finished blanket has the perfect drape and softness.
Yarn
- Weight: DK weight yarn (Light #3)
- Recommended Brand: Cascade Yarns 220 Superwash Merino (or any similar DK weight yarn)
- Color: Soft sage green (or your preferred color)
- Yardage: Approximately 800-900 yards (about 4-5 skeins, depending on the brand)
Why this yarn? The superwash merino wool is incredibly soft against a baby's delicate skin, and it's machine-washable for easy care—a must for any baby item. The DK weight gives the blanket enough substance to be cozy without being too heavy.
Needles & Notions
- Needle: US 6 (4.0 mm) circular knitting needle, 32 inches long (the length is crucial to hold all 166 stitches comfortably)
- Notions: Stitch markers (at least 2), tapestry needle for weaving in ends, scissors
Gauge
- Gauge: 22 stitches and 30 rows = 4 inches in stockinette stitch
Important: Always knit a gauge swatch before starting. This ensures your finished blanket will be the correct size. If your gauge is off, adjust your needle size accordingly (use a smaller needle if you have too few stitches, a larger needle if you have too many).
Step-by-Step Instructions
This pattern is broken down into manageable sections. The key to success is understanding the Leaf Stitch pattern, which is worked over a repeat of 8 stitches. Once you master this 8-row repeat, the rest of the blanket is simply repetition and border knitting.
Finished Size
Approximately 30 inches wide by 36 inches long—a perfect size for a stroller, crib, or cuddling.
Special Stitches: The Leaf Stitch Pattern (Worked over 8 stitches)
This stitch creates the beautiful embossed leaf motif. It's a combination of knits, purls, yarn overs, and decreases. Here is the full 8-row repeat:
- Row 1 (RS): P1, k6, p1
- Row 2 (WS): K1, p6, k1
- Row 3: P1, (k2tog, yo) twice, k2, p1
- Row 4: K1, p6, k1
- Row 5: P1, k2, (yo, ssk) twice, p1
- Row 6: K1, p6, k1
- Row 7: P1, k6, p1
- Row 8: K1, p6, k1
Abbreviation Key:
- RS: Right Side (the front of the blanket)
- WS: Wrong Side (the back of the blanket)
- K: Knit
- P: Purl
- K2tog: Knit two stitches together (a right-leaning decrease)
- Ssk: Slip, slip, knit (a left-leaning decrease)
- Yo: Yarn over (creates an eyelet hole)
Pro Tip: The yarn overs paired with the decreases create the leaf's shape. The k2tog on Row 3 leans right, and the ssk on Row 5 leans left, which gives the leaf its symmetrical, organic curve.
Getting Started: The Garter Stitch Border
The border is knit in garter stitch (knitting every row), which creates a sturdy, non-curling edge that beautifully frames the delicate leaf pattern.
- Cast On: Loosely cast on 166 stitches. Using a larger needle or a stretchy cast-on method (like the long-tail cast-on) will prevent the edge from being too tight.
- Knit the Border: Knit 6 rows in garter stitch (knit every stitch across). This completes the bottom border.
Knitting the Main Body
Now we'll introduce the Leaf Stitch pattern while maintaining the garter stitch borders on each side.
- Set-Up Row 1 (RS): K6 (border), place marker, *work Row 1 of Leaf Stitch (P1, k6, p1) over the next 8 stitches, repeat from * until 6 stitches remain, place marker, K6 (border).
- Set-Up Row 2 (WS): K6, slip marker, *work Row 2 of Leaf Stitch (K1, p6, k1) over the next 8 stitches, repeat from * to marker, slip marker, K6.
Continue the Pattern: Continue in this manner, always knitting the first and last 6 stitches (the borders) and working the 8-row Leaf Stitch pattern across the middle section. Remember to slip the markers as you come to them.
Repeat: Repeat the 8-row Leaf Stitch pattern until the blanket measures approximately 34 inches from the cast-on edge. It's best to end after completing a WS row (Row 2, 4, 6, or 8 of the pattern) so you're ready to start the top border on a RS row.
Counting Tip: To keep track of your rows, use a row counter or place a locking stitch marker on the edge of your work every time you complete a full 8-row repeat. This will save you from having to count rows manually.
Finishing the Top Border
Just like the bottom, the top needs a garter stitch border to frame the pattern and keep the edges flat.
- Knit the Border: Knit 6 rows in garter stitch (knit every stitch across).
- Bind Off: Bind off loosely on the next RS row. To ensure a stretchy edge, use a larger needle to bind off or use a stretchy bind-off method like "Jeny's Surprisingly Stretchy Bind-Off."
Finishing Touches: Weaving and Blocking
The final steps are what elevate your blanket from a simple knit to a polished heirloom.
- Weave in Ends: Thread your tapestry needle and carefully weave in all loose ends along the side edges or within the border stitches. Make sure to weave in at least 4-6 inches of yarn to secure them properly.
- Blocking: This step is crucial for the Whispering Willow Blanket. Blocking will "open up" the leaf stitch pattern, making the yarn overs more defined and the texture more pronounced. To block, soak the blanket in lukewarm water with a gentle wool wash for 15-20 minutes. Gently squeeze out excess water (do not wring). Lay the blanket flat on a clean towel, roll it up to remove more water, then unroll and shape it to the correct dimensions (30" x 36"). Pin the edges if necessary and allow it to dry completely.
Once dry, your Whispering Willow Baby Blanket is ready to be gifted or used. The soft, textured fabric will provide warmth and comfort, while the beautiful leaf pattern will be a constant reminder of the love and care you knitted into every stitch.
Happy knitting, and enjoy creating this little piece of nature for your little one!