Whispering Pines Fringed Scarf Free Pattern
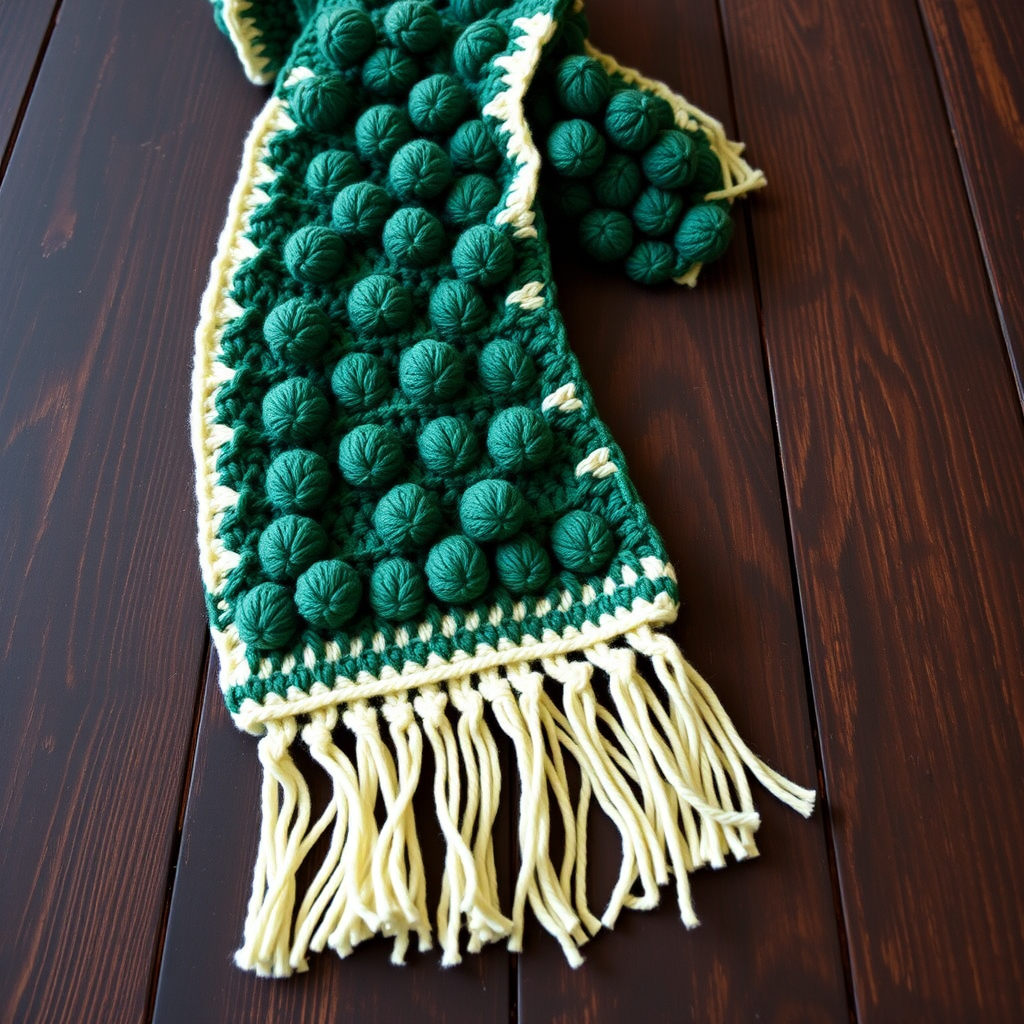
Whispering Pines Fringed Scarf: A Free Crochet Pattern for Woodland Charm
Imagine wrapping yourself in the quiet beauty of a pine forest—the soft rustle of needles, the earthy scent of evergreen, the gentle warmth of nature's embrace. That's exactly the feeling you'll capture with the Whispering Pines Fringed Scarf. This free crochet pattern features a stunning, textured pinecone stitch that creates dimensional, raised clusters against a smooth double crochet background. Finished with a delicate cream border and flowing fringe, this scarf is the perfect blend of rustic charm and modern style.
Whether you're a seasoned crocheter looking for a new texture to master or a confident beginner ready for a rewarding challenge, this pattern is designed to guide you every step of the way. The result? A cozy, handmade accessory that will become a staple in your wardrobe and a heartfelt gift for someone special.
Materials Needed
Before we begin our journey into the pines, let's gather our supplies. This project uses simple, readily available materials:
- Yarn: Worsted weight yarn in two colors:
- Main Color (MC): Forest Green (approximately 450-500 yards)
- Contrast Color (CC): Cream (approximately 150-200 yards)
- Crochet Hook: I/9 (5.5 mm) crochet hook
- Other Tools: Yarn needle for weaving in ends, scissors for trimming fringe
Gauge: 14 stitches and 12 rows = 4 inches in pattern stitch (after blocking). While gauge is important for exact sizing, this scarf is forgiving—even if your gauge is slightly off, you'll still end up with a beautiful, wearable piece.
Step-by-Step Instructions
Let's dive into the pattern! Don't be intimidated by the pinecone stitch—it's easier than it looks and creates such a beautiful effect. We'll work through this together, one row at a time.
Pattern Notes
- The pattern is worked in rows lengthwise, meaning you'll be crocheting along the long edge of the scarf.
- The chain 3 (ch 3) at the beginning of each row counts as your first double crochet (dc).
- The pinecone stitch is a cluster of 5 double crochets worked in the same stitch, then closed together. We'll break this down in detail below.
Foundation Chain
With your Main Color (MC) yarn, chain 32. This will give you a scarf that's approximately 9 inches wide once finished.
Row 1: The Base Row
Double crochet (dc) in the 4th chain from your hook. This counts as your first dc. Continue to dc in each chain across the row. You should have 30 double crochets total. Turn your work.
Row 2: Introducing the Pinecone Stitch
This is where the magic begins! Follow these steps carefully:
- Chain 3 (counts as your first dc). Dc in the next 2 stitches.
- Skip the next stitch.
- Work a pinecone stitch in the next stitch:
- Yarn over, insert hook into the stitch, yarn over and pull up a loop, yarn over and pull through 2 loops (you now have 2 loops on your hook).
- Repeat this 4 more times in the same stitch. You'll have 5 incomplete double crochets and 6 loops on your hook.
- Yarn over and pull through all 6 loops on your hook. This closes the pinecone! Chain 1 to secure it (this is optional but helps keep the stitch neat).
- Skip the next stitch. Dc in the next 3 stitches.
- Repeat from * across the row, ending with a dc in the last stitch. Turn.
Pro Tip: The pinecone stitch creates a beautiful, raised texture. Take your time with it—the first one is always the trickiest, but you'll be a pro by the end of the row!
Row 3: Smooth Sailing
Chain 3 (counts as first dc). Dc in each stitch across the row. Turn. This row creates the smooth background that lets your pinecones shine.
Row 4: Offsetting the Pattern
This row staggers the pinecones for a beautiful, organic look:
- Chain 3 (counts as first dc). Dc in the next stitch.
- Skip the next stitch. Work a pinecone stitch in the next stitch (same as before).
- Skip the next stitch. Dc in the next 3 stitches.
- Repeat from * across, ending with dc in the last 2 stitches. Turn.
Rows 5-6: Building the Rhythm
Repeat Row 3 for both Row 5 and Row 6. These smooth rows give your eyes (and hands!) a moment to rest between the textured rows.
Row 7: Pinecone Row Again
Repeat Row 2 exactly. This will align your pinecones with those in Row 2.
Rows 8-9: Smooth Background
Repeat Row 3 for both rows.
Row 10: Offset Pinecones
Repeat Row 4 to stagger the pinecones again.
Rows 11-12: Finishing the Pattern Repeat
Repeat Row 3 for both rows. You've now completed one full pattern repeat!
Continuing the Pattern
Repeat Rows 2 through 12 until your scarf measures approximately 70 inches from the beginning. This will give you a luxurious, draping scarf. Be sure to end with a Row 3 repeat (a smooth row) so your work is even. Fasten off your MC yarn and weave in the ends.
Adding the Cream Border
Now it's time to add that beautiful cream finish:
- With your Contrast Color (CC) yarn, join with a slip stitch in any corner of the scarf.
- Work 1 single crochet (sc) in each stitch across the top and bottom edges.
- Along the sides, work 2 sc in each row-end (the sides of your rows).
- At each corner, work 3 sc in the corner stitch to help the corners lay flat.
- Join with a slip stitch to the first sc. Fasten off and weave in ends.
Creating the Fringe
The fringe is the perfect finishing touch—it adds movement and that classic, cozy scarf look:
- Cut your CC yarn into 12-inch strands. You'll need about 30-40 strands total.
- For each fringe: take 3 strands and fold them in half.
- Insert your hook through the edge stitch at the bottom of the scarf (through the cream border).
- Pull the folded loop through the stitch.
- Pull the loose ends through the loop and tighten gently.
- Space your fringe evenly along the bottom edge, about 1 inch apart.
- Once all fringe is attached, trim the ends to even them up.
Final Thoughts
Congratulations! You've just created your very own Whispering Pines Fringed Scarf. Take a moment to admire your work—the textured pinecones, the smooth cream border, the flowing fringe. This scarf is more than just an accessory; it's a piece of art you made with your own hands.
This pattern is perfect for gifting during the holiday season, keeping yourself cozy on crisp autumn walks, or adding a touch of woodland charm to any outfit. The pinecone stitch is a wonderful technique to add to your crochet repertoire, and once you've mastered it, you'll find yourself using it in hats, blankets, and more.
We'd love to see your finished creation! Share your photos on social media with the hashtag #WhisperingPinesScarf and tag us so we can celebrate your beautiful work. Happy crocheting, and may your days be filled with the peaceful serenity of the pines!


