Whispering Pines Forest Moss Stitch Scarf Free Pattern
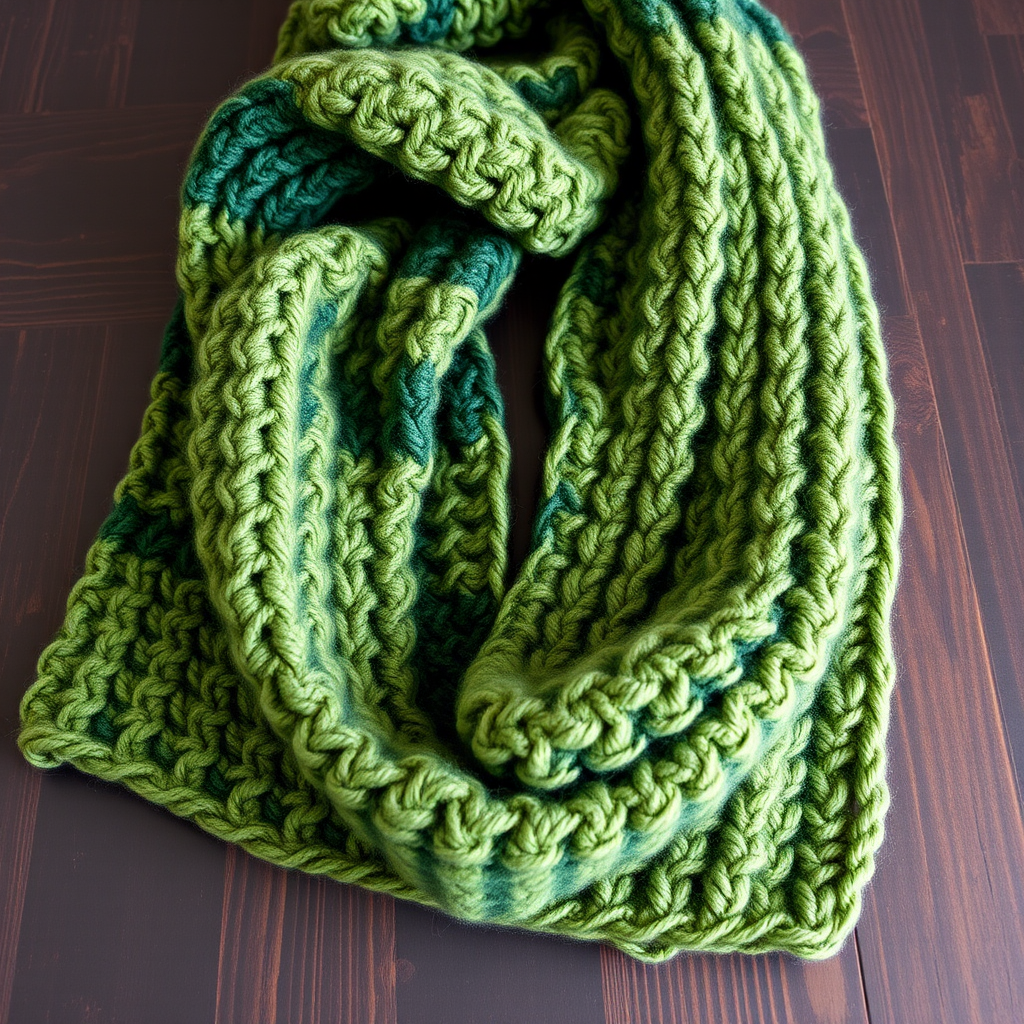
Whispering Pines Forest Moss Stitch Scarf: A Free Knitting Pattern for Cozy Autumn Days
Wrap yourself in the quiet serenity of a misty woodland with this deeply textured moss stitch scarf, knit in a gradient of forest greens. The reversible, squishy fabric evokes the softness of moss underfoot, making it a cozy companion for crisp autumn walks. This free knitting pattern is perfect for intermediate beginners looking to expand their skills with color changes and a classic textured stitch.
This scarf features a beautiful ombre effect, transitioning from deep forest green at the ends through rich moss green to a soft sage center. The moss stitch creates a dense, bumpy texture that resembles tiny pebbles or moss clusters, and the fabric is completely reversible—so both sides look equally beautiful. Whether you're knitting for yourself or as a handmade gift, this pattern is sure to become a favorite.
Materials Needed
Before you begin, gather the following materials. All yarn amounts are approximate and based on a standard worsted weight yarn.
Yarn
- Yarn A (deep forest green): 150g (approximately 300 yards)
- Yarn B (moss green): 150g (approximately 300 yards)
- Yarn C (sage green): 100g (approximately 200 yards)
Total yarn needed: approximately 400g of worsted weight yarn in three shades of green.
Needles & Notions
- US 8 (5mm) knitting needles — straight or circular (worked flat)
- Tapestry needle for weaving in ends
- Scissors
- Measuring tape (optional, for checking gauge)
Gauge
18 stitches and 26 rows = 4 inches in moss stitch pattern. Gauge is important for achieving the correct finished size. If your gauge is off, adjust your needle size accordingly. A swatch of at least 4x4 inches is recommended.
Abbreviations
- k = knit
- p = purl
- st(s) = stitch(es)
- rep = repeat
Pattern Notes
- The scarf is worked flat in one piece, lengthwise.
- The moss stitch pattern is a simple 2-row repeat that creates a reversible, textured fabric.
- Color changes are made at the end of a row. Simply drop the old yarn and pick up the new one, leaving a 6-inch tail to weave in later. Do not carry yarn up the side of the work.
- The finished scarf measures approximately 9 inches wide and 60 inches long (before blocking). Blocking may slightly alter dimensions.
Step-by-Step Instructions
Moss Stitch Pattern (Worked over an even number of stitches)
Row 1: *k1, p1; rep from * to end of row.
Row 2: *p1, k1; rep from * to end of row.
Repeat Rows 1 and 2 for the pattern.
Note: Because you are working with an even number of stitches (40), the pattern creates a perfect seed/moss stitch where knits and purls alternate both horizontally and vertically.
Cast On
With Yarn A (deep forest green), cast on 40 stitches using your preferred method (long-tail cast on works well). Leave a tail of at least 6 inches for weaving in later.
Section 1: Yarn A (Deep Forest Green)
Work in moss stitch pattern for 60 rows (approximately 9 inches). End after completing a Row 2 of the pattern, so you are ready to start with Row 1 on the next section.
Tip: Place a stitch marker or safety pin on the right side of your work to help you keep track of your rows if desired.
Section 2: Yarn B (Moss Green)
At the end of Row 60, cut Yarn A leaving a 6-inch tail. Join Yarn B (moss green) by simply starting to knit with the new yarn on the next row.
Work in moss stitch pattern for 80 rows (approximately 12 inches). End after completing a Row 2 of the pattern.
Section 3: Yarn C (Sage Green)
At the end of Row 140 (80 rows into Section 2), cut Yarn B leaving a 6-inch tail. Join Yarn C (sage green).
Work in moss stitch pattern for 40 rows (approximately 6 inches). End after completing a Row 2 of the pattern.
Section 4: Yarn B (Moss Green)
At the end of Row 180 (40 rows into Section 3), cut Yarn C leaving a 6-inch tail. Join Yarn B (moss green).
Work in moss stitch pattern for 80 rows (approximately 12 inches). End after completing a Row 2 of the pattern.
Section 5: Yarn A (Deep Forest Green)
At the end of Row 260 (80 rows into Section 4), cut Yarn B leaving a 6-inch tail. Join Yarn A (deep forest green).
Work in moss stitch pattern for 60 rows (approximately 9 inches). End after completing a Row 2 of the pattern.
Bind Off
Bind off all stitches loosely in pattern. This means: knit the knit stitches and purl the purl stitches as they appear. To bind off in pattern:
- Knit the first stitch.
- Purl the second stitch (since it's a purl stitch in the pattern).
- Pass the first stitch over the second stitch and off the needle.
- Continue in this manner, working each stitch as it appears (knit the knits, purl the purls) and passing the previous stitch over.
Binding off loosely is crucial to maintain the stretchy, drapey edge of the scarf. If your bind off is too tight, the edge will pucker.
Finishing
Weaving in Ends
Using a tapestry needle, weave in all loose ends on the wrong side of the work. Thread the tail through the needle and weave it through the purl bumps of the same color for about 2-3 inches. Trim any excess yarn. Repeat for all color change points and the cast on/bind off tails.
Blocking
Gently block the scarf to even out the stitches and enhance the texture. To wet block:
- Soak the scarf in lukewarm water with a small amount of wool wash for 15-20 minutes.
- Gently squeeze out excess water (do not wring or twist).
- Lay the scarf flat on a clean towel and roll it up to remove additional moisture.
- Lay the scarf flat on a blocking mat or dry towel, shaping it to its intended dimensions.
- Pin if necessary to straighten edges, but avoid over-stretching the moss stitch.
- Allow to dry completely before wearing.
Tips for Success
- Keep your tension consistent — especially when changing colors. The moss stitch is forgiving, but consistent tension will create a more uniform texture.
- Count your rows — use a row counter or tally marks to keep track of your sections. The color changes are what create the beautiful gradient effect.
- Don't pull too tight on color changes — when joining a new yarn, leave a slightly longer tail and don't pull the first stitch too tight, as this can cause puckering at the color change lines.
- Practice the moss stitch — if you're new to this stitch, knit a small swatch first to get comfortable with the rhythm of k1, p1 and p1, k1.
Customization Ideas
While this pattern uses three shades of green for a forest-inspired ombre, feel free to experiment:
- Monochrome: Use a single color for a classic, understated scarf.
- Seasonal palette: Try warm autumnal tones like rust, amber, and mustard.
- Ocean vibes: Use shades of blue and teal for a coastal feel.
- Adjustable length: Add or subtract rows in any section to customize the length. Just remember to keep the sections balanced for a symmetrical look.
This Whispering Pines Forest Moss Stitch Scarf is more than just an accessory—it's a meditative knitting project that connects you to the calming rhythms of nature. The repetitive moss stitch is soothing to knit, and watching the colors gradually shift is deeply satisfying. Whether you're curled up by the fire or strolling through autumn leaves, this scarf will keep you warm and stylish.
Happy knitting, and may your stitches always be cozy!


