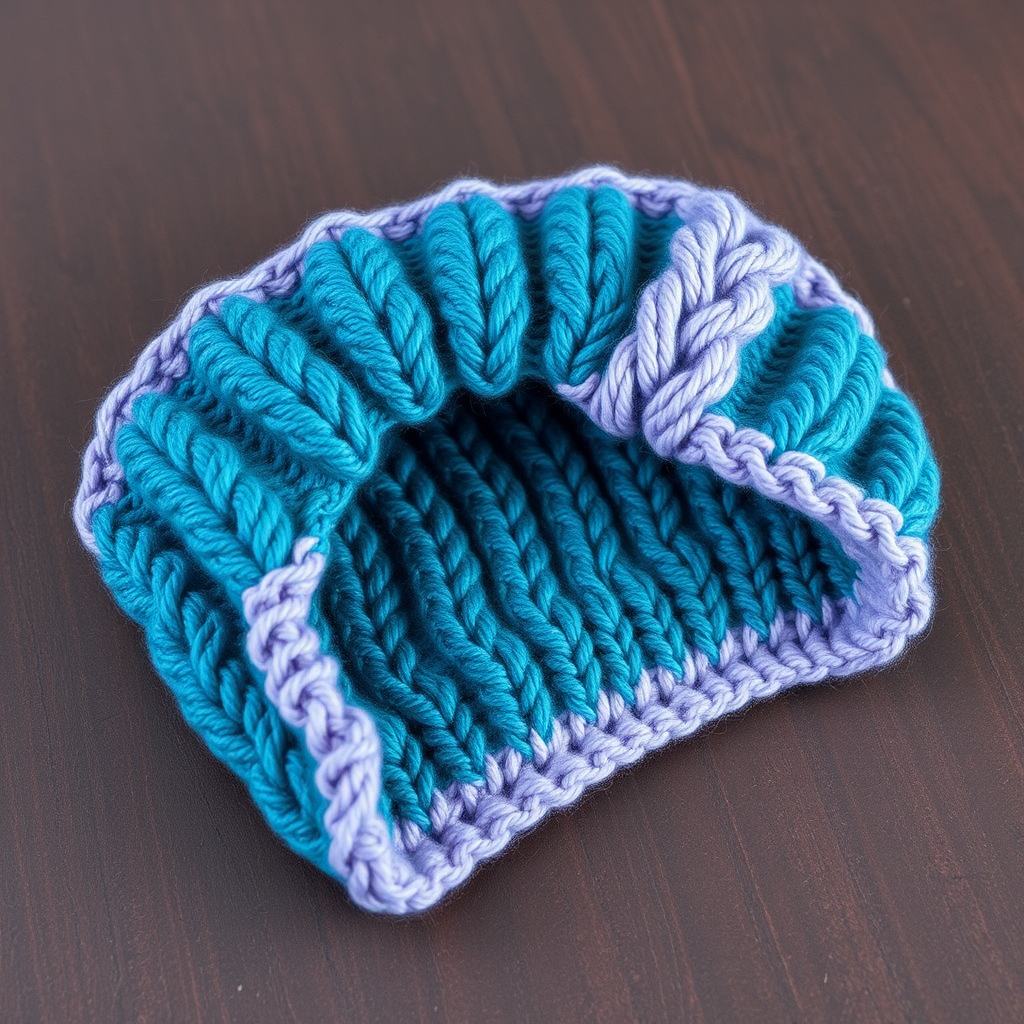
Free Pattern: Chunky Cable Knit Honeycomb Stocking in Lilac

Introduction
Welcome to your very first cable-knit adventure! This Chunky Cable Knit Honeycomb Stocking is the perfect project for anyone who has never picked up knitting needles before but is ready to make something truly special. It is a generously sized, folk-art-inspired stocking with a deep folded honeycomb cable cuff, a smooth stockinette leg, and a snug ribbed toe, all worked in soft lilac worsted cotton. The finished stocking measures about 18 inches long and 12 inches around, so it holds plenty of gifts and looks beautiful hanging by the fire. The crisp honeycomb cable gives it a rich, textured, handmade look, while the matte cotton makes every stitch soft and defined. If you can knit and purl, you can absolutely make this stocking, and we will walk through every single step together.
Materials Needed
- Yarn: Worsted weight cotton yarn (approximately 200–220 yards / 100 g per skein) in a lilac colorway. You will need about 2.5 skeins, or 500–550 yards total.
- Needles: US 7 (4.5 mm) 16-inch circular needle, plus a set of US 7 (4.5 mm) double-pointed needles (for the toe). Adjust needle size if needed to obtain gauge.
- Cable needle: One cable needle (a short, curved or straight needle used to hold stitches temporarily while you make a cable).
- Stitch markers: At least 4 stitch markers (small rings that clip onto your needle to mark places in your work).
- Tapestry needle: A large-eyed, blunt-tipped needle for seaming and weaving in ends.
- Scissors: Any sharp pair of craft scissors.
- Finished size: Length approximately 18 inches / 46 cm from the top of the folded cuff to the toe. Circumference approximately 12 inches / 30 cm (a generous size that fits a wide range of gifts).
Abbreviations and Beginner Glossary
- st / sts – stitch / stitches (one loop on your needle is one stitch).
- k – knit (insert the right needle into the front of the stitch from left to right, wrap the yarn around, and pull a loop through).
- p – purl (insert the right needle into the front of the stitch from right to left, wrap the yarn around the front, and pull a loop through).
- RS – right side (the front, outward-facing side of your work).
- WS – wrong side (the back, inward-facing side of your work).
- rep – repeat (do the same thing again).
- pm – place marker (slide a stitch marker onto your needle to mark a spot).
- sl1 – slip one stitch (move one stitch from the left needle to the right needle without knitting or purling it).
- k2tog – knit two stitches together (insert the needle through two stitches at once and knit them as one, which decreases your stitch count by one).
- ssk – slip, slip, knit (slip one stitch knitwise, slip a second stitch knitwise, then knit both together through the back loops; this is a left-leaning decrease).
- p2tog – purl two stitches together (purl two stitches as one, decreasing by one).
- C4B – cable 4 back (slip 2 stitches onto the cable needle and hold them in back of your work, knit the next 2 stitches from the left needle, then knit the 2 stitches from the cable needle).
- C4F – cable 4 front (slip 2 stitches onto the cable needle and hold them in front of your work, knit the next 2 stitches from the left needle, then knit the 2 stitches from the cable needle).
- 2x2 ribbing – a stretchy pattern of knit 2, purl 2 repeated across the row.
- stockinette stitch – knit every stitch when working in the round; when working flat, knit on the RS and purl on the WS.
- Kitchener stitch – a way of joining two sets of live stitches so the seam is invisible (we will explain it in the finishing section).
- mattress stitch – a seaming technique that joins two edges neatly and invisibly.
Gauge
20 stitches and 26 rows = 4 inches / 10 cm in stockinette stitch on US 7 needles, after blocking.
Gauge matters because it tells you how big your stitches are. If your stitches are bigger than the pattern expects, your stocking will come out too large; if they are smaller, it will come out too small. To check your gauge, cast on about 30 stitches and knit a square in stockinette stitch (knit one row, purl one row, back and forth) until it measures about 4 inches tall. Lay it flat, place a ruler across the middle, and count how many stitches fit in 4 inches. If you have more than 20, try a larger needle; if you have fewer, try a smaller needle. Always measure after gently blocking (wetting and drying) your swatch, because cotton relaxes when washed.
Beginner Tips Before You Start
- Use stitch markers generously. Place a marker before and after each 16-stitch cable panel so you always know exactly where the cables begin and end. This prevents the most common beginner mistake of losing your place.
- Do not pull your yarn too tight. Keep your tension relaxed and even. Tight stitches make cables hard to work and make the finished fabric stiff. If your stitches feel hard to slide on the needle, you are pulling too tight.
- Count your stitches at the end of every row. The pattern tells you the stitch count in parentheses after each row. If your count does not match, stop and fix it before moving on.
- Read the whole cable row before you begin. Cable rows are the trickiest part. Read the instruction out loud, then work it slowly, one group of four stitches at a time.
- Keep your cable needle close. When you are not using it, tuck it into your yarn ball so it does not roll away.
- Do not be afraid to undo. If something looks wrong, gently slide the stitches off and pull the yarn back to fix it. Every knitter does this, even experts.
Step-by-Step Instructions
Honeycomb Cable Panel (worked over 16 stitches)
This panel is the star of the stocking. It is worked flat (back and forth) and repeated on both sides of the cuff.
- Rows 1, 3, 5, 7 (RS): Knit. (16 sts)
- Rows 2, 4, 6, 8 (WS): Purl. (16 sts)
- Row 9 (RS): C4B, C4F, C4B, C4F. (16 sts)
- Rows 10–16: Work as rows 2–8 (purl on WS, knit on RS). (16 sts)
- Row 17 (RS): C4F, C4B, C4F, C4B. (16 sts)
- Rows 18–24: Work as rows 2–8. (16 sts)
Repeat rows 1–24 for the cable pattern.
Cuff (worked flat, then seamed)
- Cast on: With the circular needle, cast on 64 sts using the long-tail method. (64 sts)
- Row 1 (RS): K2, *p2, k2; rep from * to end. (64 sts)
- Row 2 (WS): P2, *k2, p2; rep from * to end. (64 sts)
- Rows 3–8: Repeat rows 1–2 three more times. (64 sts)
- Next row (RS): Work in 2x2 ribbing as established across all 64 sts. (64 sts)
- Rows 10–14: Work even in 2x2 ribbing until the piece measures 3 inches / 7.5 cm from the cast-on edge, ending on a WS row. (64 sts)
Set Up for Cable Panel
- Next row (RS): K8, place marker (pm), work row 1 of the Honeycomb Cable Panel over the next 16 sts, pm, k16, pm, work row 1 of the panel over the next 16 sts, pm, k8. (64 sts)
- Next row (WS): P8, work row 2 of the panel, p16, work row 2 of the panel, p8. (64 sts)
- Continue as established: Work the 16-stitch cable panels on each side with stockinette (knit on RS, purl on WS) between and outside them, until the cuff measures 8 inches / 20 cm from the cast-on edge, ending after row 24 of the cable panel. (64 sts)
- Bind off all sts loosely in pattern. (64 sts bound off)
Seam the Cuff
Fold the cuff in half with the right sides together. Using mattress stitch and your tapestry needle, seam the cast-on edge to the bound-off edge to form a tube. Turn the cuff right side out. The cable panel will sit at the front and back of the stocking.
Leg
- Pick up: With the right side facing and using the circular needle, pick up and knit 64 sts evenly around the lower edge of the cuff (the edge opposite the fold). Join to work in the round, placing a marker at the beginning of the round. (64 sts)
- Rounds 1–65: Knit every round (stockinette) until the leg measures 10 inches / 25 cm from the pick-up edge. (64 sts)
Heel Flap
- Rearrange stitches: Place 32 sts on hold for the instep (the front of the stocking). Work back and forth on the remaining 32 sts for the heel. (32 sts working)
- Row 1 (RS): Sl1, knit to end. (32 sts)
- Row 2 (WS): Sl1, purl to end. (32 sts)
- Rows 3–16: Repeat rows 1–2 seven more times, until the heel flap measures 2.5 inches / 6 cm, ending on a WS row. (32 sts)
Turn Heel
- Row 1 (RS): Sl1, k17, ssk, k1, turn. (31 sts)
- Row 2 (WS): Sl1, p5, p2tog, p1, turn. (30 sts)
- Row 3: Sl1, k6, ssk, k1, turn. (29 sts)
- Row 4: Sl1, p7, p2tog, p1, turn. (28 sts)
- Rows 5–12: Continue in this manner, working 1 more stitch before each decrease, until all heel stitches have been worked, ending with a RS row. (18 sts remain)
Gusset
- Set up: With the right side facing, pick up and knit 14 sts along the first side of the heel flap. Knit across the 32 held instep sts. Pick up and knit 14 sts along the second side of the heel flap. Knit across the 18 heel sts. (78 sts)
- Round 1: Knit to the last 3 sts before the instep, k2tog, k1, knit across the instep, k1, ssk, knit to end. (76 sts)
- Round 2: Knit. (76 sts)
- Rounds 3–14: Repeat rounds 1–2 six more times, until 64 sts remain. (64 sts)
Foot
- Rounds 1–46: Knit every round until the foot measures 7 inches / 18 cm from the back of the heel, or 2 inches / 5 cm less than your desired finished foot length. (64 sts)
Toe
- Round 1: K1, ssk, knit to 3 sts before the instep marker, k2tog, k1, slip marker, k1, ssk, knit to 3 sts before the end of the round, k2tog, k1. (60 sts)
- Round 2: Knit. (60 sts)
- Rounds 3–16: Repeat rounds 1–2 seven more times, until 32 sts remain. (32 sts)
- Next round: K1, ssk, knit to 3 sts before the instep marker, k2tog, k1, slip marker, k1, ssk, knit to 3 sts before the end of the round, k2tog, k1. (28 sts)
- Next round: Knit. (28 sts)
- Rounds 19–24: Repeat the last 2 rounds three more times, until 16 sts remain. (16 sts)
- Graft the toe using Kitchener stitch. (16 sts joined)
Assembly and Finishing
Grafting the toe: Cut the yarn leaving a 12-inch tail. Thread the tail onto your tapestry needle. Hold the two sets of 8 stitches parallel, one in front and one in back. Bring the needle through the first front stitch as if to knit and slip it off, then through the first back stitch as if to purl and slip it off. Then bring the needle through the next front stitch as if to purl and leave it on, then through the next back stitch as if to knit and leave it on. Repeat this rhythm across all stitches. The seam will disappear into the fabric.
Weaving in ends: Thread each loose yarn tail onto the tapestry needle and weave it back and forth through the wrong side of the fabric for about 2 inches, then trim close to the fabric. Do not knot the ends, as knots can work loose in the wash.
Blocking: Soak the finished stocking in cool water for 15 minutes, gently squeeze out the excess water (do not wring), and roll it in a towel to remove more moisture. Lay it flat on a dry towel, shape it to the finished measurements, and gently open the cable stitches with your fingers. Allow it to dry completely, which may take 24–48 hours for cotton.
Final fold: Fold the cable cuff down over the top of the stocking. The honeycomb cable panel should sit centered at the front and back.
Pro Tips and Variations
- Color changes: Try a two-tone stocking by working the cuff in lilac and the leg in a soft cream, or add a contrasting heel and toe for a classic folk-art look.
- Size adjustments: To make a smaller stocking, cast on 48 sts instead of 64 and adjust the cable panels to a single 16-stitch panel centered on the cuff. To make a larger stocking, cast on 80 sts and add a third cable panel.
- Yarn substitutions: This pattern works beautifully in any worsted weight yarn. For a warmer, fuzzier stocking, try a wool or wool-blend yarn; just remember that wool behaves differently from cotton, so always knit a gauge swatch first.
- Hanging loop: Add a small loop by casting on 12 sts, knitting a 4-inch strip in stockinette, and sewing it to the inside of the cuff before folding.