Whispering Pines Cozy Knit Tissue Box Cover Free Pattern
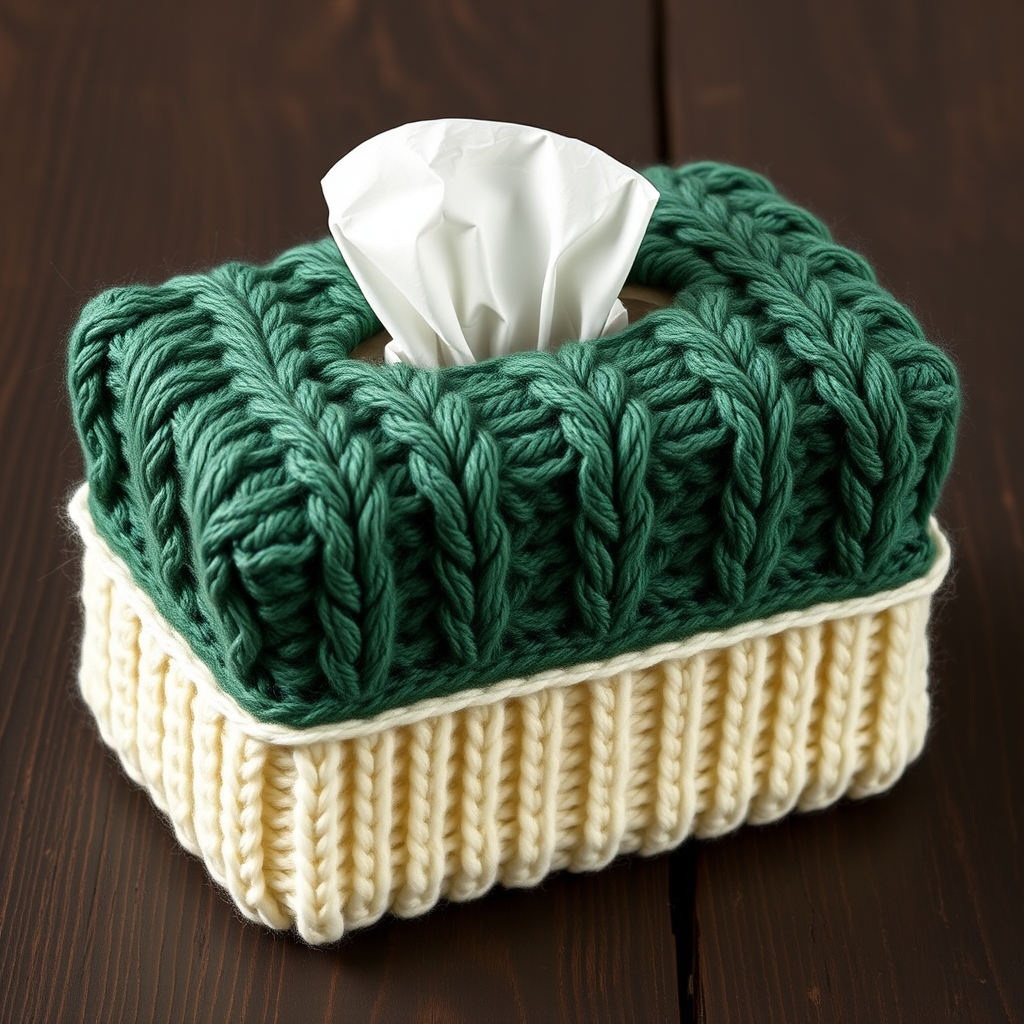
Whispering Pines Cozy Knit Tissue Box Cover: A Free Intermediate Knitting Pattern
Elevate your home decor with this charming knitted tissue box cover, featuring a delicate cable knit texture that adds warmth and sophistication to any room. This intermediate-level pattern is perfect for crafters looking to create a beautiful, functional piece. The rich forest green body with a contrasting cream bottom creates a classic, cozy aesthetic that will complement any space. Whether you're a seasoned knitter or an ambitious beginner ready for a challenge, this pattern will guide you through creating a stunning, handcrafted item that brings both style and practicality to your home.
This pattern is worked in the round from the top down and fits a standard rectangular tissue box (approximately 9 x 5 x 4 inches). The intricate cable pattern creates a beautiful textured diamond and braid effect, giving the cover a plush, handcrafted feel that drapes naturally over your tissue box.
Materials Needed
Before you begin, gather the following materials to ensure a smooth knitting experience:
- Yarn: Worsted weight yarn in two colors:
- Main Color (MC) - Forest Green (approximately 200 yards)
- Contrast Color (CC) - Cream (approximately 50 yards)
- Knitting Needles: US Size 7 (4.5 mm) knitting needles (circular or double-pointed for working in the round)
- Cable Needle: For creating the cable stitches
- Stitch Markers: To mark the beginning of rounds
- Tapestry Needle: For weaving in ends and finishing
- Scissors
Gauge: 20 stitches and 26 rows = 4 inches in stockinette stitch. Always check your gauge before starting to ensure your finished piece fits properly.
Step-by-Step Instructions
Abbreviations
Familiarize yourself with these abbreviations before you begin:
- CO: Cast on
- K: Knit
- P: Purl
- C4F: Slip 2 stitches to cable needle, hold in front, knit next 2 stitches, then knit 2 stitches from cable needle
- C4B: Slip 2 stitches to cable needle, hold in back, knit next 2 stitches, then knit 2 stitches from cable needle
- K2tog: Knit two stitches together (decrease)
- SSK: Slip, slip, knit (decrease)
- St(s): Stitch(es)
- Rnd: Round
Top Panel
Step 1: With Main Color (MC), cast on 72 stitches. Join in the round, being extremely careful not to twist your stitches. Place a stitch marker to mark the beginning of the round.
Step 2: Work the ribbed edge:
- Rounds 1-4: *K2, P2* repeat from * to end of round.
Step 3: Begin the cable pattern:
- Round 5: *C4F, P2, C4B, P2* repeat from * to end of round. (This sets up the cable pattern)
- Rounds 6-8: *K4, P2* repeat from * to end of round.
- Round 9: *C4B, P2, C4F, P2* repeat from * to end of round.
- Rounds 10-12: *K4, P2* repeat from * to end of round.
Step 4: Repeat Rounds 5-12 until the piece measures 4 inches from the cast-on edge. This creates the beautiful cable texture that will form the top of your tissue box cover.
Opening for Tissue Pull
Step 5: Create the opening for tissues:
- Next Round: Work in pattern across the first 36 stitches. Bind off the next 36 stitches loosely in pattern. Continue in pattern across the remaining 36 stitches. (You will now have two separate sections of 36 stitches each.)
Step 6: Work each side separately back and forth in rows for 2 inches, maintaining the cable pattern as established. This creates the sides of the tissue opening.
Step 7: Place both sections back on the needle, with the right sides facing you. Rejoin in the round by casting on 36 stitches between the two sections (over the opening). You now have 108 stitches total on your needles.
Body
Step 8: Continue in the round, working the cable pattern across all stitches. For the new stitches, incorporate them into the pattern as follows:
- Rounds 1-4: *K2, P2* across new stitches, and continue cable pattern on the original stitches.
Step 9: After 4 rounds, begin to shape the body to fit the box:
- Round 1: *K4, P2* repeat from * to end of round.
- Round 2: *C4F, P2* repeat from * to end of round.
- Rounds 3-4: *K4, P2* repeat from * to end of round.
Step 10: Repeat these 4 rounds until the body measures 5 inches from the top of the opening. The cover should now fit snugly over your tissue box.
Bottom Shaping
Step 11: Switch to Contrast Color (CC) - Cream. Work in stockinette stitch (knit every round) for 2 rounds. This creates the smooth, cream-colored section at the bottom of the cover.
Step 12: Begin decreasing to shape the bottom:
- Decrease Round 1: *K7, K2tog* repeat from * to end of round. (96 stitches remain)
- Knit 1 round.
- Decrease Round 2: *K6, K2tog* repeat from * to end of round. (84 stitches remain)
- Knit 1 round.
- Decrease Round 3: *K5, K2tog* repeat from * to end of round. (72 stitches remain)
- Knit 1 round.
- Decrease Round 4: *K4, K2tog* repeat from * to end of round. (60 stitches remain)
- Knit 1 round.
- Decrease Round 5: *K3, K2tog* repeat from * to end of round. (48 stitches remain)
- Knit 1 round.
- Decrease Round 6: *K2, K2tog* repeat from * to end of round. (36 stitches remain)
- Knit 1 round.
- Decrease Round 7: *K1, K2tog* repeat from * to end of round. (24 stitches remain)
- Knit 1 round.
- Decrease Round 8: *K2tog* repeat from * to end of round. (12 stitches remain)
Step 13: Cut the yarn, leaving a long tail (approximately 12 inches). Thread the tail through the remaining 12 stitches using your tapestry needle, pull tight to close the bottom, and secure firmly.
Finishing
Step 14: Weave in all loose ends using your tapestry needle, being careful to hide them within the stitches so they're not visible from the outside.
Step 15: Block gently to shape. To block, dampen the cover slightly and lay it flat to dry, gently shaping it to fit your tissue box dimensions. This will help the cables relax and the cover to drape beautifully.
Step 16: Slide the cover over your tissue box, with the opening at the top for tissue pull. The ribbed opening should sit neatly around the tissue slot, and the cream bottom should hug the base of the box.
Tips for Success
To ensure your Whispering Pines tissue box cover turns out perfectly, keep these tips in mind:
- Check your gauge: Taking time to knit a gauge swatch will save you frustration later. If your gauge is off, adjust your needle size accordingly.
- Use stitch markers: Place markers at the beginning of each pattern repeat to help you keep track of where you are in the cable pattern.
- Keep tension consistent: When working cables, be careful not to pull too tightly on the cable needle stitches, as this can distort the pattern.
- Count your stitches regularly: Especially during the decrease rounds, counting ensures you don't accidentally drop or add stitches.
- Block patiently: Proper blocking makes a significant difference in how the cables lay flat and how the cover drapes over the box.
This Whispering Pines Cozy Knit Tissue Box Cover is a wonderful project that combines beauty with functionality. The rich forest green and cream color combination brings a touch of nature indoors, while the intricate cable pattern adds texture and visual interest to any room. Whether you're making this for yourself or as a thoughtful handmade gift, the result will be a stunning piece that showcases your knitting skills. Happy knitting!


