Whispering Pines Corner-to-Corner Throw Free Pattern
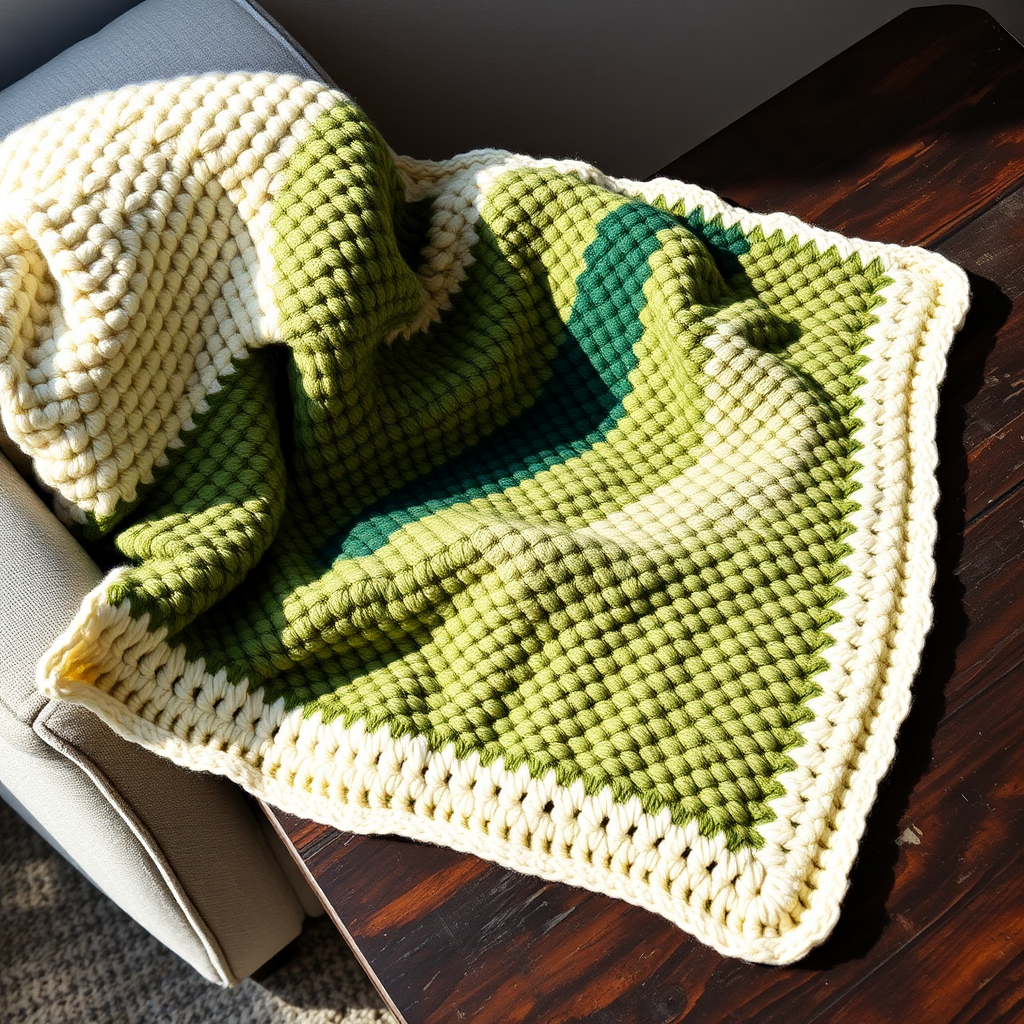
Whispering Pines Corner-to-Corner Throw: A Free Crochet Pattern
Wrap yourself in the serene beauty of a forest with this corner-to-corner (c2c) crochet throw. Featuring a stunning gradient of evergreen hues—from soft cream to deep spruce—this modern take on a classic technique creates a soft, textured fabric that drapes beautifully over any couch. Whether you're a seasoned crocheter or looking for your next cozy project, this free pattern is designed to be both relaxing to make and breathtaking to display.
Materials Needed
Before you begin, gather the following supplies to ensure a smooth crafting experience:
- Yarn: Worsted weight yarn in 5 shades of green (e.g., sage, forest, spruce, moss, cream) - approximately 1800 yards total. For this pattern, we'll use:
- Color A (cream): ~200 yards
- Color B (sage): ~400 yards
- Color C (moss): ~400 yards
- Color D (forest): ~400 yards
- Color E (spruce): ~400 yards
- Hook: 5.5 mm (I/9) crochet hook
- Other: Yarn needle for weaving in ends, scissors
Gauge: 4 c2c blocks = 4 inches; 8 rows = 4 inches. (Gauge is important for achieving the correct finished size, but this pattern is forgiving—just keep your tension consistent.)
Step-by-Step Instructions
This blanket is worked diagonally from one corner to the opposite corner using the corner-to-corner (c2c) technique. Each "block" is made of 3 chain stitches and 3 double crochet stitches, worked into the spaces of the previous row. Follow along carefully, and you'll have a stunning throw in no time.
Understanding the C2C Block
Every block in this pattern is identical: Chain 3, then work 3 double crochet (dc) into the designated space. The first block of each row is always started with a chain 6 (which counts as the chain 3 plus the first dc), then 2 more dc worked into the 4th chain from the hook. All subsequent blocks are worked into the chain-3 spaces from the previous row.
Color Sequence
Follow this color progression for a smooth gradient. Change colors at the end of each row as indicated:
- Color A (cream): Rows 1-5
- Color B (sage): Rows 6-15
- Color C (moss): Rows 16-25
- Color D (forest): Rows 26-35
- Color E (spruce): Rows 36-45
- Then repeat the sequence in reverse for the decrease (Rows 46-90).
Increasing Section (Rows 1-45)
We'll start at the corner and increase by one block each row until we reach the widest point.
Row 1: With Color A, chain 6. Work 1 dc in the 4th chain from hook, and 1 dc in each of the next 2 chains. (This forms the first block.) Turn.
Row 2: Chain 6. Work 1 dc in the 4th chain from hook, 1 dc in each of the next 2 chains. (This is the first block of this row.) Now, find the chain-3 space from the previous row (the turning chain of the previous block). Work 3 dc into that space. Turn. (You now have 2 blocks.)
Row 3: Chain 6, work 1 dc in the 4th chain from hook, 1 dc in each of the next 2 chains. Then, work 3 dc into the next chain-3 space (the space between the two blocks from the previous row). Repeat this for each chain-3 space across the row. Turn. (3 blocks)
Rows 4-45: Continue this pattern, increasing by 1 block each row. At the start of each row, chain 6 to create the new block, then work 3 dc into each chain-3 space across. When you change colors, simply drop the old color and pick up the new one at the start of the next row, leaving a 6-inch tail to weave in later. By Row 45, you should have 45 blocks across the diagonal.
Decreasing Section (Rows 46-90)
Now we'll decrease by one block each row to create the opposite corner. The technique is simple: we skip the last block of each row.
Row 46: With Color D (forest), chain 3 (this counts as the first dc of the first block). Work 2 dc into the first chain-3 space. (This completes the first block of this row.) Then, work 3 dc into each of the next chain-3 spaces across the row, but do NOT work into the last chain-3 space. Turn. (44 blocks)
Row 47: Chain 3, work 2 dc into the first chain-3 space. Work 3 dc into each of the next chain-3 spaces, skipping the last one. Turn. (43 blocks)
Rows 48-90: Continue decreasing by 1 block each row, following the color sequence in reverse (forest, moss, sage, cream). When you have only 1 block left, fasten off and weave in all ends.
Border
The border adds a polished finish and helps the blanket lie flat.
Round 1: With Color A (cream), attach yarn to any corner. Work a round of single crochet (sc) evenly around the entire blanket, working 3 sc into each corner to turn the corner smoothly. Join with a slip stitch to the first sc.
Round 2: Work a round of reverse single crochet (crab stitch) for a finished edge. To do this, work single crochet stitches from left to right (instead of right to left). Insert your hook into the next stitch to the right, yarn over, pull up a loop, yarn over, and pull through both loops on the hook. Continue this around the entire blanket. Fasten off and weave in all ends.
Finishing Touches
Once you've completed the border, take a moment to weave in any remaining loose ends with your yarn needle. Gently block the blanket if desired—this helps even out the stitches and gives it a professional look. Then, drape it over your favorite chair or sofa and enjoy the cozy, forest-inspired warmth!
This pattern is perfect for beginners and experienced crocheters alike. The repetitive c2c rhythm is meditative, and watching the gradient unfold is deeply satisfying. Happy crocheting!



