Whispering Pines Chunky Crochet Scarf Free Pattern
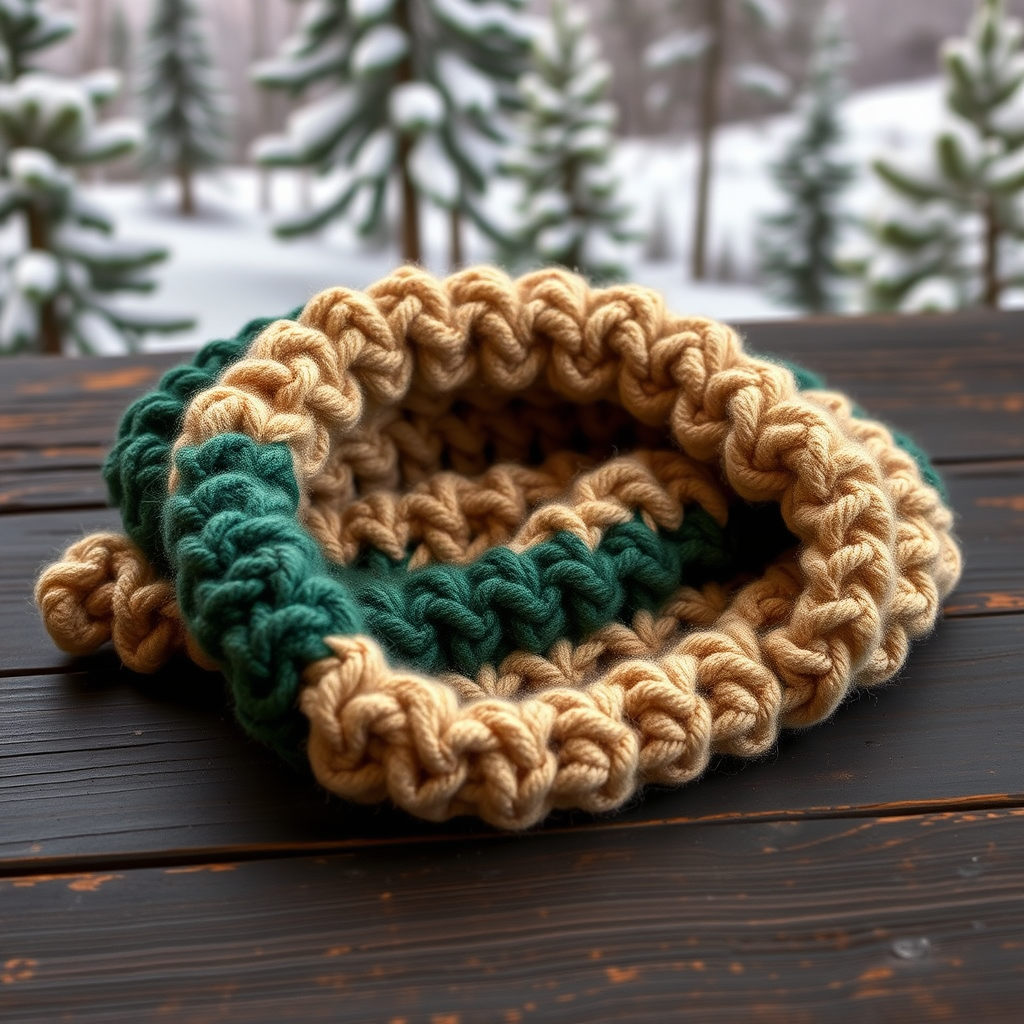
Wrap Yourself in Cozy Forest Vibes: The Whispering Pines Chunky Crochet Scarf
Imagine wrapping yourself in a cloud that smells like pine trees and feels like a warm hug on a frosty morning. That's the magic of the Whispering Pines Chunky Crochet Scarf. This isn't just any winter accessory; it's a statement piece that combines the serene beauty of a forest with the luxurious comfort of super bulky yarn. The alternating puff and single crochet stitches create a dense, plush, and wonderfully textured fabric that is both stylish and incredibly warm. Best of all, this pattern is beginner-friendly, using just one basic stitch variation to create a stunning, high-end look. Whether you're a seasoned maker or picking up a hook for the first time, this scarf is the perfect project to keep your hands busy and your neck cozy all season long.
This free pattern will guide you through every step, from the first chain to the final fringe, ensuring you create a beautiful, handmade scarf that you'll be proud to wear or gift. Let's get started!
Materials Needed: Gather Your Forest Treasures
Before we dive into the stitches, let's make sure you have everything you need. This project is wonderfully simple, requiring just a few key items.
Yarn
- Super Bulky Weight Yarn (Size 6): Approximately 250-300 yards. For the classic forest look, we recommend using Lion Brand Wool-Ease Thick & Quick in two colors: 'Forest Green' and 'Oatmeal'. However, feel free to choose any two colors that speak to you! The contrast between a deep, rich tone and a warm, neutral one really makes the puff stitch texture pop.
Hook & Notions
- Crochet Hook: Size N/P (10 mm) crochet hook. This larger hook is essential for creating the loose, drapey, and cloud-like fabric that makes this scarf so special.
- Yarn Needle: A large-eye yarn needle for weaving in the ends and attaching the fringe.
- Scissors: A sharp pair for cutting your yarn.
Gauge
- 4 puff stitches x 4 rows = 4 inches (10 cm) in pattern stitch. While gauge is important for exact sizing, this scarf is very forgiving. As long as you're using the recommended yarn and hook, you'll get a beautiful result.
Step-by-Step Instructions: Crafting Your Whispering Pines Scarf
Now for the fun part! We'll break this down into simple, manageable steps. Don't be intimidated by the puff stitch—once you get the rhythm, it's incredibly satisfying and easy to master.
Understanding the Puff Stitch (puff)
This is the star of our show. The puff stitch creates the beautiful, raised, cloud-like bumps in our fabric. Here’s how to work it:
- Yarn over (yo) and insert your hook into the specified stitch.
- Yarn over and pull up a loop. You should now have 3 loops on your hook.
- Yarn over and insert your hook into the same stitch.
- Yarn over and pull up a loop. You should now have 5 loops on your hook.
- Yarn over and insert your hook into the same stitch one more time.
- Yarn over and pull up a loop. You should now have 7 loops on your hook.
- Yarn over and pull through all 7 loops on your hook.
- Chain 1 (ch 1) to close and secure the puff. Important: This chain 1 does not count as a stitch.
Starting Your Scarf: The Foundation Row
- With your Forest Green yarn, make a slip knot and chain (ch) 28 loosely. Keeping these chains loose will make it much easier to work your first row of puff stitches.
- Row 1: Work 1 puff stitch into the 4th chain from your hook. The skipped chains will count as your first double crochet (dc).
- *Skip the next chain, then work 1 puff stitch into the following chain.*
- Repeat from * to * across the row until you have 2 chains left.
- Skip the next chain, and work 1 double crochet (dc) into the very last chain. This creates a neat, straight edge. Turn your work.
- You should now have a row with 12 puff stitches, with a dc at each end.
Building the Pattern: Row 2 and Beyond
- Row 2: Chain 3 (this counts as your first dc).
- Work 1 puff stitch into the chain-1 space of the first puff stitch from the previous row. Remember, the puff stitch creates a little hole (the ch-1 space) right next to it. This is where you'll be working.
- *Work 1 puff stitch into the chain-1 space of the next puff stitch.*
- Repeat from * to * across the row.
- Work 1 dc into the top of the turning chain from the previous row. This completes the row and keeps your edges even. Turn your work.
- Rows 3-30: Repeat Row 2, but here's where the magic of color comes in! We'll alternate colors every 2 rows to create those beautiful, wide stripes.
Adding the Color Stripes
- Rows 3 & 4: Continue with Forest Green.
- Rows 5 & 6: Switch to Oatmeal. To change colors, simply complete the last yarn over of your final puff stitch in Row 4 with the new color, and chain 3 to start the next row.
- Continue this pattern of alternating colors every 2 rows (2 rows Forest Green, 2 rows Oatmeal, etc.) until you reach your desired length. The pattern calls for approximately 60 inches (152 cm), which is about 30 rows total. Be sure to end with a Forest Green row to frame your scarf beautifully.
Finishing Touches: The Final Row
- Once your scarf reaches the desired length, it's time for a clean, simple edge.
- Final Row: With Forest Green, chain 1 and turn.
- Work 1 single crochet (sc) into each stitch across the row. This means working 1 sc into each puff stitch and 1 sc into each dc. This creates a neat, flat border that prevents the edges from curling.
- Fasten off your yarn, leaving a 6-inch tail. Use your yarn needle to weave in all loose ends securely.
Adding the Fringe (Optional but Highly Recommended)
Fringe adds the perfect finishing touch to this boho-chic scarf. It's easy to do and gives it a polished, professional look.
- Cut several lengths of yarn, each 12 inches long. You'll use 2 strands per fringe.
- Fold the 2 strands in half to create a loop.
- Insert your hook from the back to the front through an edge stitch on one of the short ends of the scarf.
- Catch the folded loop with your hook and pull it through the edge stitch.
- Pull the loose ends of the yarn through the loop and pull tight to secure the fringe.
- Repeat this process, spacing the fringes evenly across both short ends of the scarf. A good spacing is one fringe in every other stitch or so.
- Once all your fringe is attached, trim the ends of the fringe so they are all even and neat.
And there you have it—your very own Whispering Pines Chunky Crochet Scarf! A beautiful, cozy, and stylish piece that you created with your own two hands. The plush texture and serene colors are sure to make it a favorite in your winter wardrobe. Whether you're curling up by the fire or heading out for a snowy walk, this scarf will keep you warm and wrapped in handmade love. Happy crocheting!


