Whimsical Woodland Sprite Free Crochet Pattern
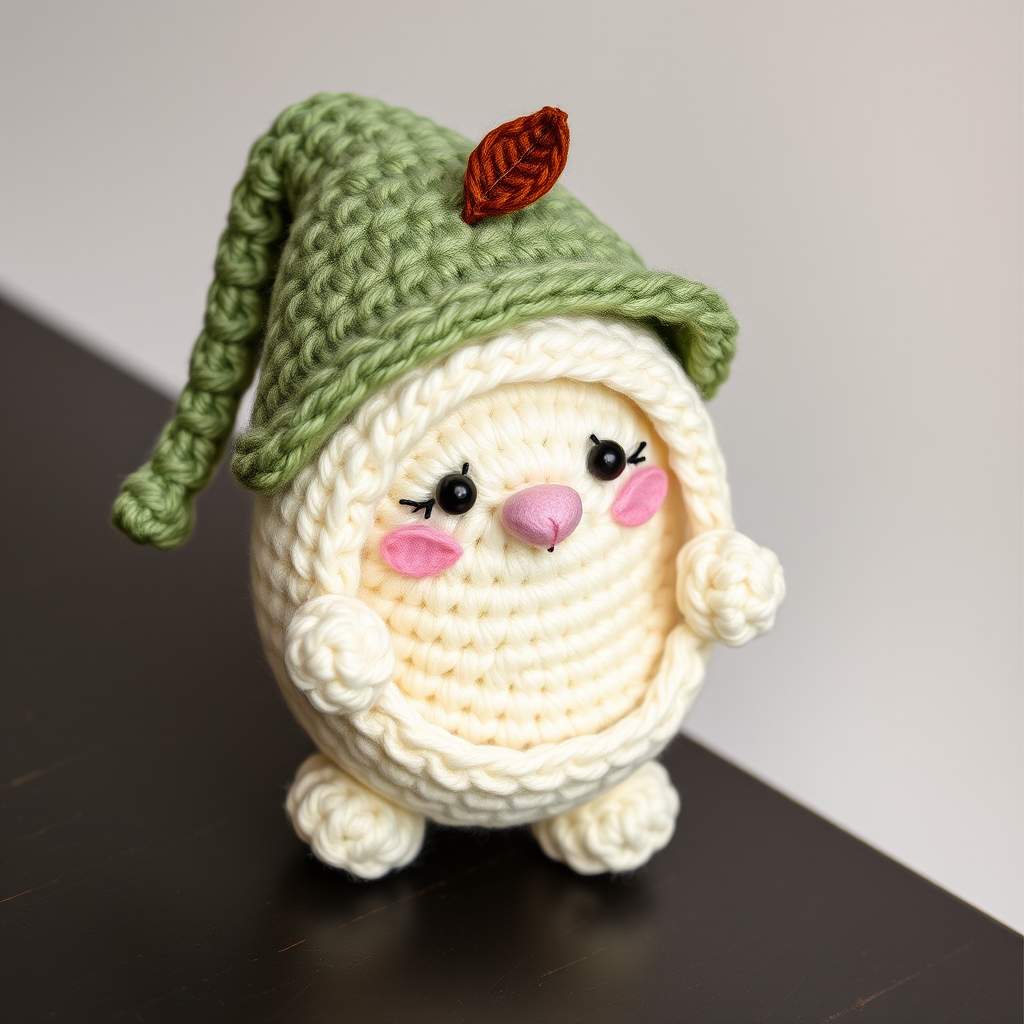
Whimsical Woodland Sprite Free Crochet Pattern
Bring a touch of enchanted forest charm to your home with this adorable crocheted sprite, complete with a floppy leaf hat and rosy cheeks. This quick and easy project is perfect for using up worsted weight yarn scraps and makes a delightful gift. Whether you're a seasoned crocheter or just starting your amigurumi journey, this beginner-friendly pattern will guide you through every step to create a whimsical companion that stands approximately 5 inches tall. The soft, stuffed appearance and visible stitch texture give this sprite a handmade, storybook quality that will brighten any shelf or nursery.
Materials Needed
Before you begin, gather the following supplies to ensure a smooth crafting session:
- Yarn: Worsted weight yarn in sage green (for the hat), cream (for the head and body), blush pink (for the nose and cheeks), and a small amount of brown (for the hat stem/leaf).
- Crochet Hook: G/6 (4.0 mm) crochet hook.
- Stitch Marker: To keep track of your rounds.
- Stuffing: Polyester fiberfill or any soft stuffing material.
- Yarn Needle: For sewing pieces together and weaving in ends.
- Black Embroidery Floss or Yarn: For embroidering the eyes.
- Scissors: For cutting yarn.
Note on Gauge: Gauge is not critical for this project; aim for a tight stitch to prevent stuffing from showing. If your stitches are loose, consider using a smaller hook.
Step-by-Step Instructions
This pattern is worked in continuous rounds unless otherwise stated. Use a stitch marker to keep track of rounds. The entire sprite is crocheted in one piece for the head and body, with separate pieces for the nose, hat, and leaf.
Head & Body (Worked as One Piece in Cream Yarn)
Start with the cream yarn and create the foundation of your sprite:
- Round 1: Make a magic ring, work 6 single crochet (sc) into the ring. (6 stitches)
- Round 2: Work 2 sc in each stitch around. (12 stitches)
- Round 3: *Sc in next stitch, 2 sc in next stitch* repeat around. (18 stitches)
- Round 4: *Sc in next 2 stitches, 2 sc in next stitch* repeat around. (24 stitches)
- Round 5: *Sc in next 3 stitches, 2 sc in next stitch* repeat around. (30 stitches)
- Rounds 6-10: Sc in each stitch around. (30 stitches) — This creates the height of the head.
- Round 11: *Sc in next 3 stitches, sc2tog (single crochet decrease)* repeat around. (24 stitches)
- Round 12: *Sc in next 2 stitches, sc2tog* repeat around. (18 stitches)
- Stuff the head firmly with fiberfill, ensuring it's plump but not overstuffed to the point of stretching stitches.
- Round 13: *Sc in next stitch, sc2tog* repeat around. (12 stitches)
- Round 14: Sc2tog around. (6 stitches)
- Fasten off, leaving a long tail. Thread the tail through a yarn needle, weave it through the front loops of the remaining 6 stitches, and pull tight to close the hole. Weave in the end securely.
Nose (In Blush Pink Yarn)
The tiny nose adds character to your sprite's face:
- Round 1: Make a magic ring, work 6 sc into the ring. (6 stitches)
- Round 2: Sc in each stitch around. (6 stitches) — This creates a small, rounded tube.
- Fasten off, leaving a long tail for sewing. Stuff lightly with a tiny amount of fiberfill. Set aside for assembly.
Hat (In Sage Green Yarn)
Create the whimsical, floppy hat that gives the sprite its woodland charm:
- Round 1: Make a magic ring, work 6 sc into the ring. (6 stitches)
- Round 2: 2 sc in each stitch around. (12 stitches)
- Round 3: *Sc in next stitch, 2 sc in next stitch* repeat around. (18 stitches)
- Round 4: *Sc in next 2 stitches, 2 sc in next stitch* repeat around. (24 stitches)
- Rounds 5-7: Sc in each stitch around. (24 stitches) — This forms the base of the hat that fits over the head.
- Round 8: *Sc in next 2 stitches, sc2tog* repeat around. (18 stitches)
- Rounds 9-10: Sc in each stitch around. (18 stitches)
- Round 11: *Sc in next stitch, sc2tog* repeat around. (12 stitches)
- Rounds 12-14: Sc in each stitch around. (12 stitches) — This elongated section will flop over naturally.
- Round 15: Sc2tog around. (6 stitches)
- Fasten off, leaving a long tail. Thread the tail through a yarn needle, weave it through the front loops of the remaining stitches, and pull tight to close. Weave in the end.
Hat Leaf (In Brown Yarn)
Add a touch of nature with a tiny leaf on the hat tip:
- Chain 6.
- Single crochet (sc) in the 2nd chain from the hook.
- Half double crochet (hdc) in the next chain.
- Double crochet (dc) in the next chain.
- Half double crochet (hdc) in the next chain.
- Single crochet (sc) in the last chain.
- Fasten off, leaving a long tail for sewing. This creates a small, leaf-shaped piece.
Assembly
Now it's time to bring all the pieces together to create your sprite:
- Sew the hat onto the top of the head: Position the hat slightly angled to one side for a whimsical, floppy look. Use the yarn needle and the tail from the hat to sew it securely around the base of the hat, catching stitches from the head underneath. Ensure it's firmly attached.
- Sew the leaf to the tip of the hat: Using the tail from the leaf, sew it onto the pointed tip of the hat. This adds a charming detail.
- Sew the nose onto the face: Position the nose about 3 rounds down from the top of the head (where the hat sits) and centered horizontally. Use the tail from the nose to sew it in place, making small stitches around the edge of the nose.
- Embroider the eyes: Using black embroidery floss or a small piece of black yarn, embroider two small eyes on either side of the nose, about 2 rounds above the nose. Make small, tight stitches to create simple dots or "x" shapes for a cute expression.
- Add rosy cheeks: Using blush pink yarn, embroider small circles on the cheeks. You can do this by making a few small, tight stitches in a circular pattern on each cheek area, or use a small piece of felt and glue if preferred. For a crocheted look, stitch a small spiral or just a few overlapping stitches.
- Weave in all ends securely: Use your yarn needle to hide any remaining yarn tails inside the sprite's body or hat, ensuring they are secure and won't unravel.
Your Whimsical Woodland Sprite is now complete! Display it on a shelf, gift it to a loved one, or create a whole family of sprites in different colors. This pattern is wonderfully versatile—experiment with different hat colors or add a tiny scarf for extra charm. Happy crocheting!


