Whimsical Woodland Gnome Free Pattern
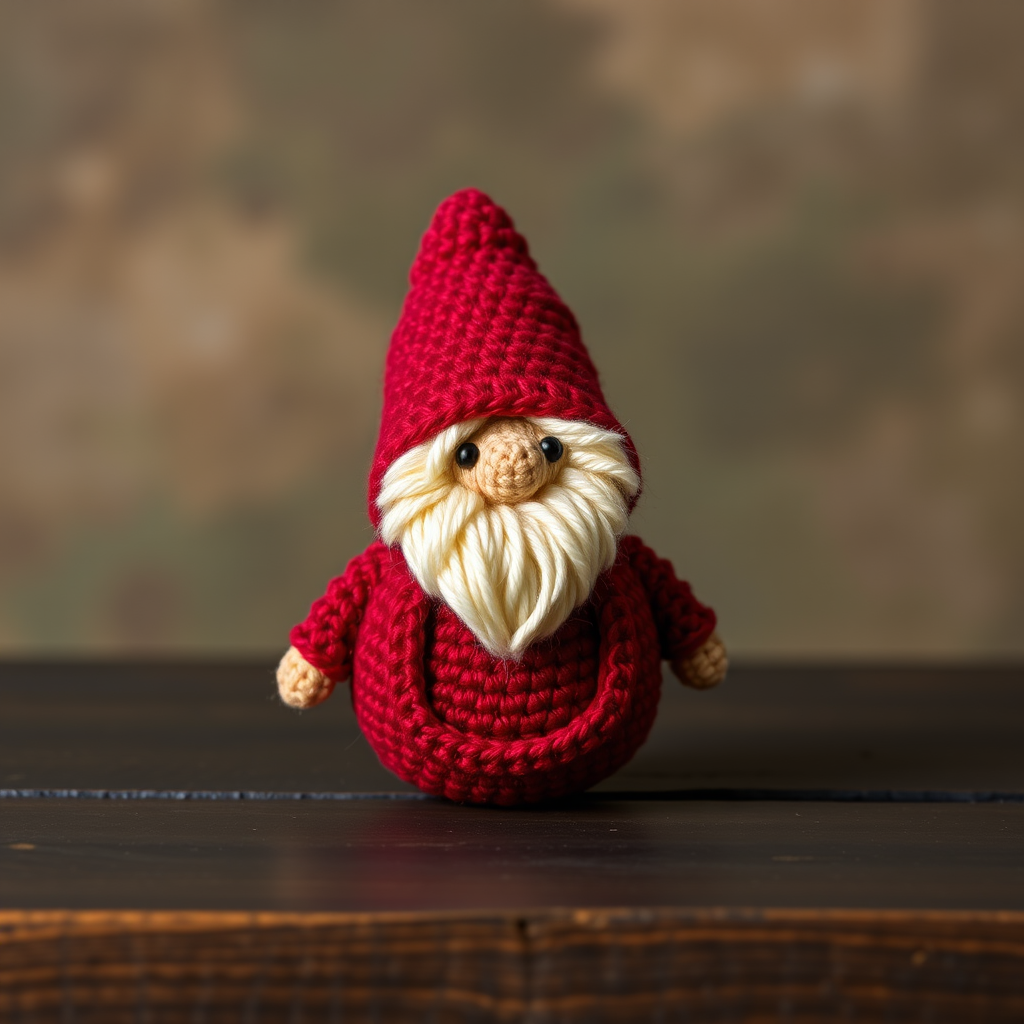
Whimsical Woodland Gnome Free Crochet Pattern
Bring a little magic into your home with this adorable pocket-sized woodland gnome! This charming amigurumi project features a fluffy beard, a pointed hat, and a sweet, round nose. It's the perfect quick weekend project for beginners and experienced crocheters alike. With simple stitches and easy-to-follow instructions, you can create a delightful handmade gift or a whimsical addition to your shelf in just an afternoon.
Materials Needed
Before you begin, gather the following supplies:
- Yarn: Worsted weight (4) cotton or acrylic yarn in the following colors:
- Red (for hat and body)
- Cream or white (for beard)
- Skin tone (for face and arms)
- Small amount of faux fur or fluffy yarn (for beard texture)
- Black yarn (for embroidering eyes)
- Crochet Hook: G/6 (4.0 mm) crochet hook
- Stitch Marker: To keep track of rounds
- Yarn Needle: For sewing pieces together and weaving in ends
- Stuffing: Polyester fiberfill or similar stuffing material
- Scissors: For cutting yarn
Gauge: Not critical for this project, but aim for a tight tension to prevent stuffing from showing through. Approximately 4 single crochet stitches = 1 inch.
Step-by-Step Instructions
This pattern is worked in continuous rounds unless otherwise stated. Use a stitch marker to keep track of your rounds.
Head & Body (Worked as One Piece)
Round 1: With skin tone yarn, make a magic ring, work 6 single crochet (sc) into the ring. (6 stitches)
Round 2: Work 2 sc in each stitch around. (12 stitches)
Round 3: (Sc in next stitch, 2 sc in next stitch) repeat around. (18 stitches)
Round 4: (Sc in next 2 stitches, 2 sc in next stitch) repeat around. (24 stitches)
Rounds 5-7: Sc in each stitch around. (24 stitches)
Round 8: (Sc in next 2 stitches, sc2tog) repeat around. (18 stitches)
Round 9: (Sc in next stitch, sc2tog) repeat around. (12 stitches) – Stuff head firmly.
Round 10: Sc2tog around. (6 stitches) – Fasten off, leaving a long tail. Weave through front loops, pull tight, and secure.
Body (Continue from Head)
Round 11: With red yarn, attach to any stitch of the head's last round. Work 2 sc in each stitch around. (12 stitches)
Round 12: (Sc in next stitch, 2 sc in next stitch) repeat around. (18 stitches)
Round 13: (Sc in next 2 stitches, 2 sc in next stitch) repeat around. (24 stitches)
Rounds 14-16: Sc in each stitch around. (24 stitches)
Round 17: (Sc in next 2 stitches, sc2tog) repeat around. (18 stitches)
Round 18: (Sc in next stitch, sc2tog) repeat around. (12 stitches) – Stuff body firmly.
Round 19: Sc2tog around. (6 stitches) – Fasten off, weave in end.
Nose
Round 1: With skin tone yarn, make a magic ring, work 6 sc into the ring. (6 stitches)
Round 2: Sc in each stitch around. (6 stitches) – Fasten off, leaving a tail. Sew nose to the center of the face, slightly above the beard line.
Beard
Attach fluffy yarn (or faux fur) to the face area using a yarn needle. Make loops of yarn around the face, from ear to ear, leaving the nose exposed. Trim to desired length.
Hat
Round 1: With red yarn, make a magic ring, work 6 sc into the ring. (6 stitches)
Round 2: (Sc in next stitch, 2 sc in next stitch) repeat around. (9 stitches)
Round 3: Sc in each stitch around. (9 stitches)
Round 4: (Sc in next 2 stitches, 2 sc in next stitch) repeat around. (12 stitches)
Round 5: Sc in each stitch around. (12 stitches)
Round 6: (Sc in next 3 stitches, 2 sc in next stitch) repeat around. (15 stitches)
Rounds 7-10: Sc in each stitch around. (15 stitches)
Round 11: (Sc in next 4 stitches, 2 sc in next stitch) repeat around. (18 stitches)
Rounds 12-14: Sc in each stitch around. (18 stitches)
Round 15: (Sc in next 5 stitches, 2 sc in next stitch) repeat around. (21 stitches)
Rounds 16-18: Sc in each stitch around. (21 stitches)
Round 19: (Sc in next 6 stitches, 2 sc in next stitch) repeat around. (24 stitches)
Rounds 20-22: Sc in each stitch around. (24 stitches)
Round 23: (Sc in next 7 stitches, 2 sc in next stitch) repeat around. (27 stitches)
Rounds 24-26: Sc in each stitch around. (27 stitches)
Round 27: (Sc in next 8 stitches, 2 sc in next stitch) repeat around. (30 stitches)
Rounds 28-30: Sc in each stitch around. (30 stitches) – Fasten off, leaving a long tail. Fold hat and sew the top edge to create a point, or leave as is. Sew hat to head, covering the top of the beard.
Arms (Make 2)
Round 1: With skin tone yarn, make a magic ring, work 6 sc into the ring. (6 stitches)
Rounds 2-4: Sc in each stitch around. (6 stitches) – Stuff lightly.
Round 5: Switch to red yarn, sc in each stitch around. (6 stitches)
Rounds 6-8: Sc in each stitch around. (6 stitches) – Fasten off, leaving a tail. Sew arms to the sides of the body.
Finishing Touches
Embroider eyes with black yarn or attach safety eyes. Add any additional details like a tiny mushroom or flower on the hat. Weave in all ends securely.
Your whimsical woodland gnome is now complete! This little fellow makes a wonderful gift, a charming decoration, or a fun addition to any amigurumi collection. Enjoy your handmade creation!


