Whimsical Woodland Fox Crochet Hat Free Pattern
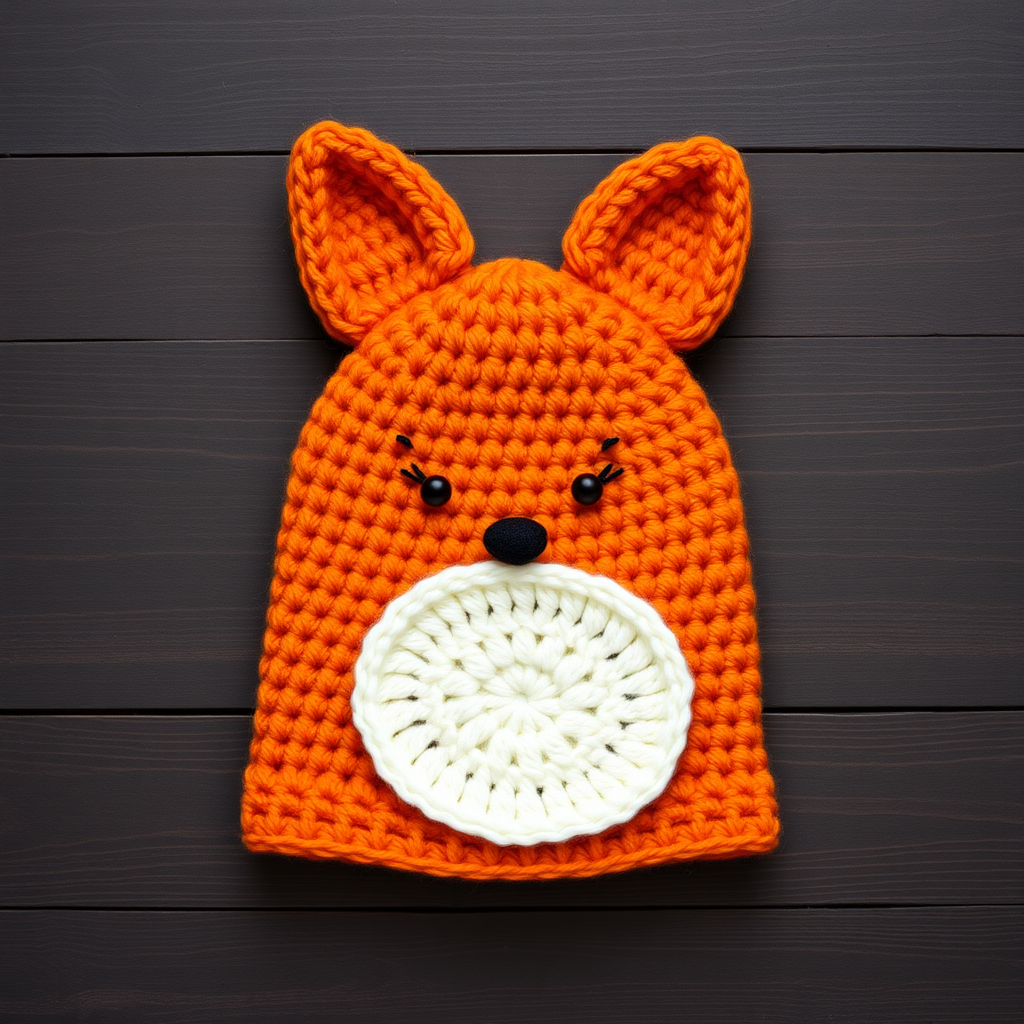
Whimsical Woodland Fox Crochet Hat: A Free Beginner-Friendly Pattern
Transform into a charming forest creature with this playful fox hat, featuring pointed ears and a cozy, textured finish. This free pattern is perfect for adding a touch of whimsy to chilly days. Whether you're a seasoned crocheter or just starting your yarn journey, this adorable hat works up quickly using basic stitches and simple shaping. The vibrant orange, crisp white, and deep black color blocking creates a striking, huggable accessory that's sure to become a favorite for fall photos, woodland-themed parties, or simply keeping warm with a smile.
This project is designed with beginners in mind, using only single crochet (sc), increases, and decreases. The magic ring start creates a seamless crown, and the separate face pieces are sewn on for a polished, professional look. Let's dive in and create your very own forest friend!
Materials Needed
Before you begin, gather the following supplies. Using the recommended yarn weight and hook size ensures your hat matches the finished size and gauge.
- Yarn: Worsted weight yarn (Category 4) in three colors:
- Orange (main color) – approx. 200 yards
- White (face patch) – approx. 50 yards
- Black (nose) – small amount (scrap yarn)
- Crochet Hook: Size J/10 (6.0 mm) – or size needed to obtain gauge.
- Yarn Needle: For weaving in ends and sewing pieces together.
- Stitch Marker (optional but helpful for keeping track of rounds).
- Scissors
Gauge: 14 single crochet (sc) x 16 rows = 4 inches (10 cm). Always check your gauge to ensure the correct fit. If your hat is too small, try a larger hook; if too big, use a smaller hook.
Step-by-Step Instructions
This pattern is worked in continuous spiral rounds (do not join at the end of each round unless specified). Use a stitch marker to mark the beginning of each round. All instructions are in US crochet terms.
Abbreviations (US Terms)
- ch = chain
- sc = single crochet
- hdc = half double crochet
- dc = double crochet
- sl st = slip stitch
- inc = increase (2 sc in the same stitch)
- dec = decrease (sc 2 stitches together)
- FO = fasten off (cut yarn and pull through loop)
Note: The numbers in parentheses at the end of each round indicate the total number of stitches you should have.
Finished Size
This pattern fits an average adult head (21-23 inches / 53-58 cm). To adjust the size, you can change your hook size (larger hook = bigger hat) or yarn weight (bulky yarn = bigger hat). For a child's size, you can stop increasing at Round 7 or 8 and continue with the even rounds.
Part 1: Hat Body (Worked in Continuous Rounds)
We'll start from the crown and work our way down to the brim, then shape the bottom edge.
Starting Ring: With orange yarn, make a magic ring. (If you're not comfortable with a magic ring, you can ch 4 and sl st to form a ring, then work Round 1 into the center.)
- Round 1: 6 sc in ring. (6)
- Round 2: inc in each st around. (12)
- Round 3: (sc in next st, inc) around. (18)
- Round 4: (sc in next 2 sts, inc) around. (24)
- Round 5: (sc in next 3 sts, inc) around. (30)
- Round 6: (sc in next 4 sts, inc) around. (36)
- Round 7: (sc in next 5 sts, inc) around. (42)
- Round 8: (sc in next 6 sts, inc) around. (48)
- Round 9: (sc in next 7 sts, inc) around. (54)
- Round 10: (sc in next 8 sts, inc) around. (60)
Rounds 11-20: sc in each st around. (60) – Continue working even (no increases) until the hat measures about 7 inches (18 cm) from the crown. This creates the main body of the beanie.
Shaping the Brim (Decreases): Now we'll add a subtle taper to the bottom edge for a snugger fit around the forehead.
- Round 21: (sc in next 8 sts, dec) around. (54)
- Round 22: (sc in next 7 sts, dec) around. (48)
- Round 23: (sc in next 6 sts, dec) around. (42)
- Round 24: (sc in next 5 sts, dec) around. (36)
- Round 25: (sc in next 4 sts, dec) around. (30)
- Round 26: (sc in next 3 sts, dec) around. (24)
- Round 27: (sc in next 2 sts, dec) around. (18)
- Round 28: (sc in next st, dec) around. (12)
- Round 29: dec around. (6)
Finishing the Hat Body: FO, leaving a long tail (about 12 inches). Thread the tail onto a yarn needle. Weave the needle through the front loops of the remaining 6 stitches. Pull tight to cinch the hole closed. Weave in the end securely on the inside of the hat.
Part 2: Fox Ears (Make 2)
These cute triangular ears are crocheted flat and then sewn onto the crown.
Starting Ring: With orange yarn, make a magic ring.
- Round 1: 6 sc in ring. (6)
- Round 2: (sc in next st, inc) around. (9)
- Round 3: (sc in next 2 sts, inc) around. (12)
- Round 4: (sc in next 3 sts, inc) around. (15)
- Rounds 5-7: sc in each st around. (15) – Work 3 rounds even to create the height of the ear.
Finishing the Ears: FO, leaving a long tail (about 10 inches) for sewing. Flatten each ear so the increases form a triangle shape. The bottom edge will be slightly curved. Position the ears on the top of the hat, about 2 inches apart on the crown (centered between the front and back). Sew the bottom edge of each ear securely to the hat using the long tail. Weave in the ends.
Part 3: White Face Patch
This oval patch creates the fox's white muzzle and cheeks. It's crocheted in the round and sewn onto the front of the hat.
Starting Ring: With white yarn, make a magic ring.
- Round 1: 6 sc in ring. (6)
- Round 2: inc in each st around. (12)
- Round 3: (sc in next st, inc) around. (18)
- Round 4: (sc in next 2 sts, inc) around. (24)
- Round 5: (sc in next 3 sts, inc) around. (30)
- Round 6: (sc in next 4 sts, inc) around. (36)
Finishing the Patch: FO, leaving a long tail (about 12 inches) for sewing. Position the white patch on the front of the hat, centered between the ears. It should cover the lower half of the hat's front, extending down toward the brim. Pin it in place to check the positioning before sewing. Using the yarn needle, whip stitch the patch securely around its entire edge to the hat. Weave in the ends.
Part 4: Black Nose
A tiny black circle completes the fox's face.
Starting Ring: With black yarn, make a magic ring.
- Round 1: 6 sc in ring. (6)
- Round 2: inc in each st around. (12)
Finishing the Nose: FO, leaving a tail (about 6 inches). Sew the black nose onto the center of the white patch, near the bottom edge of the patch (closer to the brim of the hat). Weave in the ends.
Final Assembly & Finishing Touches
- Weave in all ends: Use your yarn needle to carefully weave in any remaining loose ends on the inside of the hat to keep it looking clean.
- Optional Pom-Pom: For extra flair, you can attach a pom-pom to the very top of the hat between the ears. You can make one using orange yarn or use a faux fur pom-pom for a different texture.
- Blocking (Optional): If desired, lightly steam block the hat to even out the stitches. Be careful not to flatten the ears or the face patch.
Your Whimsical Woodland Fox Hat is complete! Slip it on and enjoy your cozy, forest-inspired transformation. This pattern is perfect for gifts, photo props, or just adding a little magic to your winter wardrobe. Happy crocheting!


